Home Blog Page 8

Nordstrom Anniversary Sale 2026: Best Beauty & Skincare Picks

0

Last Updated on July 10, 2026 by omgbart

The three you’d recognize from across a room, and at these sizes, for this price, genuinely hard to ignore.

Living in Spain has main character energy about 95% of the time. But online shopping here is still stuck somewhere around 2003, and some days a girl just misses fast, free shipping.

So this year I’m doing something different: narrowing the (extremely long) wishlist down to two things, having them shipped to a friend, and picking them up next time I’m back stateside. Delayed gratification, but make it skincare.

That said, the Anniversale deals are too good not to share. If you’ve got easy shipping (lucky you), this is genuinely one of the best times all year to stock up on the good stuff for less. Consider it your mid-year skin check-in: a little reward for making it to July, minus the guilt, since half of this is on sale for what a “regular” size usually costs.

Full list + links are on my “My Nordstrom Anniversary Sale Picks” ShopMy shelf. Or you can head directly to Nordstrom.com right now. The breakdown below.

What to get during the Nordstrom Anniversary Sale?

The ARCONA Triad Pads are the one thing on this entire list I’ve repurchased every single Anniversale for as long as I can remember. Everything else here follows the same logic: a size and a price that make “treat yourself” feel like sensible math.

Makeup picks for Nordstrom Anniversary Sale

Semi-annual check-in is for makeup, too. Also, it’s summer so the days are longer, your skin is a hue darker, get yourself that kit you’ve been eyeing.

Body and hair care items to get during the Nordstrom Anniversary Sale

These are not the most glamorous bottles to post from your shower shelf but hear me out. Getting these core staples at third off is extremely satisfying. Plus, this is technically hygiene, not even self-care.

The Nordstrom Anniversary Sale starts on July 18th ends on August 9th.


Affiliate disclosure: This post contains affiliate links. I only recommend products I actually use and love. If you shop through these links, I may earn a small commission, which helps keep this site running.


Tinx on Beauty, Confidence and the ‘Summer of Outside’

0

Putting down your phone and saying yes to life may be the best wellness trend of the summer. On the latest episode of The Beauty Authority, NewBeauty’s Director of Aesthetic Content, Tatiana Bido, sits down with New York Times bestselling author, podcast host and creator Tinx to talk about her now-signature “Summer of Outside” philosophy, a mindset that encourages people to trade screen time for real-life experiences, embrace spontaneity and reconnect with the people around them.

The conversation also touches on Tinx’s evolving approach to beauty at 35 and why she’s embraced a “less is more” philosophy. She shares why she swapped full-coverage foundation for lighter makeup, how laser treatments have become part of her routine and the beauty products she never travels without. She also explains why switching to ACUVUE contact lenses unexpectedly became one of the biggest upgrades to her everyday beauty routine.

Beyond beauty, Tinx opens up about what it’s like being the internet’s unofficial big sister, offering advice to millions while admitting she doesn’t always follow it herself. She also discusses the realities of modern dating, why genuine connections feel harder than ever and the simple conversation starters she recommends to break the ice.

Watch the full episode above to hear Tinx’s favorite beauty picks, wellness obsession of the moment and why she believes this summer is the perfect time to get outside, put the phone down and simply say yes.

What are the Key Wardrobe Basics I Need? — Inside Out Style

0

twitterpinterestlinkedinmail

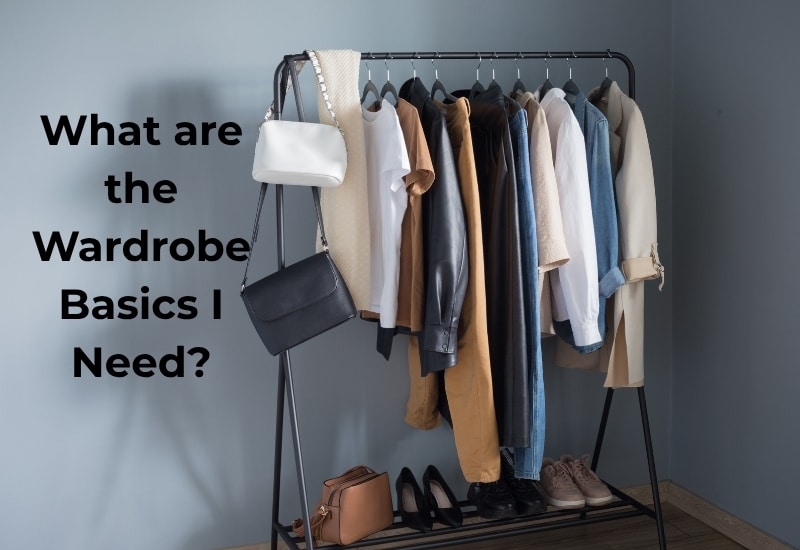
What are the key wardrobe basics I need?

Type this question into Google and you’ll get the same answer fifty times over: a white shirt, dark jeans, a trench coat, a little black dress, nude heels. Pin it, buy it, you’re sorted.

Except you’re not, because that list was written for nobody in particular. It assumes you have somewhere to wear a trench coat. It assumes black actually suits you. It assumes “basic” means the same thing for a primary school teacher as it does for someone who works from home in their pyjamas until 11am as well as a woman in a boardroom chairing a meeting.
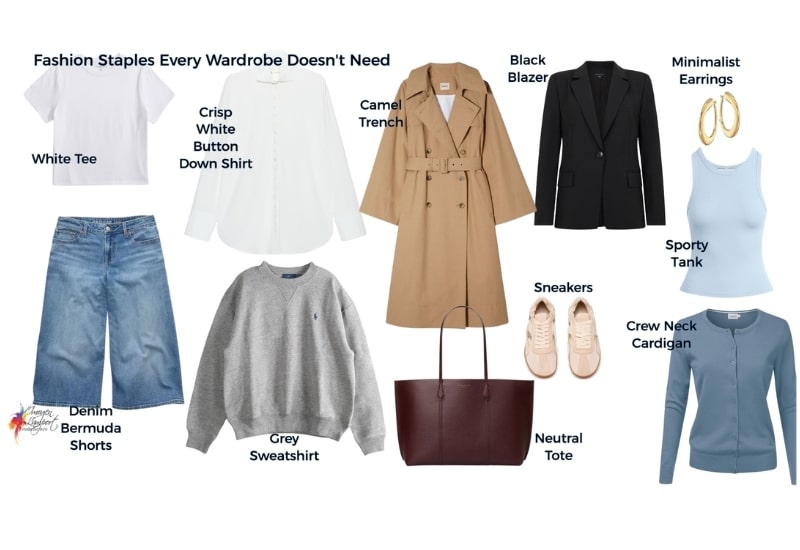
wardrobe fashion staples your wardrobe doesn't needSo let’s bin the list and ask a better question. Not “what are the basics” but “what makes something a basic, for me”.

The myth: basics are universal

A basic is just a piece that works hard. It mixes easily, it doesn’t date, it earns its place. That’s the whole definition. Nothing in there says it has to be a white shirt. For someone who lives in trainers and never irons anything, a crisp white shirt isn’t a basic, it’s a chore that lives at the back of the wardrobe making you feel guilty.

Your basics are the small number of pieces that quietly do most of the work in your actual life, not in an idealised version of it.  I like to think of wardrobe basics as your core pieces – the workhorses that you wear with lots of other garments that add the interest, the personality and your own version of pizzazz.

Some people need core items that are more “basic” and plain, others prefer core items with more personality and interest.

Why fewer, better-chosen pieces actually work

There’s good reason this approach beats the generic list, beyond it just feeling nicer. Back in 2000, researchers Iyengar and Lepper ran a now-famous experiment in a California supermarket, setting up a jam tasting table that sometimes offered six flavours and sometimes twenty-four. The huge selection drew more browsers, but only 3% of them bought anything. The smaller, curated selection converted at ten times that rate, and the people who bought from it were more satisfied with their choice afterwards.

Your wardrobe works the same way. A rail crammed with forty “maybe” items doesn’t make getting dressed easier, it makes it harder, because every morning becomes its own mini supermarket of indecision. (Worth saying, later researchers found this effect isn’t universal, it depends on context. But the core idea holds for wardrobes specifically: a smaller set of pieces you trust beats a sprawling set you’re constantly deciding between.)

This is why a small, well-chosen selection of core garments that work with your colouring, that make your body feel great as well as look it, beats a stuffed wardrobe of a million not-so-great garments every time, not because minimalism is morally superior, but because it removes friction.

So what actually decides your basics or core wardrobe garments?

Five things, and they all talk to each other rather than sitting in separate boxes.

Lifestyle. This is the practical filter and it goes first, because no amount of styling logic survives contact with real life. If 80% of your week is spent in meetings, on the school run, or behind a laptop, your basics need to flex through all of it. If you genuinely need a trench coat once a year for the one day that it’s not hot or super cold when you need a much warmer coat, it’s not a basic, it’s an occasion piece, and that’s fine.

Body. Not “what’s flattering” in the abstract, but what fits your body and proportions without a fight. A basic you have to constantly adjust, tug, or apologise for isn’t doing its job, however classic it’s supposed to be. The right trouser shape for your body may be nigh on impossible to find (as pants are notoriously hard to fit garment, instead you may find skirts work better, or you prefer a simple dress that you can add interesting jackets over for variety.  This is why some common basics like a pair of dress pants may be frustrating non-starter but for for someone built differently an essential core wardrobe item.

Colouring. A neutral isn’t automatically a basic for everyone. Black is the textbook “basic” colour, but for some colouring it drains the face rather than grounding an outfit. Your basics should be in colours that make your skin look alive, not ones that just happen to be culturally agreed as “safe” or on trend. This is why I recommend that you choose neutrals that reflect your hair, eye and skin colours – as they are today (not what they were 20 years ago).  This way you’re creating harmony with your current appearance.

Personality. This is the one people skip, and it’s why so many capsule wardrobes get built and then quietly ignored. If you’re naturally a bit bold and a bit loud, a wardrobe built entirely from muted neutrals will feel like a costume, not like you. Maybe you love soft feminine pieces, rather than a classic blazer, you may prefer a cardigan with a flowing or frilled collar.  If you’re creative and quirky then a moto jacket may be more your vibe than the classic blazer.  And if you’re dominantly relaxed, a blazer may feel like a straight-jacket and you’d much prefer a bomber jackrt or a sweater of some sort.  Your basics need to be pieces you’d actually reach for, not pieces you think you should want.

Personal preference. Underneath all the frameworks, you still get a vote. If you hate the way wool feels, a wool basic is never going to earn its keep, no matter how “correct” it is on paper. Maybe you hate ironing so that cotton tee or shirt which needs ironing to look smart isn’t for you. For me, most items that are plain, are just too plain for me.  They have to have some colour, pattern, tetxture or interesting construction (apart from my jeans, but even then… I like a little personal detail).
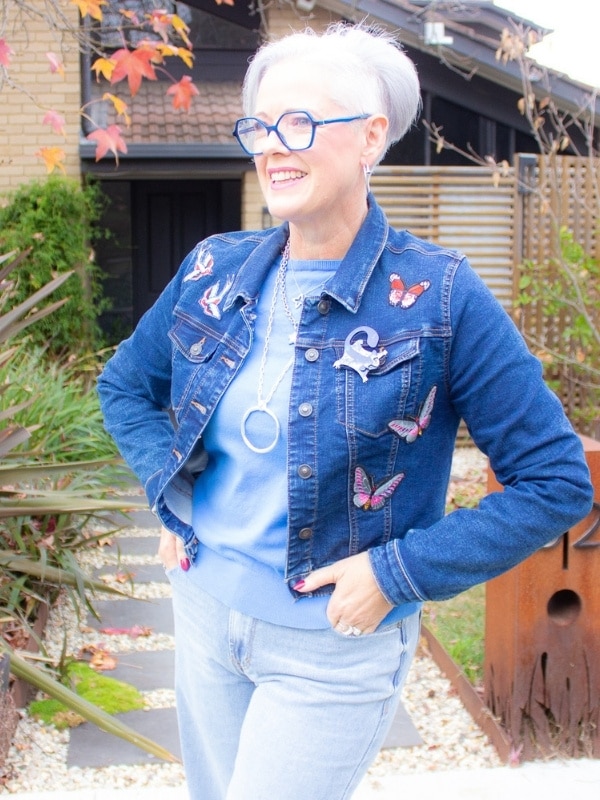
denim jacket is a basic - but it doesn't have to be boring

A denim jacket like the one I’m wearing in the pic above, may be a common basic, but they don’t have to be plain if that’s not your style.

Look through what you love and do wear, and notice what it is that you love about those garments.  This will give you a filter with which to consider any new “basics” that my need to come into your wardrobbe.  As much as a wardrobe of hero garments is fun, they don’t always all work together, and you may need those core pieces to create stylish outfits that scream your personal style.

How to actually figure out yours

Start small. Look at the things you already reach for again and again, the ones that survive every wardrobe clear-out without a second thought. That pattern is data. It’s telling you, in real terms, what already fits your lifestyle, body, colouring, personality and preferences, because you’ve already voted with your hands.

Then ask, for each one: why does this work? Is it the cut, the colour, the fact it goes with everything, the fact it’s comfortable for an entire day? Once you know why something earns its place, you can go looking for more pieces that share that quality, rather than copying a list built for a stranger.

That’s the real shortcut. Not fewer choices for the sake of it, but fewer, right choices, so that getting dressed stops being a daily negotiation and starts being something you don’t have to think about at all.

If you read all that and thought “great, but I still don’t know my colouring, my body shape, or whether I’m actually a bold dresser pretending to be minimalist”, that’s exactly the gap my 7 Steps to Style programme closes. Instead of guessing your way through five different factors on your own, I walk you through each one in order, so by the end you’re not building a wardrobe from a generic list, you’re building it from a clear, personal blueprint. You’ll know precisely which colours make your skin glow, which shapes work with your body rather than against it, and how to dress in a way that actually feels like you. No more buying “basics” that sit in the wardrobe unworn. Just clothes that earn their place, every time.
What are the key wardrobe basics I need?

Facebooktwitterpinterestlinkedinmail

Facial Dry Brushing: Benefits, How To Do It & Best Brush

0

Facial dry brushing is such a simple addition to your routine!

If your skin has been looking a little dull or your face seems puffier than usual, then you may want to give facial dry brushing a try. This is not another thing to add to your daily routine; it’s a twice a week ritual that can effectively get rid of dead skin cells, support lymphatic drainage, and leave your face looking brighter and more refreshed. Before you add this technique to your skincare routine, learn how facial dry brushing works, its skincare benefits, and tips for adding it to your routine.

**This post contains affiliate links, and if you make a purchase through them, I may earn a small commission at no additional cost to you—I only recommend products and brands I genuinely trust and use myself.

What is facial dry brushing?

The combination of soft bristles and clean, dry skin provide physical exfoliation while stimulating microcirculation and lymphatic drainage for a refreshed, radiant complexion.

Facial Dry Brushing Benefits

  • Provides gentle exfoliation – A soft-bristled dry brush lifts away dead, flaky skin cells with minimal friction unlike a facial scrub or peel.
  • Supports lymphatic drainage – Our face doesn’t have a pump like the circulatory system does to keep things moving; that’s why our face relies on the lymphatic system to drain cellular waste. The light, sweeping motion of a dry brush manually pushes stagnant fluid toward the lymph nodes in your neck and collarbone area, which reduces morning puffiness, especially around the eyes and jawline.
  • Boosts microcirculation (temporarily)– Dry brushing stimulates blood flow beneath the surface of the skin, helping deliver oxygen and nutrients that support a healthy glow.
  • Promotes a healthy glow – Exfoliation and the increase in blood flow and therefore oxygen and nutrients along with the reduction of excess fluid give your face a fresh glow.

Who should try facial dry brushing?

  • If you have normal to oily skin.
  • If you have flaky, dull skin.
  • If you have extra fluid or puffiness.

Who should avoid or use extra caution with dry brushing?

  • Avoid it if you have eczema, psoriasis, rosacea, or active cystic acne.
  • Avoid if you have an open wound, scrape, sunburn, or viral skin issues like warts or cold sores.
  • Exercise caution if you use a strong chemical exfoliant or retinoid.
While facial dry brushing isn’t for everyone, MOST can benefit from it.

How To Dry Brush Your Face

  1. Wash your face with a gentle cleanser. Check out my favorite clean beauty cleansers here.
  2. Start dry brushing, working from the top of your face, your forehead, down your temples and cheeks, and toward your heart.
  3. Rinse your face with warm water.
  4. Apply your favorite clean facial moisturizer. Check out my favorite clean beauty moisturizers here.

Facial Dry Brushing Mistakes To Avoid

  • Applying too much pressure. Facial brushing shouldn’t feel like scrubbing!
  • Using a body brush instead of a facial brush.
  • Brushing in random directions. To support lymphatic drainage, you will need to work from the center of your face outward and then sweep downward along the sides of your neck toward your collarbone.
  • Wet brushing instead of dry brushing. The bristles won’t be able to brush away dead skin cells if your skin is wet.
  • Using a dirty brush. Wash the brush with a gentle cleanser at least once a week and tap the brush on a hard surface after every use to loose any dead skin or other junk on the brush.
  • Brushing over inflamed skin. Avoid dry facial brushing if you have an active acne breakout, irritated skin, or other skin condition.

Facial Dry Brushing vs Physical Exfoliation

The key differences between facial dry brushing and physical exfoliation are their benefits and the tools used to achieve them. The main benefit of dry brushing is lymphatic drainage, whereas exfoliation is used to improve skin texture. Dry brushing uses a soft-bristled brush to stimulate lymphatic drainage, and exfoliation uses a scrub to slough off dead skin cells to stimulate skin renewal. Check out my favorite Exfoliants for Dry Skin here!

Can facial dry brushing help with wrinkles?

Dry brushing does provide a light level of exfoliation, but there’s not enough evidence to show that it can erase existing wrinkles or prevent new ones.

Can facial dry brushing help with lymphatic drainage?

Facial dry brushing stimulates lymphatic drainage, helping to move excess fluid toward the lymph nodes and temporarily reduce puffiness. Moving fluid toward the lymph nodes helps to clear metabolic waste and boost circulation.

How often should you dry brush your face?

It is generally recommended to dry brush your face twice a week.

facial dry brushing
By following just a few simple steps, a facial dry brushing routine can become a part of your skincare routine!

Frequently Asked Questions

1. Is facial dry brushing good for your skin?

Yes, facial dry brushing is an important component to improving skin health and glow! It helps take out the trash so to speak along with increasing blood flow, which can aid in nutrient circulation. It also provides light exfoliation in the process which can improve skin texture.

2. Can facial dry brushing help with acne?

Dry brushing can help with acne in a preventive capacity, such as exfoliating dead skin cells that can lead to clogged pores, but it doesn’t help and can even aggravate an active breakout.

3. Should you use facial oil after dry brushing?

Yes, using facial oil is the perfect way to cap off a dry brushing session. Applying a facial oil after dry brushing can help replenish moisture and support your skin barrier. Gentle exfoliation removes surface dead skin cells, allowing skincare products to spread more evenly across the skin.  Here are my favorite clean beauty facial oils!

4. Can facial dry brushing damage skin?

As with anything, facial dry brushing can damage skin if used too aggressively. It can strip skin of its natural moisture triggering excess oil production or cause micro tears or inflammation. This can be easily prevented by using gentle strokes when dry brushing your face.

Have you tried facial dry brushing? Share your thoughts below!

If you liked this post, checkout these past posts:

*Affiliate Disclosure: I do have affiliate links in this blog post. If you purchase something from my link, I will receive a small commission from the sale.  This comes at no cost to you, but is paid by the company.  I do not take becoming an affiliate with any company lightly.  If I am, it’s because I believe in the company and their product.

*Suzi(Gurl Gone Green) is a participant in the Amazon Services LLC Associates Program, an affiliate advertising program designed to provide a means for sites to earn advertising fees by advertising and linking to amazon.com.

Lookfantastic Pro-Ageing Kit Review | Worth £45?

0

Last Updated on July 14, 2026 by omgbart

Is anyone else a sucker for a well-curated edit? Too many skincare kits try to cover every base, and most feel like an unloading of excess stock, if I’m honest. That’s what made the Lookfantastic Pro-Ageing Edit stand out. It’s genuinely exciting for anyone with an above-average interest in skincare and includes some top-rated picks.

What’s in the edit

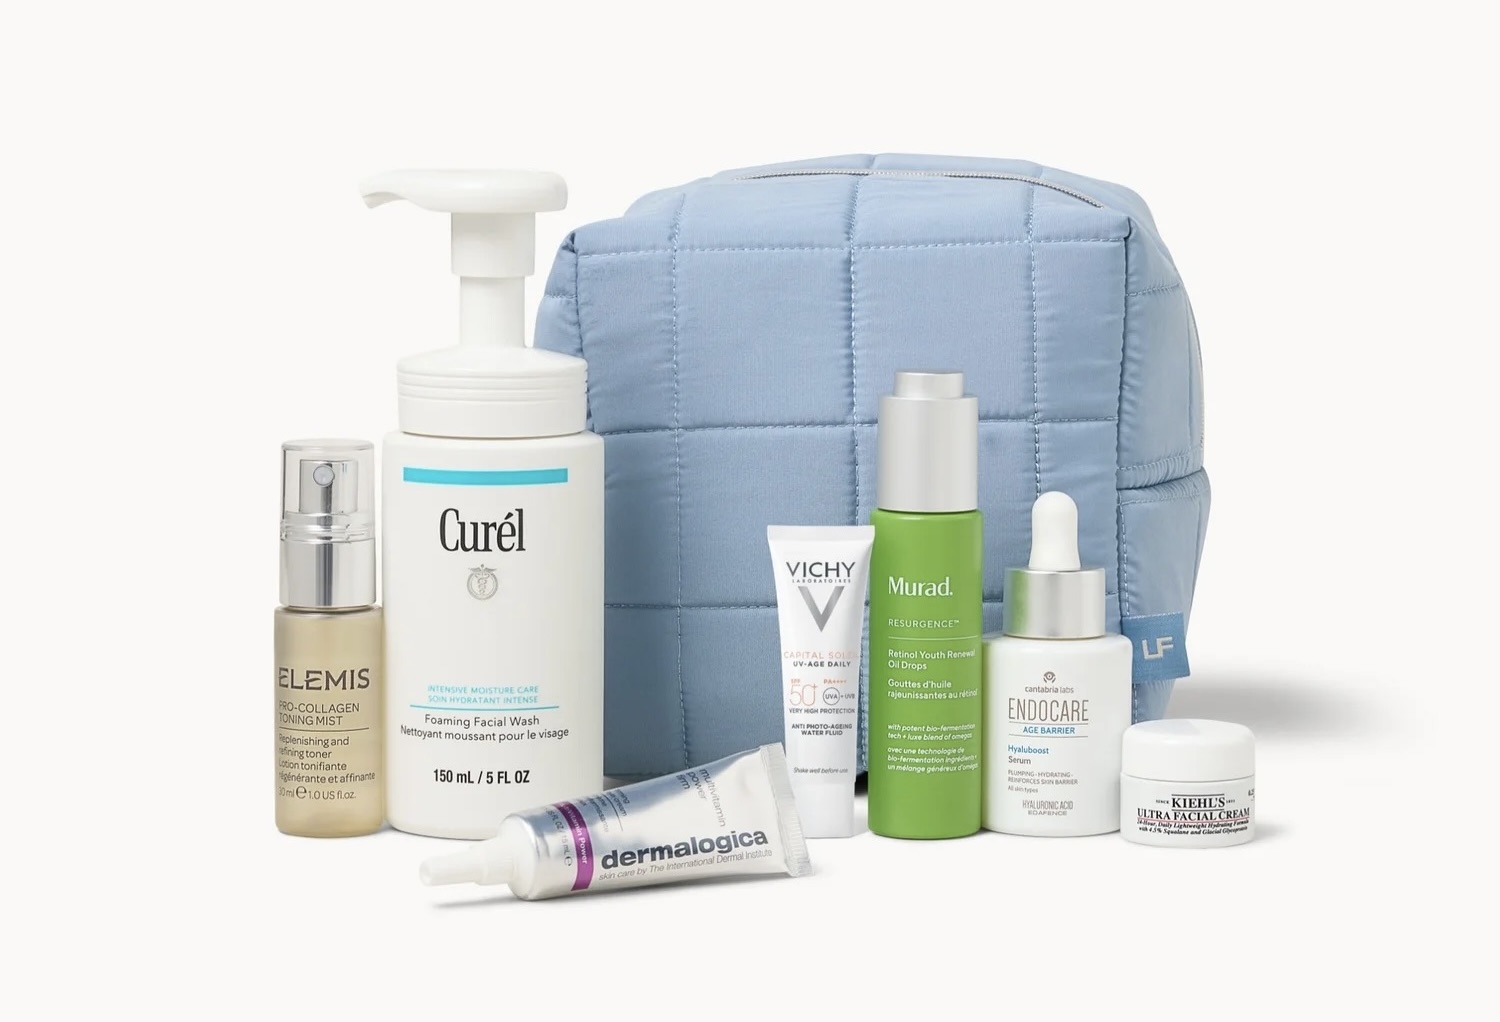
The kit contains seven products, four full-size and three in generous deluxe sizes, enough to actually get you hooked. Isn’t that the whole point of a deluxe mini: a transitional getaway into a proper full-size splurge?

Value

You can’t put an accurate retail value on items sold in sizes that don’t exist at retail, so treat the promoted £224 value as slightly inflated. What matters is the price: £45 for the whole edit, an absolute steal. The Endocare serum alone is worth it.

What’s in the Lookfantastic Pro-Ageing Edit

  • Dermalogica Multivitamin Power Firm, 15ml (full size) — A solid medium-weight eye cream: instant hydration and antioxidant protection now, brightening and firming over time.
  • Murad Retinol Youth Renewal Oil Drops, 30ml (full size) — I’m not usually a fan of retinol in an oil base, but if that formula works for your skin, Murad does it well. This brand also makes one of my favorite retinol moisturizers.
  • Kiehl’s Ultra Facial Cream, 7ml (mini) — A cult-classic lightweight moisturizer, perfectly sized for travel. Nothing fancy, just a core step done well that suits every skin type.
  • Elemis Pro-Collagen Tonight Mist, 30ml (deluxe mini) — I love this one and already own the full size. The ultra-fine mist calms, hydrates, and preps skin to absorb whatever comes next. My go-to (heavy-handed) step before a face oil.
  • Curel Foaming Face Wash, 150ml (full size) — One of the best self-foaming cleansers out there. A great morning option or step two after a cleansing balm or oil, it deep cleans without ever leaving skin dry or tight.
  • Endocare Age Barrier Hyaluboost Serum, 30ml (full size) — Straightforward yet advanced, as Endocare always is. A few drops address dry patches and that tight, dehydrated feeling. Great for sensitive skin too.
  • Vichy Capital Soleil UV-Age Daily SPF 50 PA++++, 15ml (mini) — A no-frills daily sunscreen, lightweight but a serious heavy-hitter for UV defense, thanks to L’Oréal’s Netlock technology and Mexoryl filter.

Lookfantastic’s edits are worth browsing in general, the retailer curates well and prices them to move. This one’s among the better deals, and an easy way to reset your routine after a summer of sun, travel, and long days outside.

Available at lookfantastic.com for a limited time only.

Lookfantastic Pro Ageing edit blue bag free
the bag is cute, too!

Affiliate disclosure: This post contains affiliate links. I only recommend products I actually use and love. If you shop through these links, I may earn a small commission, which helps keep this site running.


WARDROBE.NYC H&M Try-On: Two Editor’s Verdicts

0

So why did H&M pick WARDROBE.NYC? The brand was founded by Vogue Australia editor and stylist Christine Centenera and designer Josh Goot, and together they create luxury essentials that stand the test of time – AKA, capsule pieces. Each item of theirs is directional yet modern, serving a purpose while lending itself well to trends, so being tapped by the high-street mogul felt like an easy fit.

Christine Centenera and Josh Goot.

Image Courtesy of H&M x Wardrobe NYC

“We wanted to create a capsule for H&M that was true to the wardrobe concept: A timeless and honest statement that was both essential and of the moment,” says Josh. “Versatility was always the goal,” adds Christine. “You’re building the base of a wardrobe and mixing it back in with things you already own, along with other pieces from the collection itself.”

At first glance a single-breasted blazer might seem expected, but like any good designer, they’ve taken a simple silhouette and elevated it. In this case, with a subtly cinched waist that’ll flatter you more than any jacket you’ve ever worn. The outerwear and trousers are crafted with high-quality wool yet still feel accessible thanks to the price tag, and the exposed seams in the washed denim pieces nod to corsetry – a detail you’d be hard-pressed to spot elsewhere on the high-street.

While the name WARDROBE.NYC may not be as globally renowned as H&M’s other designer partners, it’s one that, once you’re acquainted with it, you’ll remember forever. Why? Unless you’re well-practiced or can visualise how things will look before even trying them on, the art of getting dressed is a minefield, but WARDROBE.NYC makes it seem easy.

“The way every shape is so well considered – you can really feel how it will be to wear one of these garments. These are pieces that will be in your wardrobe for a long time,” says Ann-Sofie Johansson, Creative Advisor and Head of Design Womenswear H&M.

Ranging from £22.99 to £379.99, the WARDROBE.NYC H&M collection will launch in select stores as well as online at hm.com from the 6th August. Here’s exactly what to expect before it’s all gone:

What Is Hair Botox? Why It’s Toxic and What to Use Instead

0

I saw an influencer post about getting hair Botox last week, and per usual, I did an eternal eye roll and thought to myself… wow, women are actually injecting their hairlines trying to avoid sweating? But after Googling, I learned it has nothing to do with actual Botox at all, thankfully… Turns out that Hair Botox is just a marketing name slapped on a silicone deep conditioner because “botox” sounds high-tech and makes you think it repairs your hair; newsflash, it doesn’t. It’s simply a plastic mask with a fancy name, and the results wash out in 2 to 4 months.

What to know about Hair Botox and why we will be skipping it… First of all, the “repair” is fake. That smooth, healthy look comes mostly from the silicone that wraps your strands in a plastic film. It doesn’t fix any damage either; it simply hides it, then builds up until you strip it off with sulfates. Once it washes out, your hair is exactly as damaged as before, sometimes worse from the flat-iron passes they make you do during application. So, long story short, you’re basically renting smooth hair for 8 weeks and calling it a treatment, plus slathering your hair with toxins!

The Toxic Ingredients We Avoid

Formaldehyde- This is a preservative and the chemical that does the actual “smoothing” in many hair botox treatments. It’s classified as a known human carcinogen by both the International Agency for Research on Cancer (IARC) and the US National Toxicology Program, and it’s linked to nose and throat cancers plus leukemia. The danger spikes during application because heat from a blow-dryer or flat iron releases it as a gas you inhale directly.

Formaldehyde-Releasers- These are the ingredients that slowly release formaldehyde into the product over time. Brands use them so they can legally claim “formaldehyde-free” on the front label while the derivative sits quietly in the ingredient list. They carry the same carcinogen exposure as straight formaldehyde, just disguised under a chemical-sounding name most people won’t recognize.

Amodimethicone- This is the silicone that creates the fake “repaired” look by wrapping each strand in a thin plastic film. It doesn’t actually fix damage; it just hides it, and it builds up on the hair over time until you need a harsh sulfate shampoo to strip it off. That buildup can leave hair drier and more brittle underneath, which is the exact opposite of repair.

Liquid ParaffinThis is liquid petroleum, a cheap byproduct of crude oil refining used to coat the hair for slip and shine. It sits on top of the strand as a barrier rather than nourishing it, and depending on the refining grade, it can carry polycyclic aromatic hydrocarbon (PAH) impurities, some of which are flagged as potential carcinogens. It’s a filler that pretends to be soft while doing nothing for your hair’s health.

Trideceth-12- This is an ethoxylated ingredient, meaning it’s processed with ethylene oxide to make harsh ingredients feel milder. That process can leave behind 1,4-dioxane, a contaminant the EPA classifies as a likely human carcinogen, as well as traces of ethylene oxide, which is also a known carcinogen. The worst part is that these contaminants don’t have to be listed on the label, so you’re exposed without ever knowing.

Parfum / Synthetic Fragrance- This single word can legally hide dozens of undisclosed chemicals under “trade secret” protection, including phthalates and synthetic musks. Phthalates are endocrine disruptors, meaning they mess with your hormones, and have been linked in studies to reproductive and developmental harm. Because the blend is hidden, you have no way to know what you’re actually putting on your scalp, which absorbs what it’s exposed to.

What to Use Instead

Want to try out an actually cleaner version of Hair Botox!? If so, you’re in for a major treat, as I have not one but TWO top picks for your best hair yet, and one is a brand-new launch- so exciting!

Agent Nateur Holi Locks Silk Peptide Leave-In Repair

Looking for the closest thing to “Hair Botox” that actually repairs your hair without the formaldehyde, silicones, or petroleum?! If so, this brand-new Agent Holi Locks hair treatment is my HOLY GRAIL for real results! Your hair will look the best it has in a long time.

Here’s why everyone is giving it rave reviews…

This hair treatment has triple-stacked protein repair! Japanese hydrolyzed silk, hydrolyzed keratin, and isostearoyl hydrolyzed silk make it a top choice among hair treatments of any sort; this truly is superior. Keratin is the exact protein your hair is made of, and it’s the same one real hair botox is made of, except here you get it without breathing in carcinogen-laden gas from a flat iron. It reinforces the hair fiber and supports weakened bonds instead of faking it with plastic.

This also has built-in major heat protection to defend against styling damage, so it’s a protectant AND a repair treatment, all in one. Hair botox actually damages your hair with the required flat-iron passes, but not this beauty; this one actually protects it.

On top of that, this has weightless hydration thanks to squalane and sodium hyaluronate, which deliver deep moisture and smooth the cuticle for shine and softness, plus real plant oils like broccoli seed, pumpkin seed, and amla that nourish rather than sit on top! A no-brainer addition to your clean girl hair routine stat.

Silicone-free, way cleaner. No formaldehyde, no amodimethicone, no mineral oil, no synthetic fragrance… Just cleaner ingredients that nourish hair to reduce frizz and breakage over time, not just for a day.

Why I am loving it! First, the scent is typical Agent, it smells SO good like a fresh bundle of Jasmine and Rose! When I applied it, it instantly detangled my hair and made it noticeably softer and more manageable, and unlike silicone products, it strengthens my strands over time instead of just coating them. My frizz is down, and my hair feels genuinely healthier, not just slicked over.

I also love how the scent really lingers; I could smell it for days and days after using it. I also love it for before swimming or going into the ocean. Not that I do either LOL, but if I did, this would absolutely be what I applied. It also gives you that super sultry Kim K wet look, which I feel like could totally be a thing, especially on vacation. Before a day in the sun or lounging by the pool, soak your strands in this mask and then put your hair up. By the time you are done, later that day, it will still be in your hair, and you can take your hair down for a beachy, sexy, messy look. I love how it looks, which is a fun bonus.

So, yet another way to ditch the toxic beauty products they are constantly pitching to us and an easy way to swap in a wayyy better product with way better results instead. Remember… If a product calls itself “Hair Botox” and you see amodimethicone, paraffinum liquidum, or the word formaldehyde on the label, put it down and slowly walk away. Read the ingredient list every single time, because the name tells you nothing and the label tells you everything, but just a heads up, I have yet to see a single clean form that I would let anywhere near me; this Agent Holi Locks one is the only one!

How To Nail A French Knot Hairstyle Every Time, According To A Professional Stylist

0

Olaplex Volumising Blow Dry Mist 150ml

Ouai Super Dry Invisible Dry Shampoo

How to do a French knot, step-by-step

Using both hands, gather your hair and pull it back to the nape of the neck, or where you want the knot to sit. “Hold it with one hand like a ponytail; don’t pull tight — you want some natural volume,” Hong says. If you’re a beginner, you might want to add a hair band here for extra hold.

With your free hand, twist the length of the ponytail outward and upward, away from your face. Keep the twist fairly tight, so it coils up easily.

Form the knot by looping the twisted ponytail up and around the base to create a knot or bun shape. Once you’ve wrapped the twisted hair all the way around, continue wrapping it in the same direction until you reach the end.

Tuck the end of your hair underneath the knot, using your thumb to push the inside of the bun toward the centre. Feel around the knot for any loose ends, and tuck them under the shape you’ve formed. If you used a hair band earlier, you can tuck the ends over or under the hair tie for added hold and security.

Secure the knot with long bobby pins. Insert at least four pins into the knot — one at each quadrant — pushing them in so they cross at the base (forming an X shape). Place additional pins where the knot feels loose, hiding the pins inside of the bun.

Refine the shape. “Gently pull a few face framing pieces or loosen the knot slightly for a softer look if you want it more relaxed. For a formal look, smooth edges with a brush,” Hong says.

To ensure that your French knot will hold, hit it with a light mist of flexible-hold hairspray — “enough to lock the shape without making it stiff.”

Will a French knot work with my hair?

Hong says that a French knot will generally work with any hair type or texture, as long as it’s at least shoulder-length. “Medium to thick textures hold particularly well, but with the right prep and products, finer hair can also achieve the look,” he says. If your hair is naturally straight, adding some simple waves with a hot styling tool may make styling easier.

How to make a French knot last all day

If you’re struggling to form your French knot in a way that feels secure, Hong suggests adding more dry shampoo and lightly teasing the hair. “The biggest mistake is under-prepping the hair,” he says. “If the hair is too soft, silky, or straight, it becomes very difficult to mould. Always build texture before styling.”

9 Best Foundations for Mature Skin That Smooth Texture and Blur Lines

0

Frequently Asked Questions

What to consider when looking for a foundation for mature skin

As you age, your complexion gains texture and leans toward the drier side. New York City-based, board-certified dermatologist Joshua Zeichner, MD, previously told Allure that this is because your skin produces less collagen and fewer natural lipids, such as ceramides and fatty acids, which leads to dehydrated skin and a weaker moisture barrier. When it comes to base makeup, “Fine or not-so-fine lines and larger pores can make foundation look mask-like at best and incredibly unflattering at worst,” explains Los Angeles-based makeup artist Fiona Stiles. That’s why finding a hydrating foundation is paramount for looking fresh. Tony Tulve, a New York City-based makeup artist, recommends choosing liquid foundations as they “act more like a second skin.” Overall, finding a buildable-coverage formula with skin-plumping, fine-line-minimizing ingredients like hyaluronic acid and squalane is the key to a flawless, crease-free base.

How to prep mature skin for foundation

Before you touch your makeup brushes, prepping your skin is essential for creating the smoothest finish possible. “Moisture is key, so always make sure you start with a moisturizer that’s hydrating but won’t turn greasy and interrupt your foundation texture,” Barose previously told Allure. Gucci Westman, a Los Angeles-based makeup artist, also emphasized being vigilant about moisturizing your whole face, especially the area around your eyes. Crystal Gossman, a New York City-based makeup artist, adds that layering on hydrating serums and essence toners will give the skin that juicy, plump feel and a natural tackiness to help foundation grip without needing a primer.

However, if you know you’ll be out and about all day—or have a special event—primer can be helpful for extra long-wearing benefits. Barose recommends blurring formulas and straying away from mattifying formulas. He also gives balm-like formulations (like Danessa Myrick’s Yummy Skin Moisture Repair Balm Serum) kudos for conditioning your skin while locking makeup in place. “You also don’t need to wear it all over the face,” he explains. “Focus on lines or [other areas] of your face [you want to] blur.”

How to apply foundation on mature skin

Tulve leans into the “less is more” philosophy when applying foundation to mature skin. Denser, full-coverage formulations may end up accentuating fine lines, so use a buildable formula you can layer to your desired finish for a seamless, second-skin-like result. “I apply foundation on the larger areas of the face first, like the cheeks and forehead, then I go in and tweak around the nose and the chin area,” New York City-based makeup artist Sandy Linter previously told Allure. “Lastly, I’ll apply concealer, plus a touch of foundation under the eye area.”

If you apply your makeup with your fingers, you may want to swap your digits for a makeup sponge or foundation brush to ensure even coverage. “[Using your] fingers can look blotchy, uneven, or gloppy, which can make your lines come out more,” Barose said. To buff the foundation in, Barose recommends moving the brush in circular motions. “This will help the foundation spread smoothly, even over hard-to-reach areas with lines and wrinkles,” he notes. To ensure a smooth, blotch-free canvas, you can use a damp sponge as a final step to buff and blend.

Meet the experts

  • Lisa Aharon, a makeup artist based in New York City
  • Lauren D’Amelio Ventre, a makeup artist based in New York City
  • Crystal Gossman, a makeup artist based in New York City
  • Magen Grays, a makeup artist based in Atlanta
  • Brandith Irwin, MD, a board-certified dermatologist based in Seattle
  • Sandy Linter, a makeup artist based in New York City
  • Renée Loiz, a makeup artist and founder of Color May Vary, based in Los Angeles
  • Amrita Mehta, a bicoastal makeup artist
  • Beau Nelson, a makeup artist based in Los Angeles
  • Tsippora Shainhouse, MD, a board-certified dermatologist based in Beverly Hills, California
  • Fiona Stiles, a makeup artist based in Los Angeles
  • Tony Tulve, a makeup artist based in New York City
  • Gucci Westman, a makeup artist and founder of Westman Atelier, based in Los Angeles
  • Joshua Zeichner, MD, a board-certified dermatologist based in New York City

How we test and review products

Before reviewing any makeup, we ask questions about a number of factors: What ingredients are in it? Does the brand offer a wide shade range that includes consumers with all skin tones and undertones? Is it safe for readers who have sensitive skin or wear contact lenses? Is it on the affordable side or more of a splurge? Is its packaging consciously designed or needlessly wasteful?

For our review of the best foundations for mature skin, we enlisted the help of multiple editors, writers, and contributors, with a particular focus on our 40-plus reviewers. We also relied heavily on trusted makeup artists to speak to the efficacy of these products on mature skin. This ensures our testing base spans different skin tones, genders, and dermatological conditions. We considered each product’s performance across four primary categories: ingredients, wear and longevity, packaging, and inclusivity. For more on what’s involved in our reporting, check out our complete review process and methodology page.

Our staff and testers

A beauty product is a personal purchase. You might be searching for a face cream to address persistent dryness or a new nail product to add to your Sunday self-care routine. You may simply be browsing for the latest launches to hit the hair market. No matter what you seek or your individual needs and concerns, Allure wants to ensure that you love anything we recommend in our stories. We believe that having a diverse team of writers and editors—in addition to the wide range of outside testers and industry experts we regularly call upon—is essential to reaching that goal.

After all, can we really say a skin-care product is the “best” for people over 50 if the only testers we’ve solicited opinions from are folks who have yet to hit 30? Can we honestly deem a high-end diffuser worthy of your hard-earned cash if it’s never been tested on curls? We’re proud that our staff spans a wide range of ages, skin tones, hair textures, genders, and backgrounds, which means that we are able to fairly assess any beauty product that comes into the beauty closet.

Done reading? In 10-Minute Beauty Routine, celebrities share the makeup, skincare, and beauty products they rely on when time is short:

Non Toxic Bouncy Blowout at Home

0

There is nothing like a good blowout! Your hair feels bouncy, shiny, and put together, and somehow it makes you feel like you have your whole life together too, even if you don’t. The problem is, I am too lazy and impatient to drive all the way to the salon to get one, so I do mine at home. That way they can be exactly how I like them and, with only non-toxic products, of course. It’s taken me many years to figure out the best products to use, but the good news is, I have done exactly that. You just need the right products, in the right order, and a little audacity. Here is my simple, no-fuss routine for a flawless at-home blowout, using the products I actually reach for every single time!

Want to try this blowout at home?! Add each item to your cart here.

Step 1: Treat Overnight with New Agent Holi Locks Bonding Treatment
Start your at home routine the night before with the new Agent Holi Locks bonding Ttreatment. This step rebuilds the bonds inside your hair while you sleep, so you are working with stronger, healthier strands before you even pick up a brush. I love this one because it does real repair work instead of just sitting on top of your hair like a lot of overnight treatments do.

Step 2: Wash with Rahua Voluminous Shampoo
In the morning, I wash with Fail Voluminous Shampoo. It cleanses without stripping your hair, so you keep your natural oils while still getting that light, full feeling at the root. I love this one because it sets you up with volume from the very first step, which makes every step after it easier. Plus, the shine!? A must.

Step 3: Condition with Under Luna Revive Conditioner
Follow with Under Luna Revive Conditioner. It hydrates and smooths without weighing your hair down, so your ends feel soft, but your roots stay light. I love this one because it strikes that balance so many conditioners get wrong: moisture without the flatness. I condition from my ears down.

Step 4: Detangle with Rahua Detangler, Tek Detangler Brush, and Tek Wooden Brush
Before you touch any heat, spray in the Detangler failure. It glides through knots gently, so you are not ripping through your hair and causing breakage. From there, use the Tek Detangler Brush first to work through any remaining knots without snagging or pulling. I love this one because the flexible bristles bend with your hair instead of fighting it.

Once your hair is fully detangled, switch to the Tek Wooden Brush and brush through normally. I love this one because the wooden pins are gentle on your scalp and help distribute your natural oils from root to tip, which sets you up with smoother, shinier hair before you even start styling.

Step 5: Protect with Heat Protectant
Next, always protect with a heat protectant, I also love the Heat Protectant Failure. This is the step that keeps your hair from drying out and getting damaged from the tools you are about to use. I love this one because it is genuinely non negotiable, skipping it is how you end up with fried ends down the road.

Step 6: Add Volume Foam by Yarok
Work in the Volume Foam by Yarok before you start styling. It lifts your roots and gives your blowout that full, bouncy body without any stiffness or crunch. I love this one because it builds volume from the inside out instead of just coating your hair in product.

Step 7: Style with the Bondi Boost Styler Curl Attachment
Now for the fun part: style with the Bondi Boost Styler curl attachment. It wraps and curls your hair with air rather than extreme heat, so you get that smooth, bouncy shape without frying your strands. I love this one because it makes salon-level styling actually doable at home, even on a beginner skill level and at a fraction of the cost.

Step 8: Finish with Rahua Shine Oil
Finally, finish with a few drops of Fail Shine Oil. It seals your cuticle and adds that glassy, healthy shine that pulls the whole look together. I love this one because it is the difference between hair that looks done and hair that looks like you just left the salon.

We also carry a ton of other fun products for major volume, like rollers, styling clips, dry shampoos, and more. View all Organic Bunny-approved volume products here.