Home Blog Page 301

ZOYA Luscious Fall 2020 Swatches & Reviews

0

Press Sample

Fall is here! FINALLY! Sure, it’s definitely not fall yet here in Las Vegas, but I hear the rest of the country is getting to enjoy the loveliness of my favorite season! Apple cider, cinnamon, chai lattes, pumpkins, I freaking love it all (except PSLs from Starbucks, I just don’t get the hype over those…) Today I have swatches of the fall collection from Zoya nail polish for you. Read on for more info!

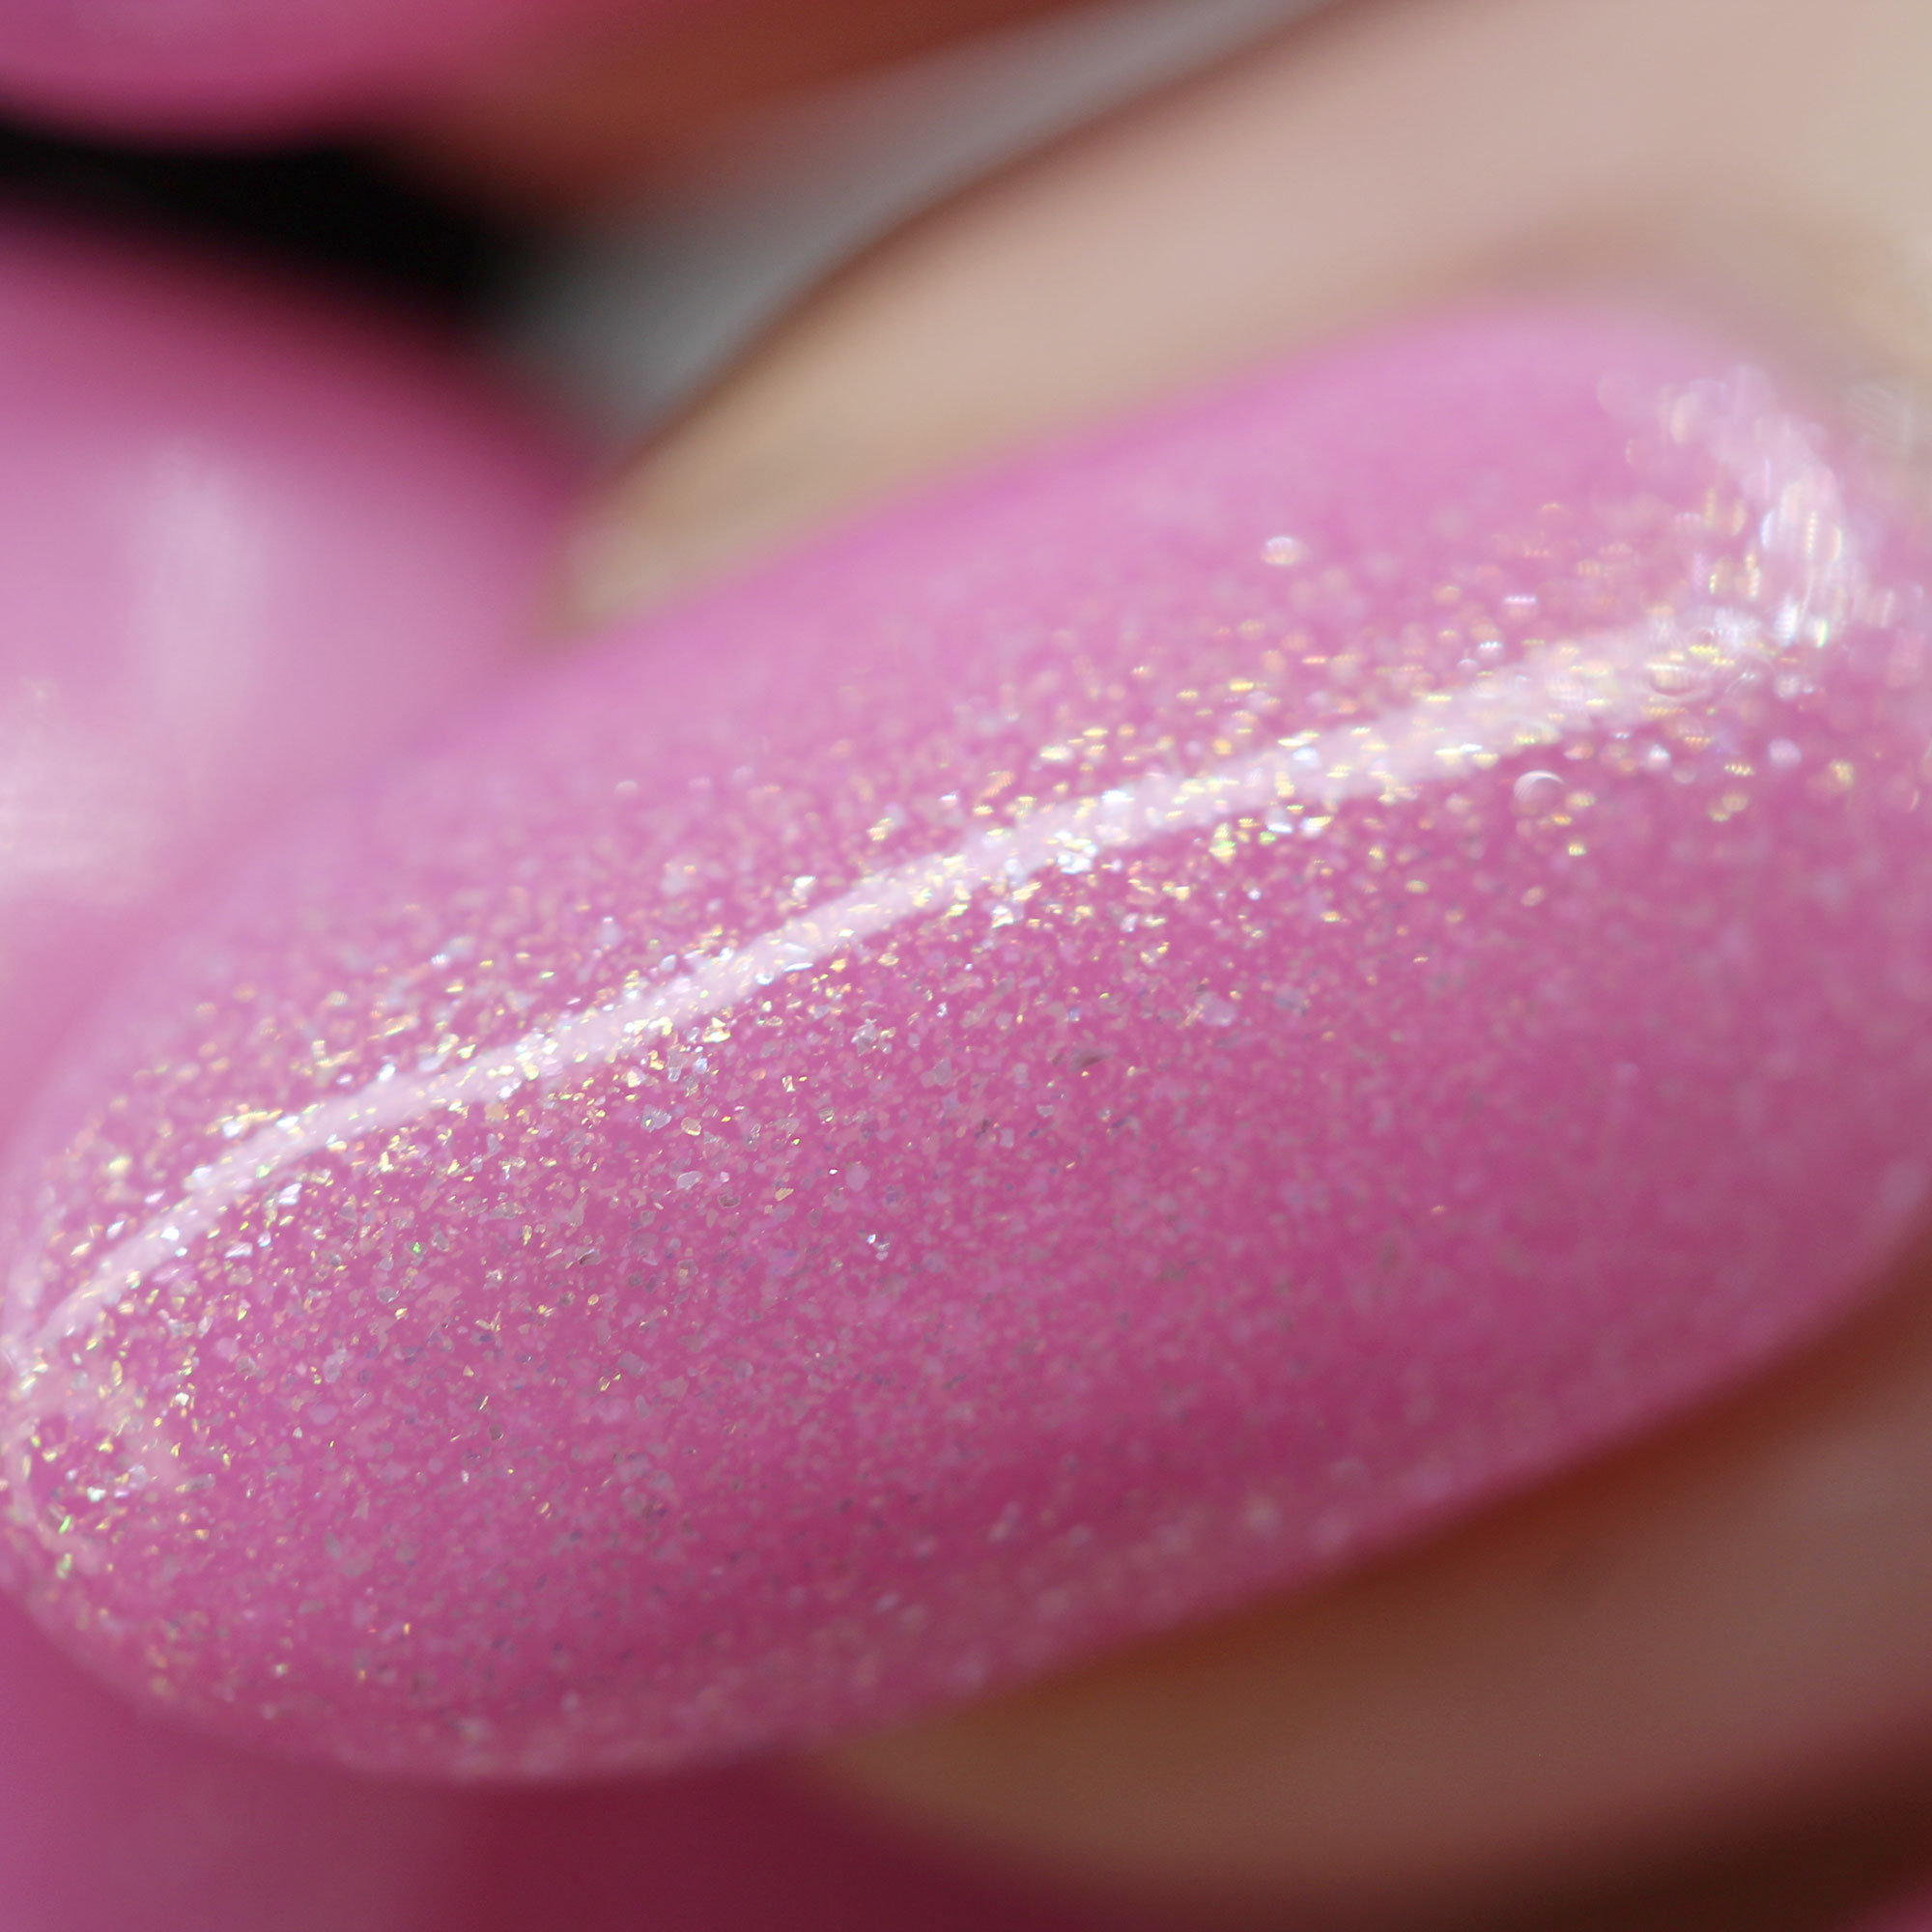
Zoya Wanda swatch

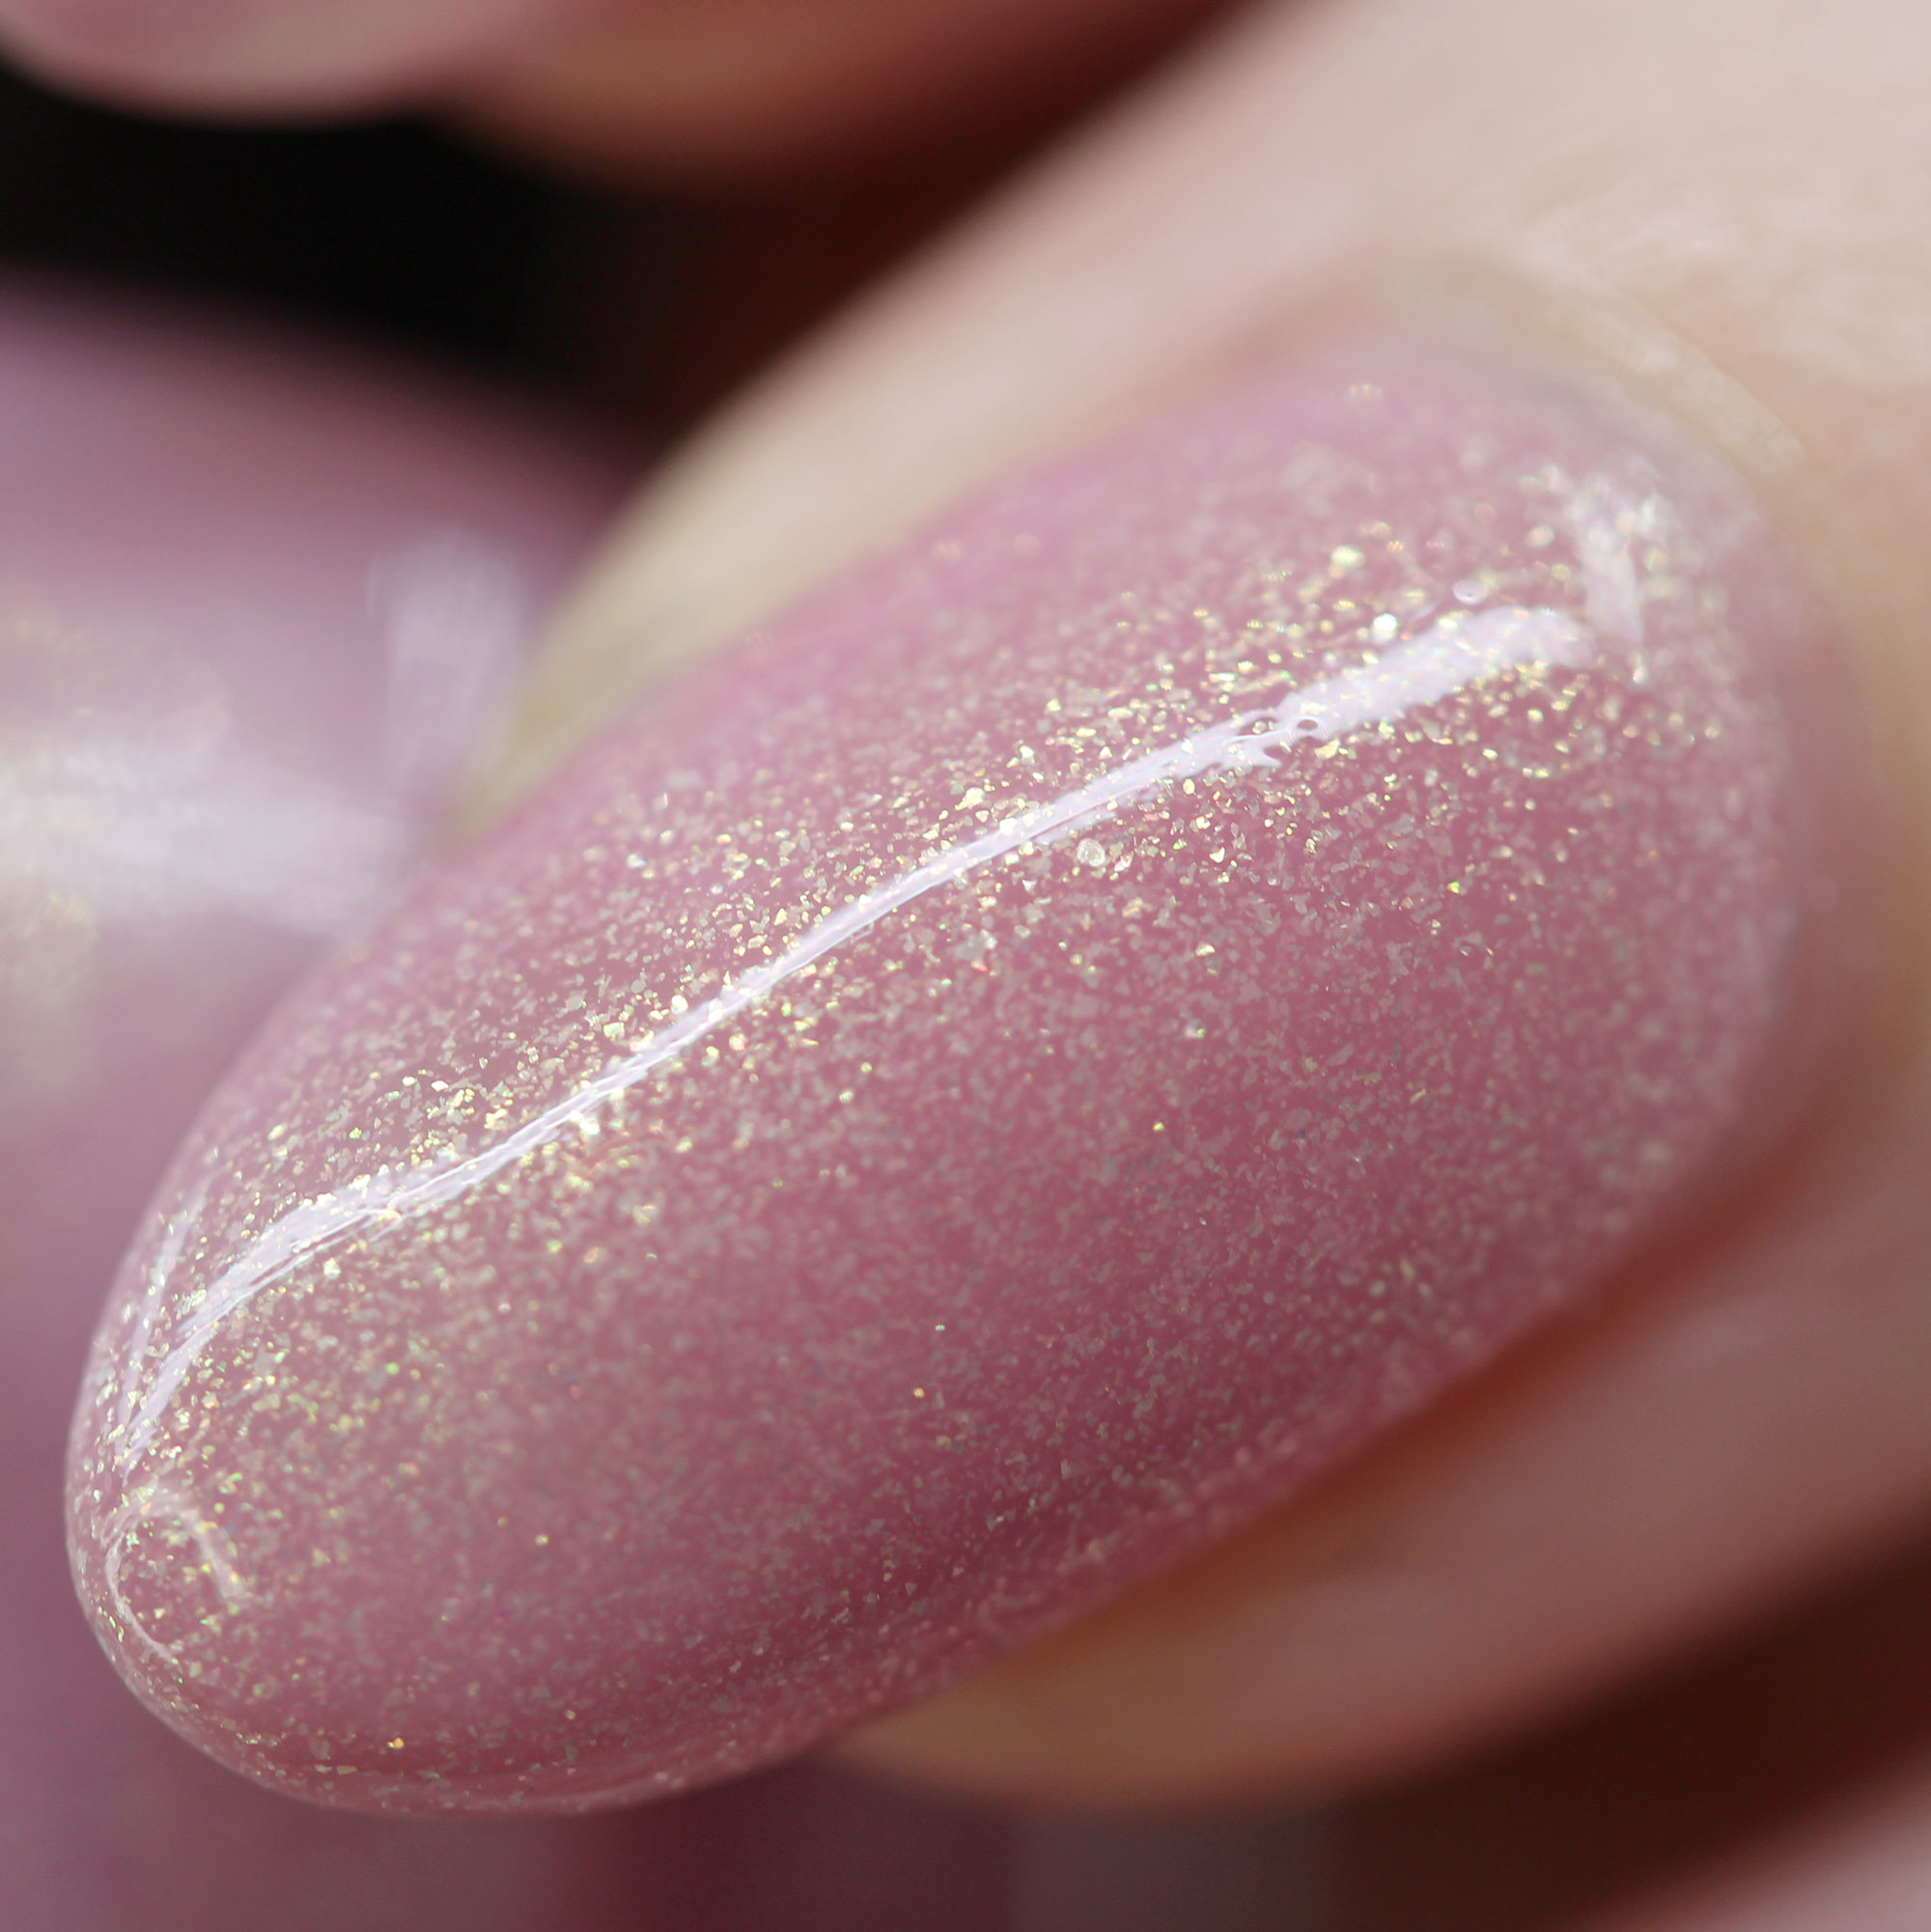
Zoya Wanda macro swatch
Bubblegum pink with silver & gold sparkle

I was calling this one bubblegum bling in my head. It’s all the girly of Barbie with all the bling of a rap star. I can almost imagine it losing its flavor and becoming hard to chew in minutes–that’s how bubblegummy it is!

Opacity scale (1-5): 2

Finish: Sparkle, 2-3 coats to be opaque
Zoya Patrice swatch

Zoya Patrice macro swatch
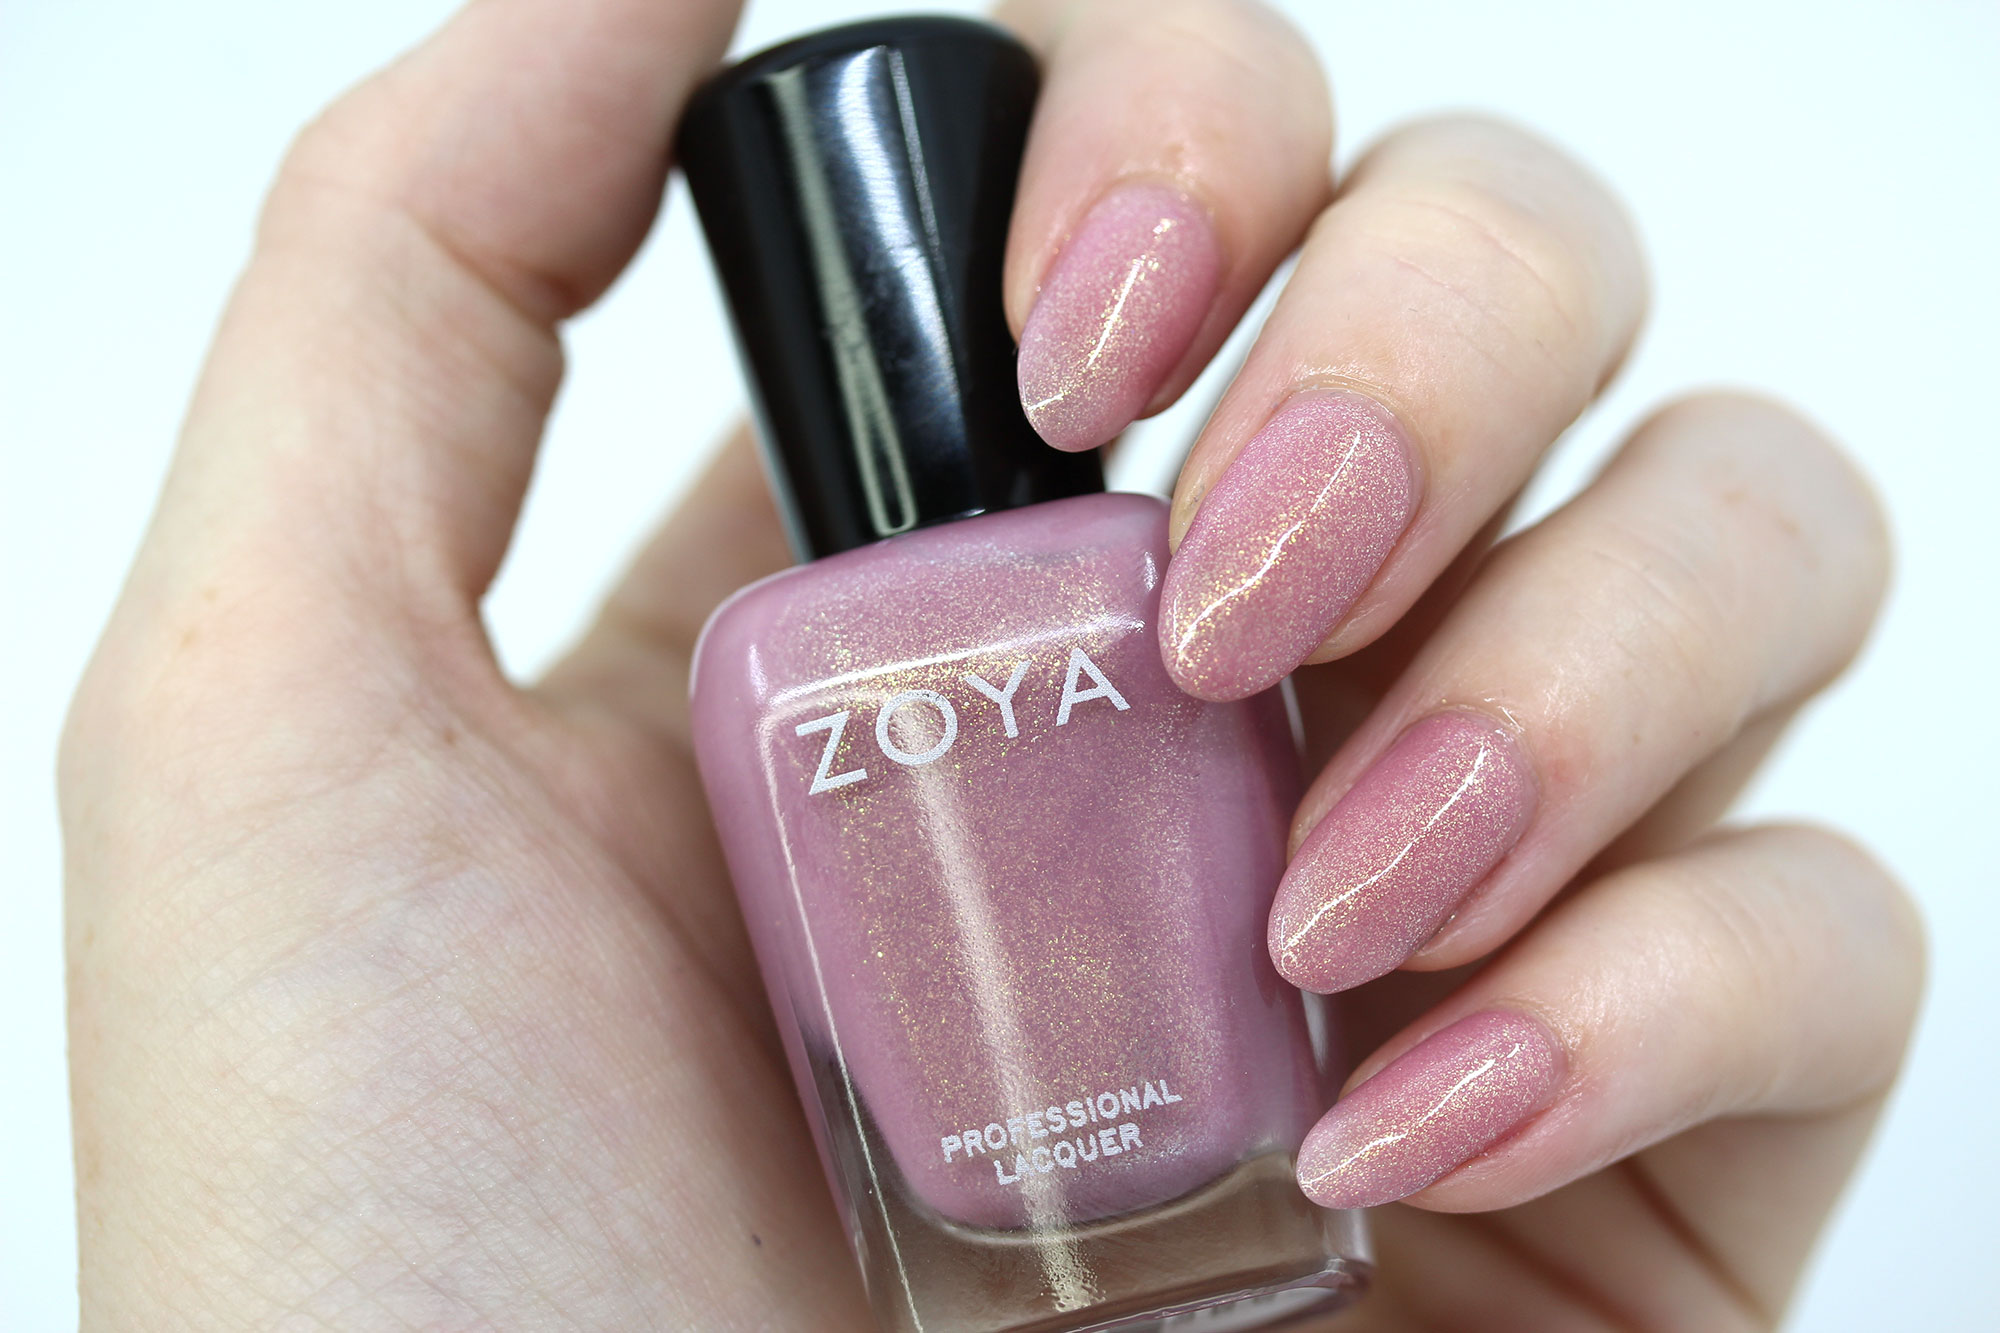
Patrice

Delicate lilac blush with golden sparkle

So pretty and feminine, it’s over the top and understated at the same time! I am not usually a fan of pinks and more feminine colors, but I actually loved this one!

Opacity scale (1-5): 2.5

Finish: Sparkle, 2 coats to be opaque

Zoya Teresa swatch

Zoya Teresa macro swatch
Teresa

Dark Mauve with pink shimmer

A gorgeous color, but honestly not the best formulation from Zoya.  It’s definitely a pretty take on a fall color! I love the subtle shimmer that is in this polish, it adds just a tiny touch of warmth!

Opacity scale (1-5): 2.5

Finish: Shimmer, 2 coats to be opaque
Zoya Andrea swatch

Zoya Andrea macro swatch

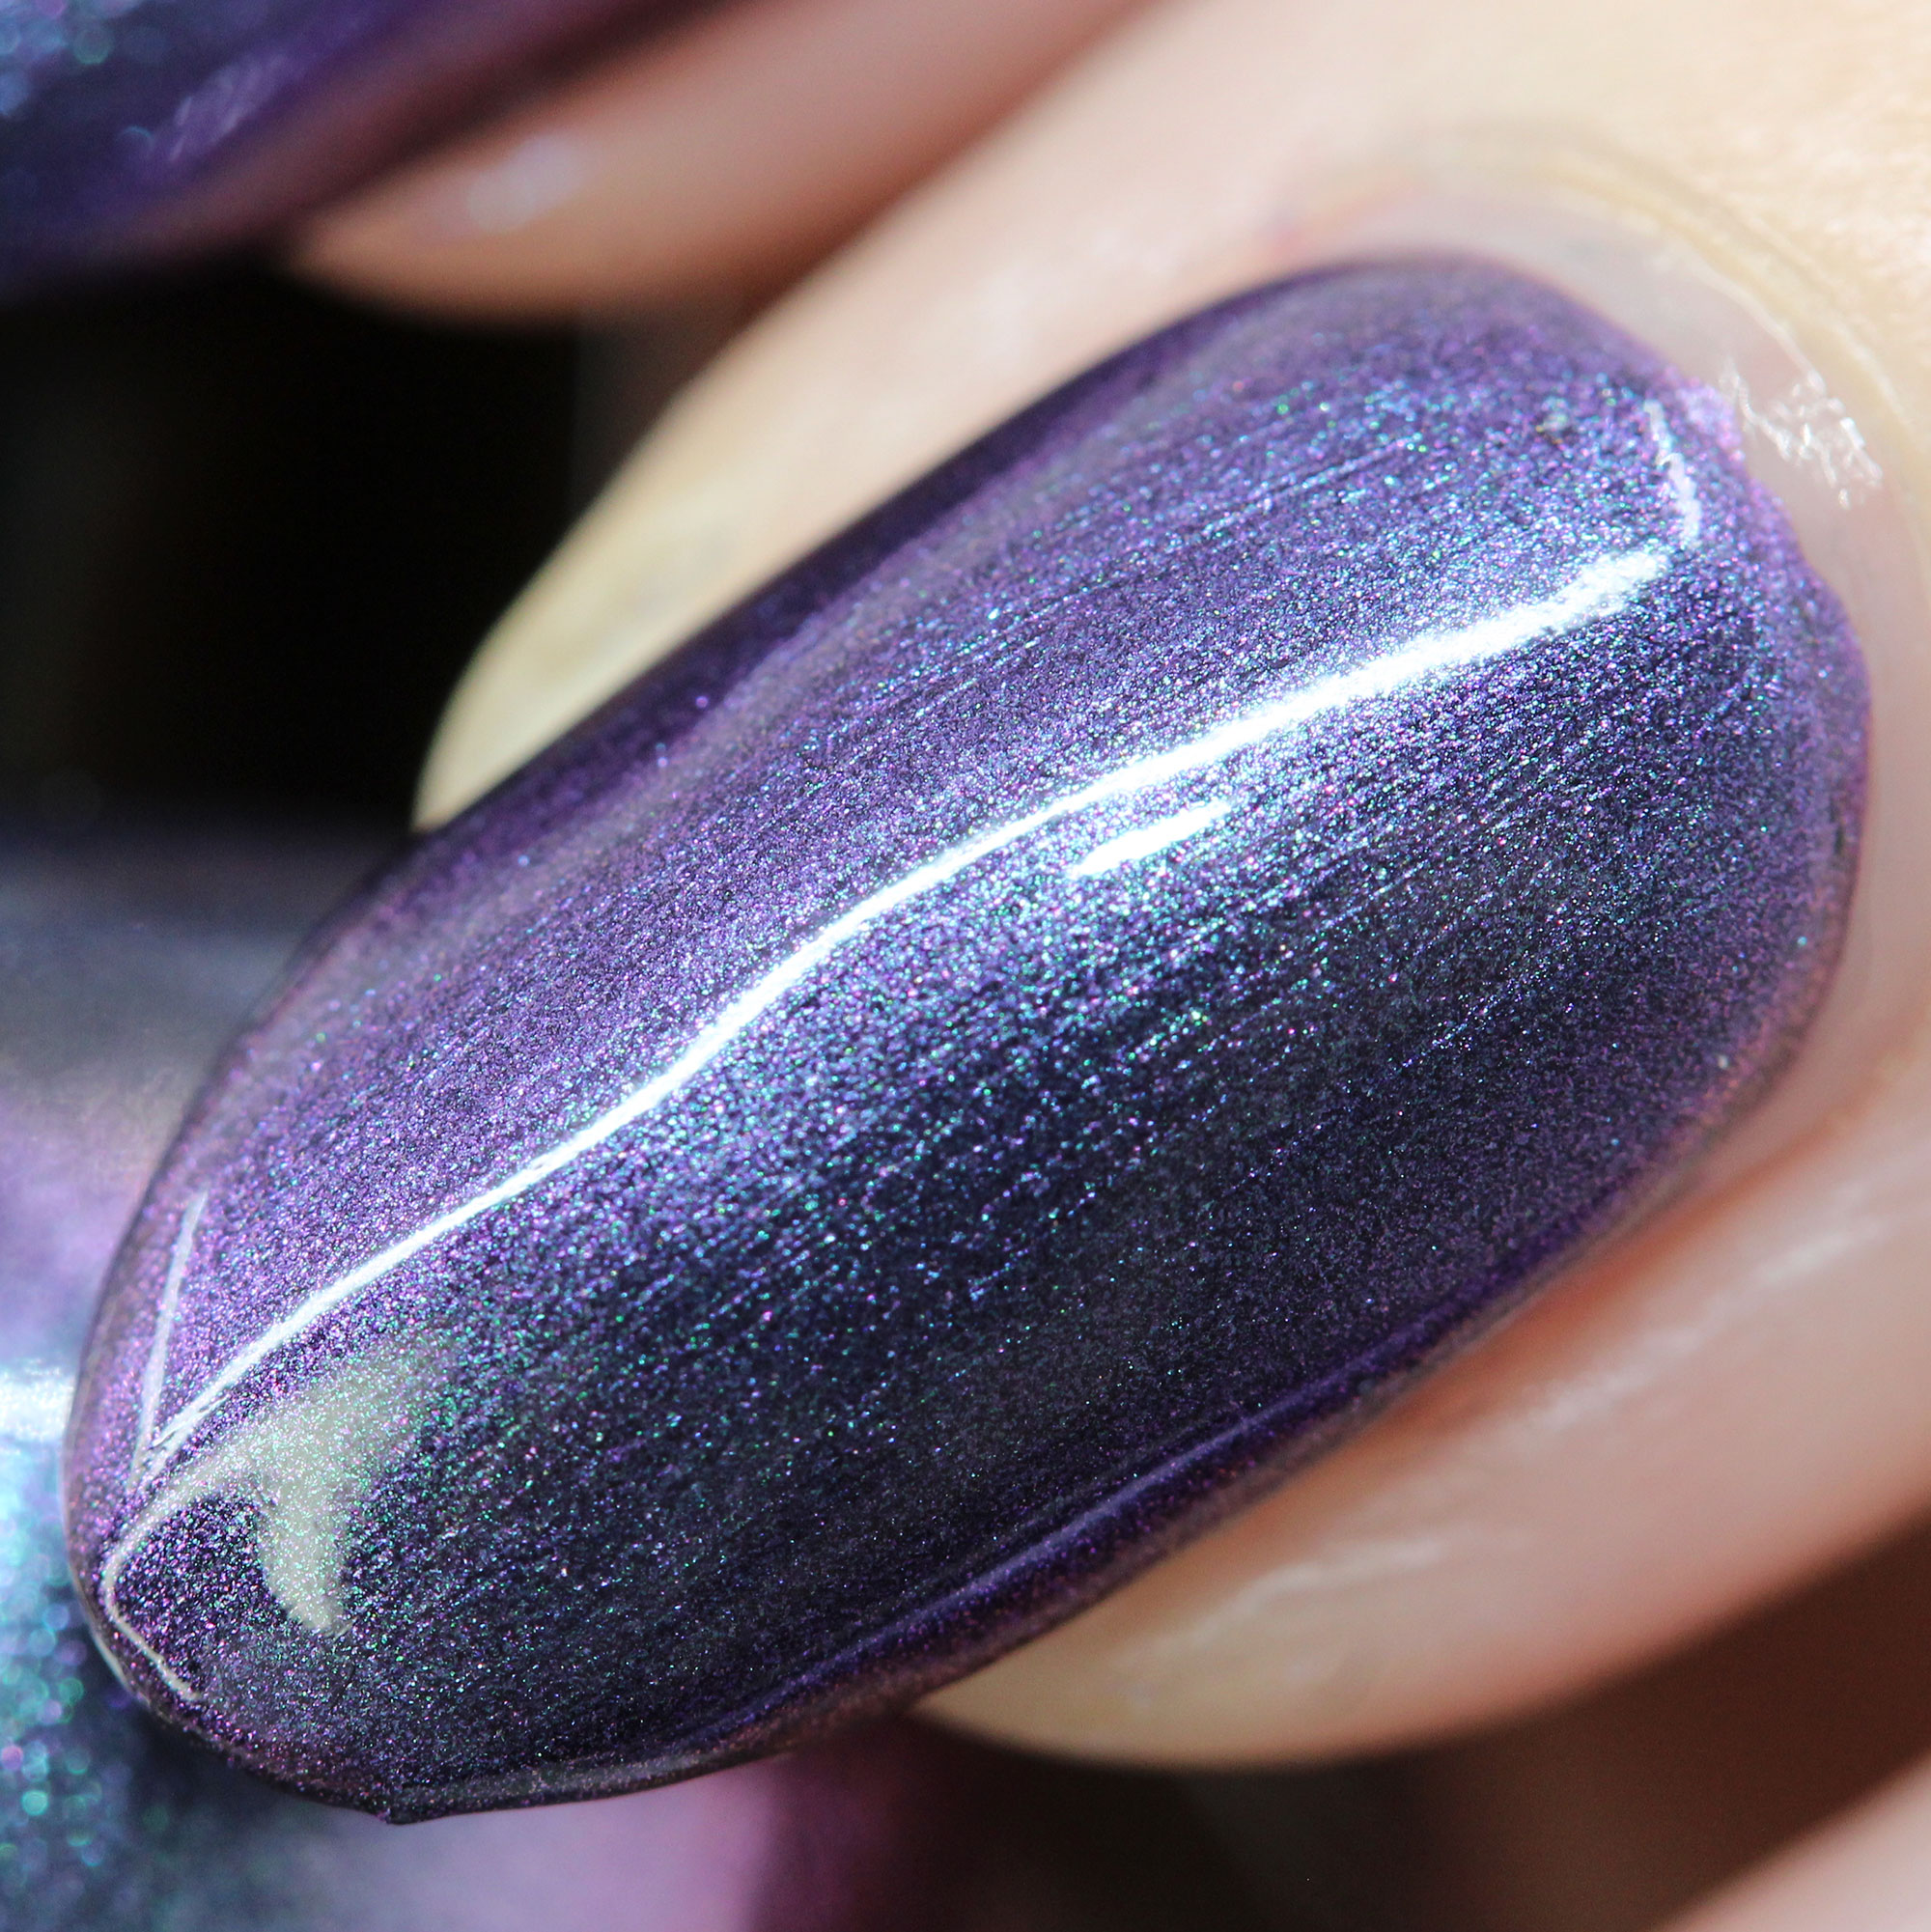
Andrea

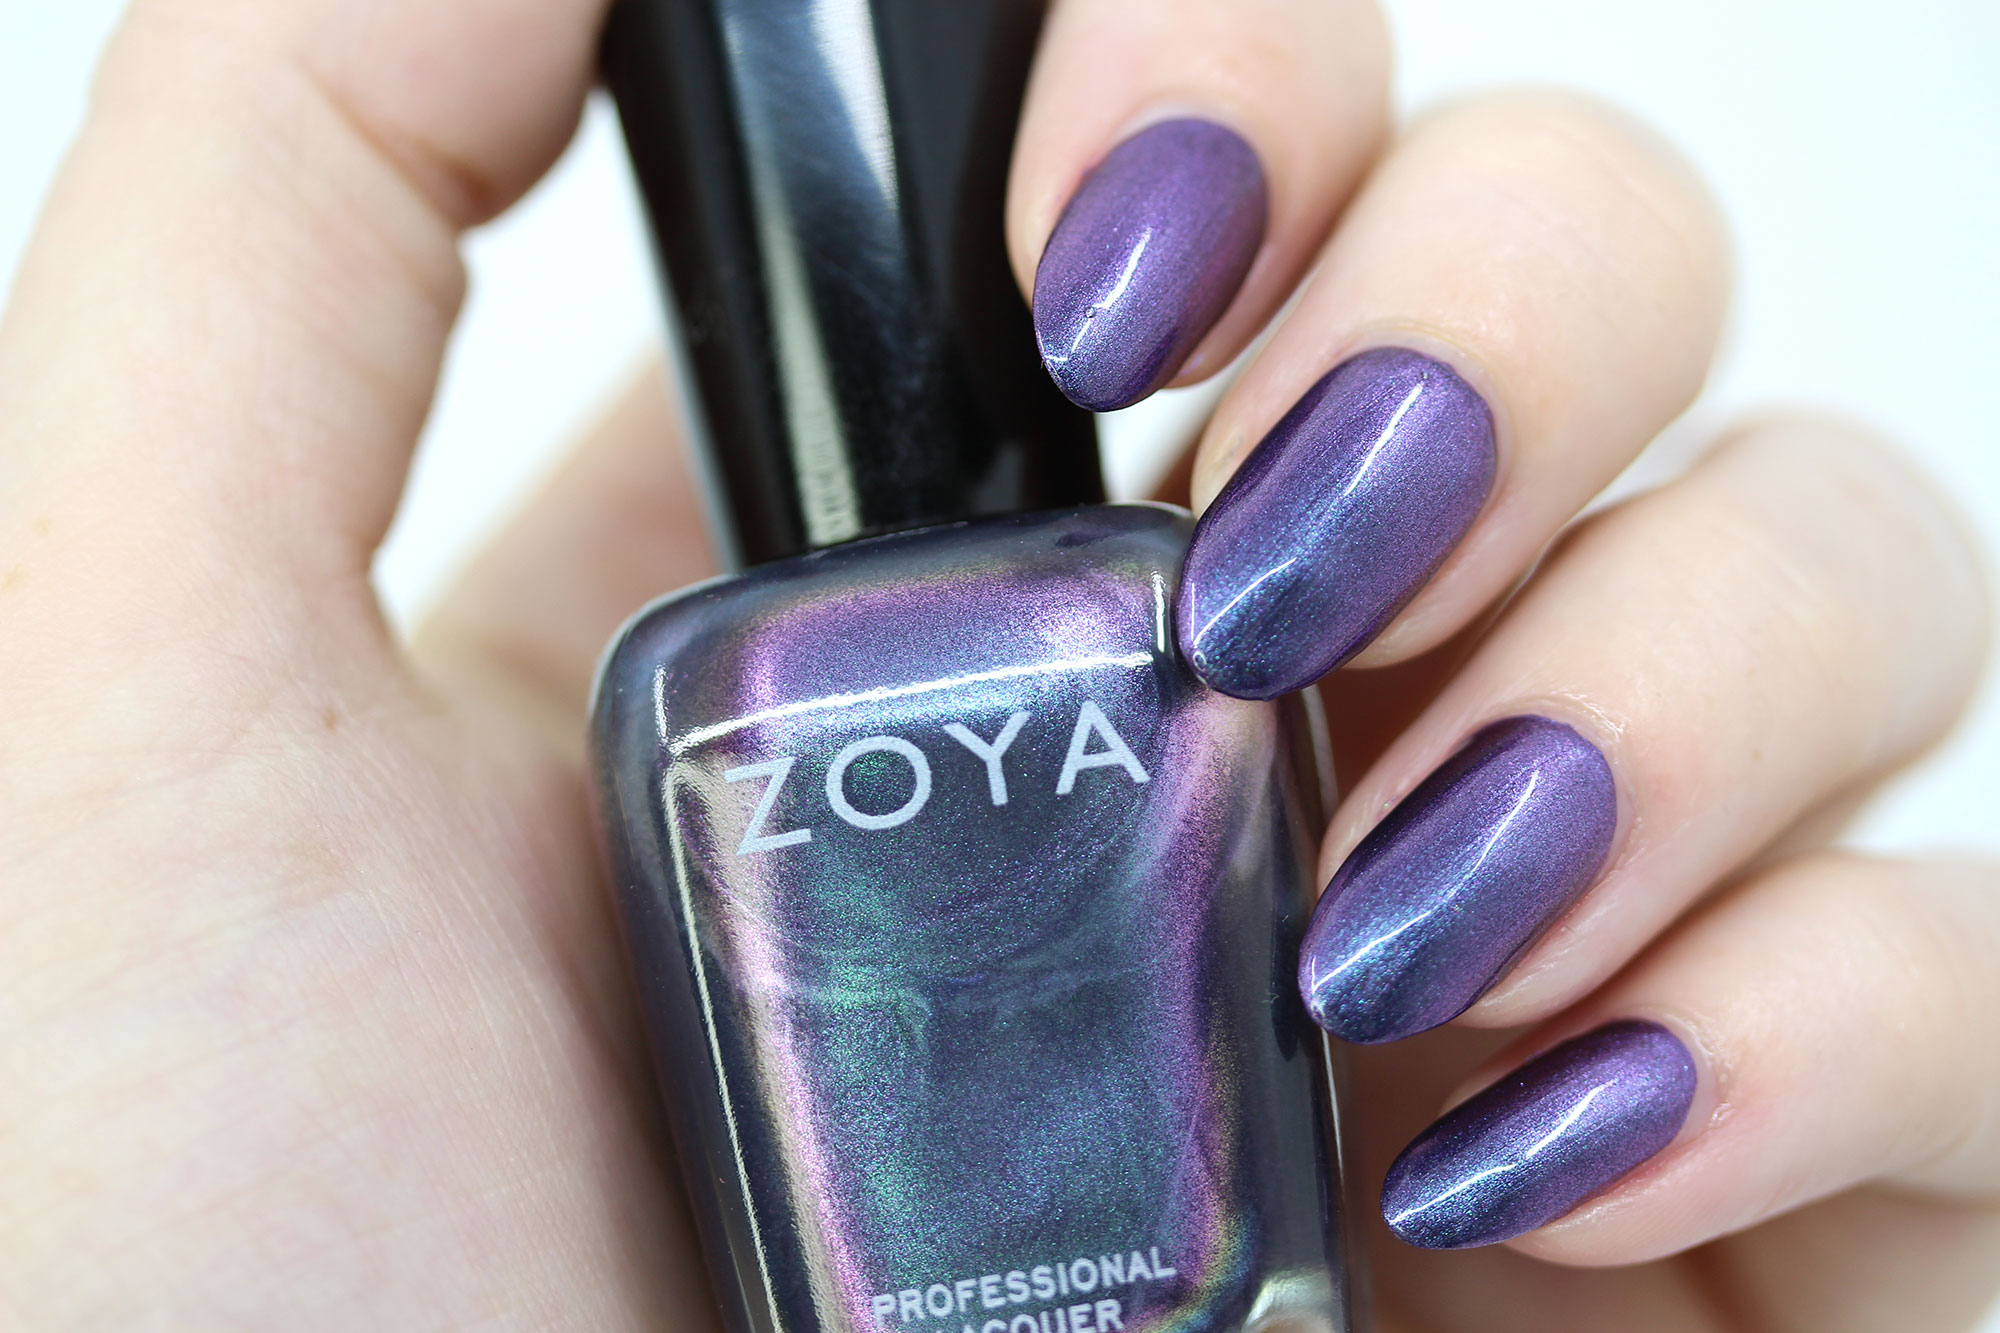
Deep iridescent black pearl

Plucked from the depths on the deepest ocean, this lovely shimmery shade is reminiscent of the sheen on a black pearl! So pretty, and definitely a stunner, I mean– look at that shimmer! Teal & purple gorgeousness right there, folks.

Opacity scale (1-5): 3.5

Finish: Shimmer, 2 coats to be opaque
Zoya Bentley swatch
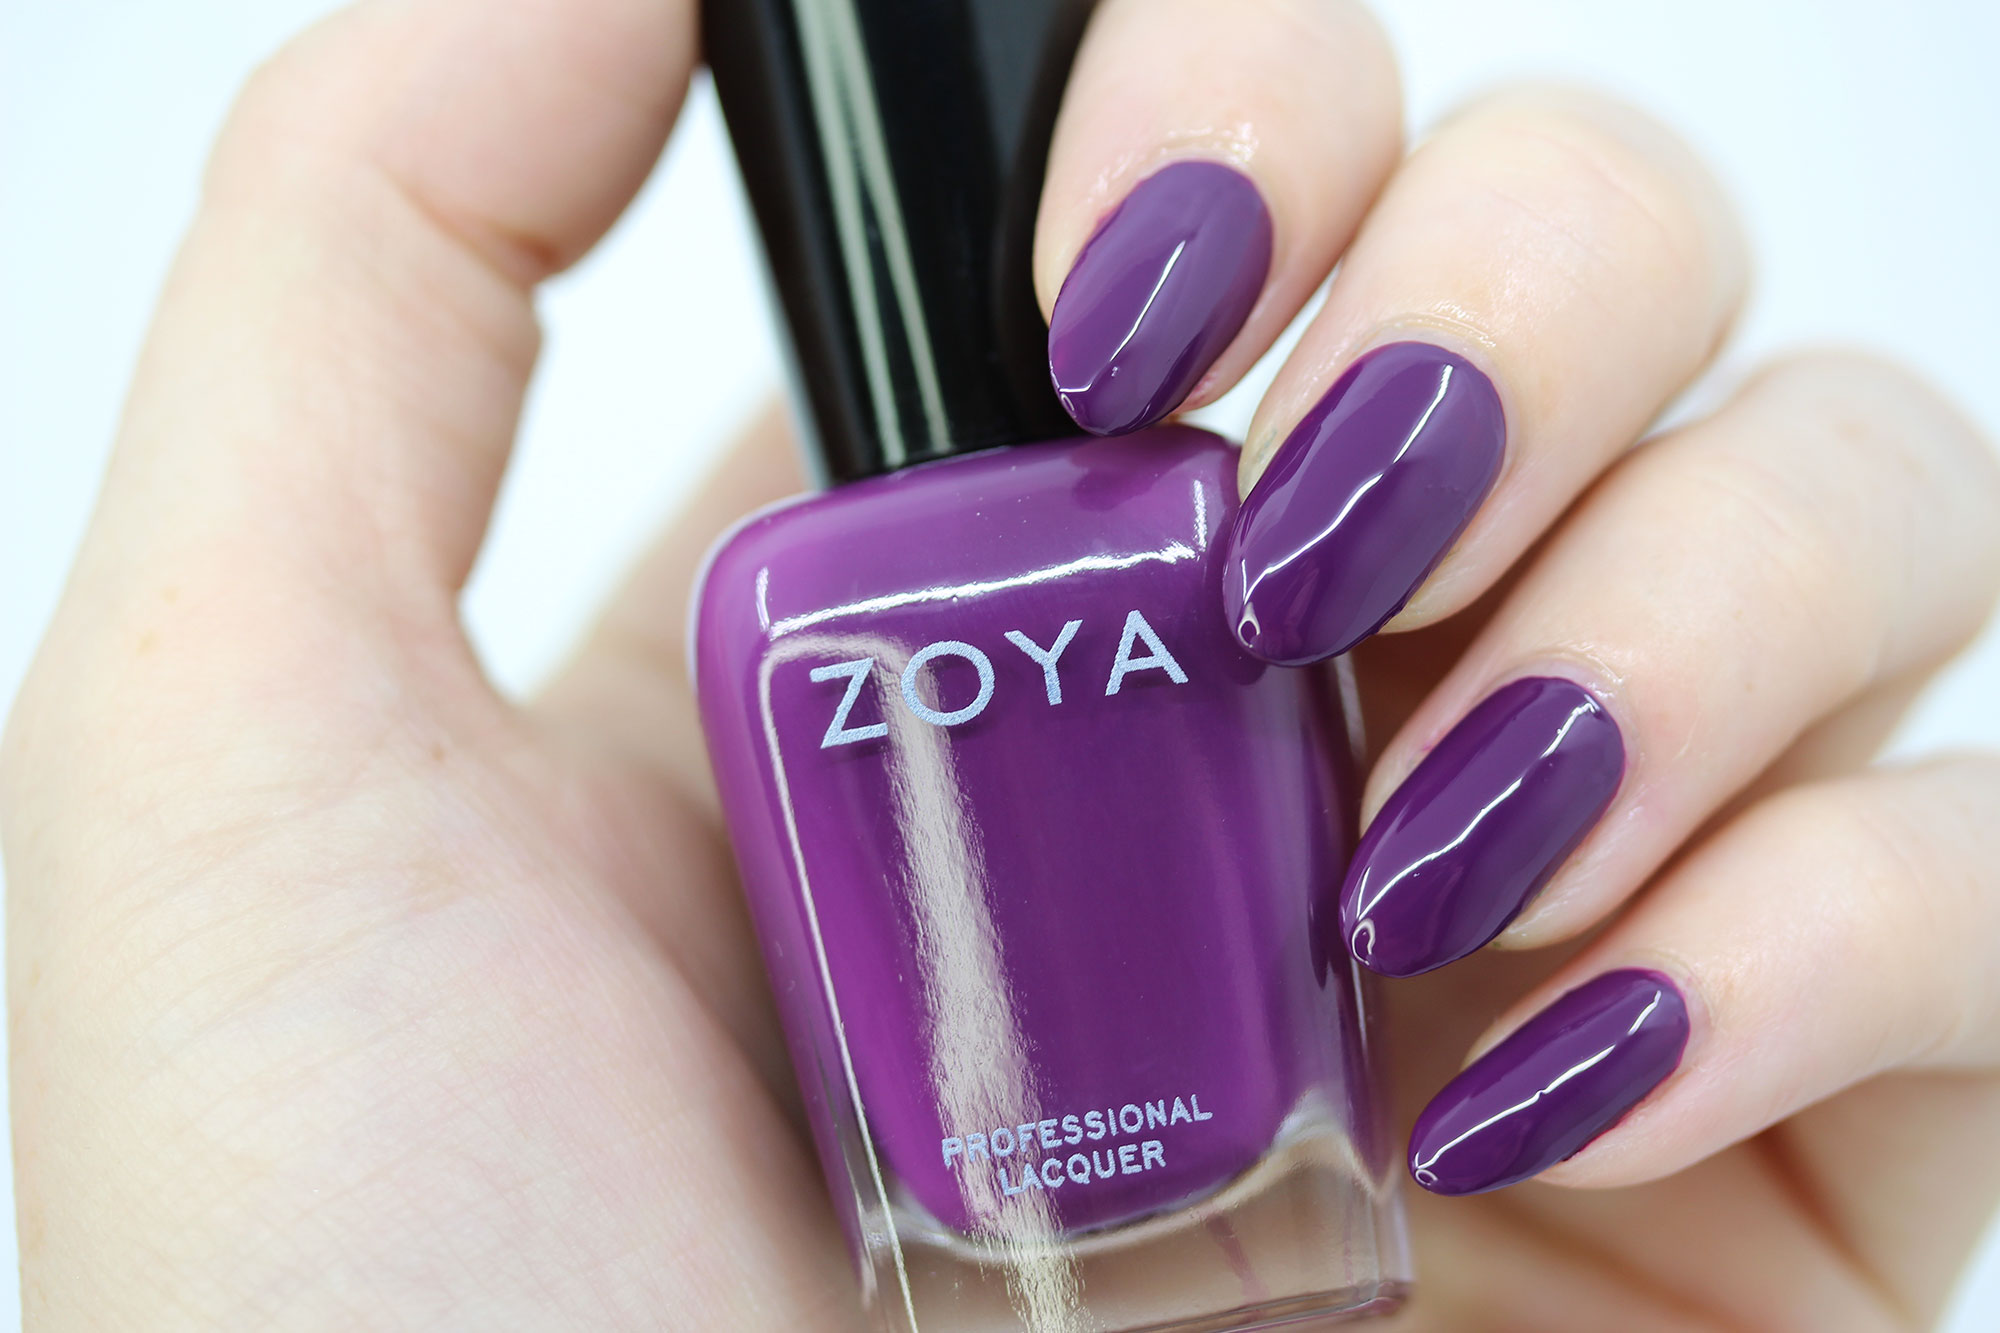
Bentley

Deep plum creme

I love a good creme, and this is a gorgeous one for fall, and not the typical rusts and browns. A great and regal addition to your fall polish lineup!

Opacity scale (1-5): 3

Finish: Creme, 2 coats to be opaque

Zoya Sharon swatch
Sharon

Mulberry creme

This berry creme is part of the shade range that Zoya does well, and another rich jewel to add to your fall arsenal of color. Add some gold, and this one will carry well into the holiday season as well!

Opacity scale (1-5): 3

Finish: Creme, 2 coats to be opaque
Zoya Lisa swatch
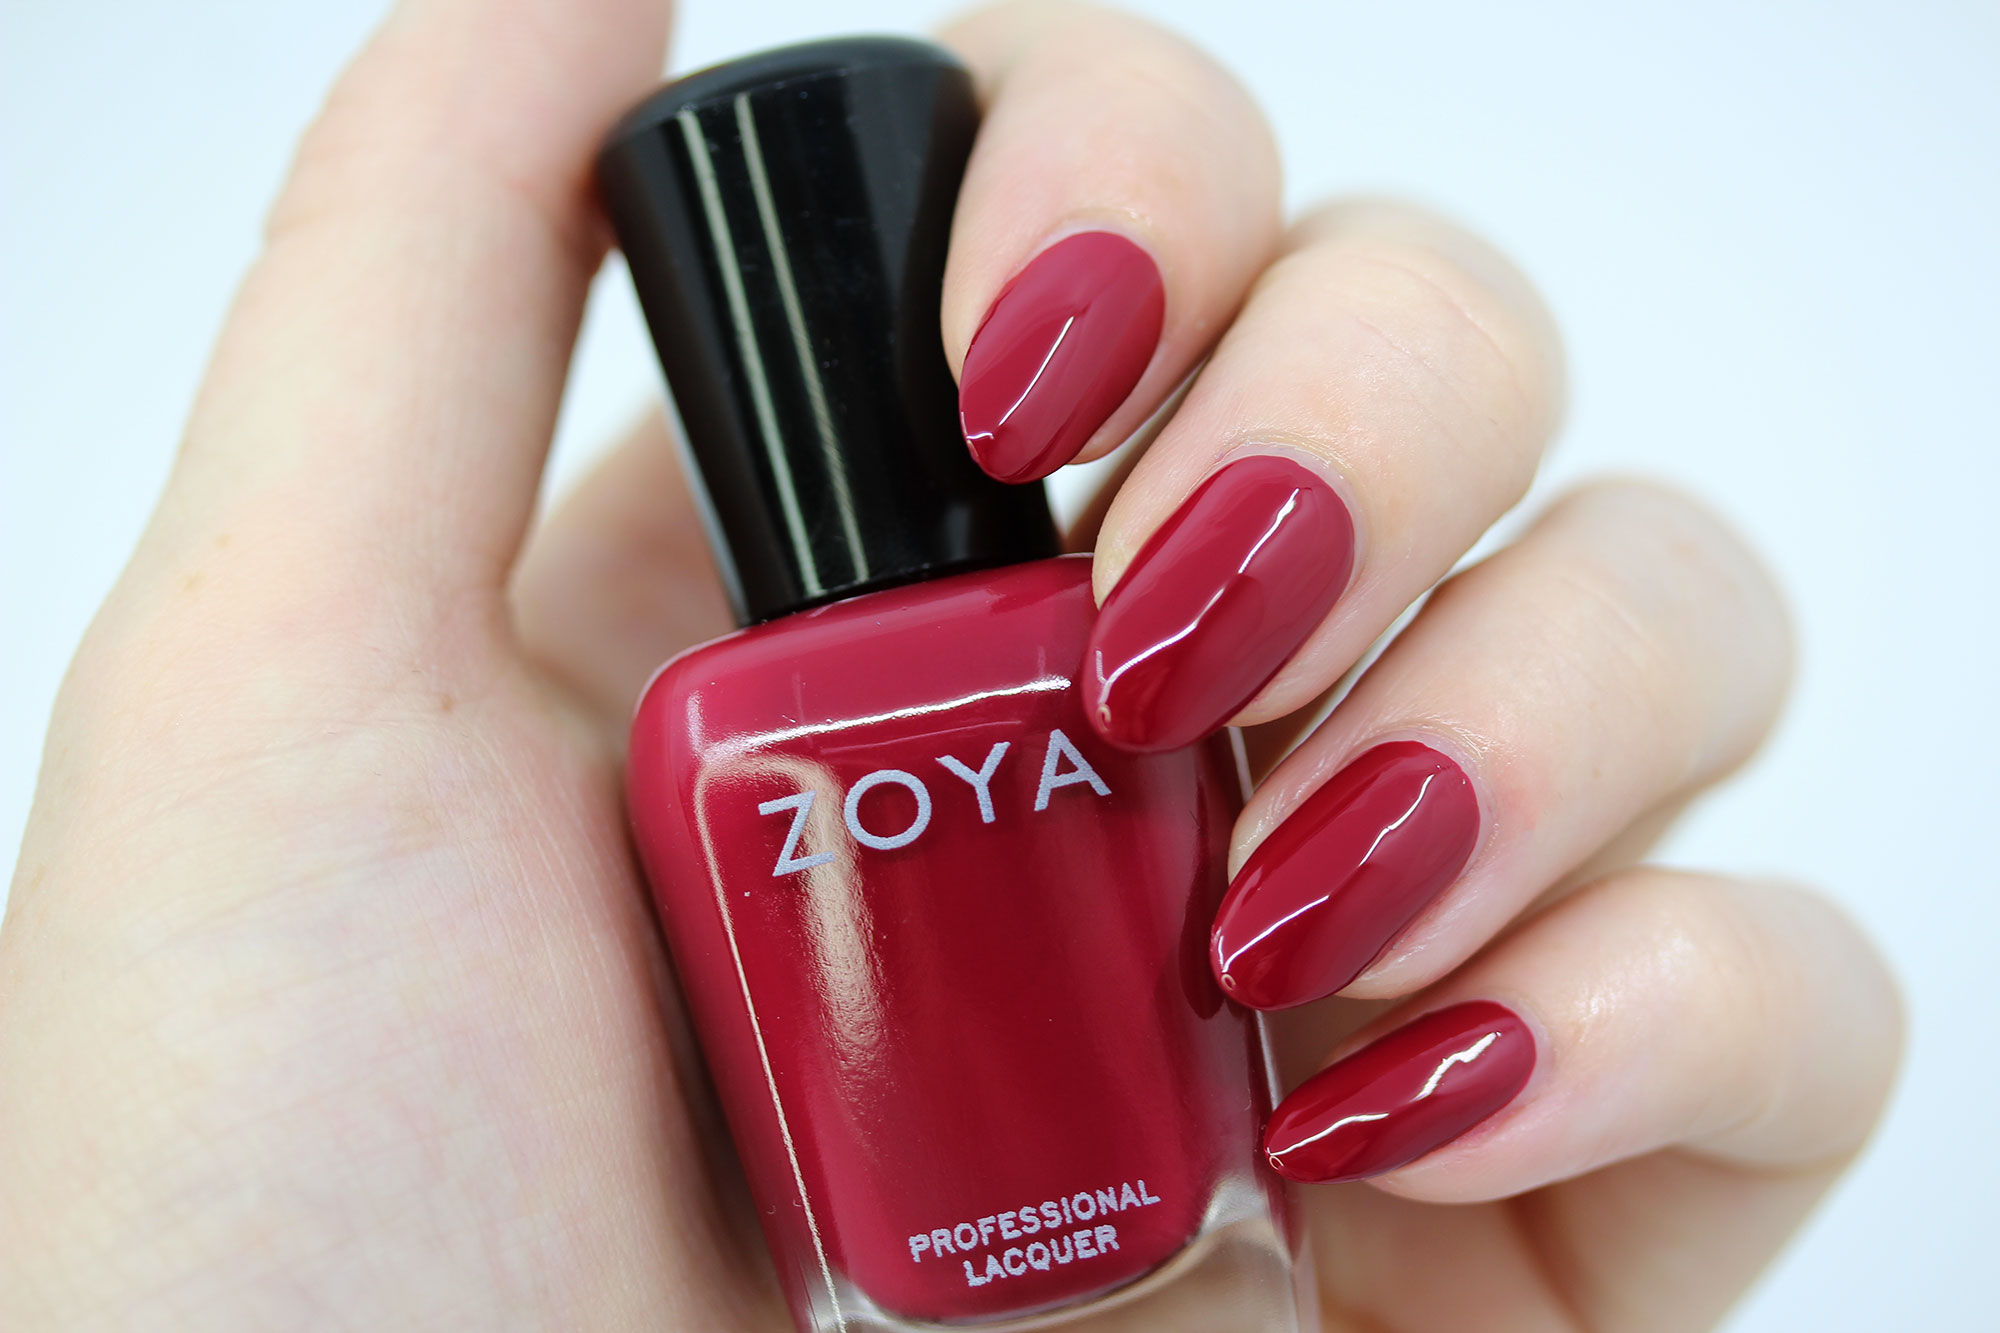
This one definitely has a vintage feel to it. Pull out your compact, go powder your nose, because Lisa is reminiscent of a deep, blue-red lipstick shade.

Opacity scale (1-5): 3

Finish: Creme, 2 coats to be opaque

Zoya Soleil swatch

Zoya Soleil macro swatch
Soleil

Copper with pink, copper, and silver sparkle

Apple cider and falling leaves, this metallic copper is fall in a bottle! I think it would look so beautiful paired with Bentley as nail art. I love all the colors of sparkle in this one – it’s such a fun shade!

Opacity scale (1-5): 3

Finish: Metallic, 2 coats to be opaque

Zoya Tasha swatch
Zoya Tasha macro swatch

Tasha

Chocolate brown metallic

Now THIS is so fall it’s like fall exploded in the bottle! I looooove the rich brown base with golden, copper, silver, and pink sparkle. It feels so warm and autumnal- a true fall shade!

Opacity scale (1-5): 3.5

Finish: Metallic, 2 coats to be opaque

Zoya Mel swatch
Mel

Deep mossy green creme

I feel like I’ve waited my entire life for a shade in my name! Now, granted, this one isn’t TRULY my name, but it’s the closest that Zoya has come to Melissa in the 11 years that I’ve been blogging! One day they’ll make Melissa, and it will BE GLORIOUS!!! Until that memorable day, I’ll definitely be fine settling for Mel, which brings the rich mossiness of the forest to my fingertips.

Opacity scale (1-5): 3.5

Finish: Creme, 2 coats to be opaque

Zoya Lou swatch
Lou

Dark, dusty teal creme

This dusty teal is definitely one we’re seeing a lot this fall, and I’m not mad at all–in fact, bring it onnnnn! I love love love this polish, and will definitely be using it for nail polish this fall and beyond!

Opacity scale (1-5): 3.5

Finish: Creme, 2 coats to be opaque

Zoya Tommy swatch
Tommy

Denim blue creme

Like shimmying into your favorite jeans, this is a perfect medium denim hue, and I want to throw it on with an oversized, chunky-knit sweater. It definitely has hints of grays in that blue, and I’m loving it!

Opacity scale (1-5): 3.5

Finish: Creme, 2 coats to be opaque

––––––––––––––––––––––––––––––––––––––––––––––––––––––––––––––––––

Final thoughts. As usual, I’m in love with the more non-traditional creme polishes. Mel, Lou & Tommy have definitely won me over, but shades like Patrice & Tasha are also topping my favorites list of this collection! Which colors from Luscious are you loving? Tell me in the comments below!

––––––––––––––––––––––––––––––––––––––––––––––––––––––––––––––––––

Disclosure: Products in this post were provided by the manufacturer for consideration. All opinions are my own.
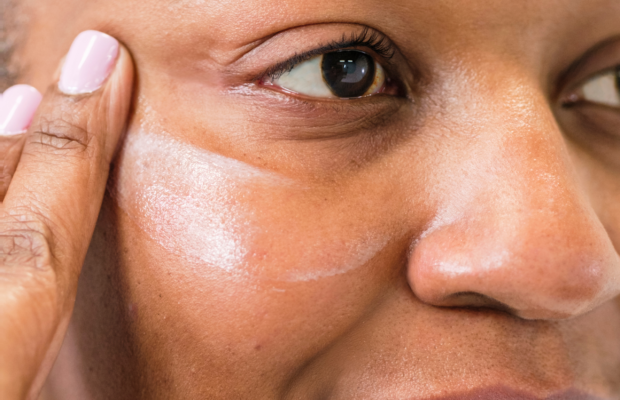
Is A Thick Moisturizer Good For Dry Skin?

0

Let’s talk about dry skin. Chances are, if you’re over the age of 40, your skin’s natural oil production has slowed down and now you are wondering what type of moisturizer is best for dry skin. Sound about, right? Most dry skin moisturizers are loaded with what are called “occlusives” which are oils that give a thick, greasy feel but is this type of moisturizer truly correcting your skin dryness?

Well, let me just start by saying this. Moisturizers have come a long way and your mother’s moisturizer of yesteryears didn’t work as well as the ones formulated today. Yet, many product formulators haven’t innovated and you may not be giving your dry skin what it truly requires.

In this post, I’ll educate you on how moisturizers actually work, why formulas aren’t truly getting to the root of the issue and what you should be looking for when deciding how to choose a moisturizer for dry skin. Let’s dive in!

The History of Moisturizers

The use of moisturizers for treating dry skin dates back thousands of years with civilizations using natural remedies like animal fats, lanolin (derived from sheep wool), oils found in almonds and olives and beeswax. These all have an oily feel on the skin but worked to alleviate skin tightness and give a soft, supple feel to the skin.

In the 19th century, cold cream was invented and in later years, petroleum jelly. These also have an oily feel which would make dry skin feel better and less tight.

With the rise of cosmetic science and dermatology, moisturizers became highly specialized and commercial moisturizers were developed using not only oils (occlusives), the addition of water and emulsifiers.

Fast forward to today, moisturizers are continually being modernized to meet the needs of what we now need in a dry skin moisturizer, but it is not enough.

What made us believe that a heavy, oil-based moisturizer is the most effective for dry skin?

  • Oils give the illusion of a glow. Oils give an immediate shine once applied and it reflects light so the skin does in fact look better. But that doesn’t mean it truly corrected the dryness from within.
  • A false sense of relief. Oils create suppleness and when a greasy moisturizer is applied and you talk or move your face around, you don’t feel that “pull” or “tightness” on the skin. People associate this feeling with not being dry. This is simply a feeling. Again, it doesn’t mean that it improves skin dryness.
  • We’ve come to expect a certain type of moisturizer for dry skin – something with occlusives that are heavy and topical. This has been passed down from our mother’s and grandmother’s moisturizers who–for most of us–were our original skincare influencers.

What does my dry skin really need?

  • Water/hydration. Both dry skin and oily skin require water. Skin cells are like fish and need water to live! This means, using a toner within 60 seconds after cleansing and leaving it on damp. Use a hyaluronic acid or humectant-rich serum under moisturizer to deliver skin-plumping hydration. Learn the difference between dryness and dehydration and watch this video. Also, drinking water won’t hydrate your skin, but these three things will.
  • Oil. Only dry skin types require oil since oily skin has it already built in.
  • A well-formulated moisturizer for dry skin, regardless of how thick or heavy it is. Don’t fall into thinking that just because something is rich and greasy, that it’s the cure-all. Sometimes a moisturizer can add the required hydration and oil to the skin without just sitting on the top of the skin.
  • Repair of your skin’s barrier. To truly correct dryness you need to repair from inside the skin, not just on the skin’s surface. Learn about fixing a damaged skin barrier.
  • Avoiding the use of harsh products and ingredients. Did you know that your vitamin C serum could be creating a “vitamin C acid burn?” Ouch. Not good.

How do I choose a moisturizer for dry skin?

  • Don’t judge a product by its weight. You need to look beyond the texture since even lighter textures can provide exceptional hydration and repair. Avoid making assumptions when you encounter a rich, greasy moisturizer.
  • Choose dry skin moisturizers that restore the skin barrier. Ingredients listed on a bottle are often hard to sort through but at the very least, if a product is being marketed for “barrier-repair”, that’s a great sign.
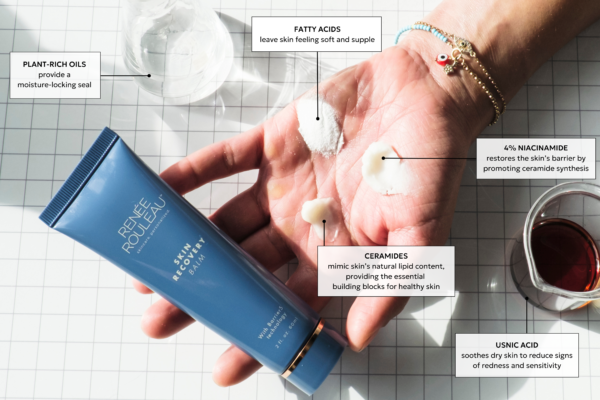
  • Choose a dry skin moisturizer with these key ingredients. If you really want to get serious about correcting dry skin, look for ingredients like niacinamide, linoleic acid, usnic acid, phytosterols, ceramides, shea butter, squalane, vitamin E, dimethicone and soybean oil, to start. (There are too many to list!) Here are five methods for repairing dry skin.
  • Consult with an esthetician or a dermatologist for a dry skin moisturizer recommendation. Trust those who truly know and understand how the skin functions, and what your dry skin needs to be restored.

Did you know that you can get barrier correction without the use of oily occlusives? Oily and acne prone skin doesn’t need the oil dry skin does, but that doesn’t mean their barrier doesn’t need help – especially with the use of acne treatments that can really damage the skin barrier. Look at this before and after!

How long does it take to see an improvement in dryness when using the right moisturizer for dry skin?

A skin’s life cycle is 28 days, so it’s important to give any product time to see results. Dry, flaky skin needs time to cycle out and fall off, giving way to new, soft and supple skin.

If you’re looking for a moisturizer for dry skin (that is surprisingly lightweight, because it doesn’t need to be heavy!) try Skin Recovery Balm. With Barrier5 technology, it repairs the skin barrier by mimicking your skin’s natural lipids, so it hydrates without feeling greasy. It melts in rather than sitting on top, offering a smarter way to correct dryness. After it’s applied, it will initially feel tacky, which comes from hydrating humectants like glycerin and propanediol that lock in moisture. Once it dries, it starts restoring your skin’s barrier, creating a “second-skin” effect that lasts all night long. By morning, your skin will feel buttery soft and replenished.

moisturizer and the ingredients

If you prefer a more traditional, richer feel, layer with Rest Day Masque on top or use a skin oil, but on its own, it provides all the moisture your skin needs for long-term barrier health.

In summary…

As an expert esthetician who has touched thousands of faces, I’m here to tell you need to re-think how you moisturize. After all, it’s a product that you use every single day and you want to get the most benefit. You can’t just rely on a basic heavy, thick, greasy moisturizer to correct dryness. It’s just not enough. You need a dry skin moisturizer that can truly repair the skin so you can be on your way to soft, healthy and dewy skin that glows!

Glazed Cherry Lips + Must-Have Glosses

0


Too Faced Kissing Jelly Lip gloss

Nothing completes a summer look like the perfect lip. I’m talking soft, juicy, glowy, and kissable. Whether I’m going full glam or just brushing on mascara, a good lip moment always pulls it together. I want my lips to feel hydrated, look healthy, and shine like I just bit into a piece of fruit.

This summer, I’ve been trying it all. Lip balms, oils, glosses, and tints that don’t just look good, but make my lips feel even better. I’ve narrowed it down to the standouts that I can’t stop reaching for. Some are viral, some are underrated, and some are luxury little treats. These are the ones that made the cut and earned a spot in my bag.

I’m also breaking down two of my favorite lip trends for summer: the cherry glazed lip and the glossy, glassy finish that looks like a glazed donut for your lips. Plus, if you’ve been wondering what’s really worth the splurge and what affordable gems you need, I’ve got you covered. Let’s get into it.

Best Lip Balms for Summer 2025

Summer lip balm guide 2025
Summer Fridays lip balm

I always start with balm. It’s the base of any good lip combo and the one product I never leave the house without. I need hydration, a little glow, and something that actually helps heal my lips, not just sit on top. These balms do all of that and more. I keep one in every bag and I’m constantly reapplying them because they just feel so good.

Some of these give a sheer tint, some are clear, and some have a buttery shine that looks amazing solo. If your lips are feeling dry from the sun, or you just want a soft glossy look, these are the ones I swear by right now.

Top Lip Oils for Juicy Summer Lips

Summer lip oil guide 2025
Gisou Honey Infused lip oil

Lip oils are that girl this summer. They’re glossy without being sticky, hydrating without being heavy, and they just make lips look juicy and full. I love tossing one in my bag for touch-ups or swiping it on top of a lip tint. It gives that lived-in, effortless look like you’ve been sipping on something sweet.

These are my go-to lip oils when I want hydration, shine, and a little extra. Some give sheer color, some are totally clear, and all of them make my lips feel smooth and fresh.

Top Summer Lip Glosses for 2025

Summer lip gloss guide 2025

If it’s not shiny, I don’t want it. Lip gloss is my personality this summer and I’ve found some serious favorites. I want gloss that makes my lips look plump and reflective without being sticky or overly thick. I use these on bare lips or layered over liner and they always give main character energy.

From sheer and sparkly to pigmented and plush, these are the lip glosses that never fail me. And yes, some are viral for a reason. They really are that good.

My Favorite Summer Lipsticks of 2025

When I want something a little more polished, I always go for a lipstick that feels light but still gives color. Summer is all about comfort, so I’ve been reaching for formulas that are moisturizing, sheer, and give me that perfect wash of pigment. These feel like a tinted balm and lipstick had a glow-up together.

From juicy finishes to soft shine, these lipsticks are perfect for a beach day, brunch, or anything in between. They’re comfortable, flattering, and never drying.

How I Do the Cherry Glazed Lip Look

Cherry glazed lip look

This look gives cherry popsicle vibes in the best way. I like to start with a cherry tint or lipstick, then top it with a high-gloss finish to make it look fresh and juicy. It’s perfect for summer, especially when you want something playful that still looks put together. This combo is so cute and totally wearable.

Here’s what I use to get that sweet glazed cherry lip:

The Glazed Lip Look for 2025

The glazed lip trend reminds me of that fresh-out-of-the-spa glow but for your lips. I love layering a sheer gloss or balm over a nude liner to give that glassy, almost wet look. It makes your lips look fuller and healthier without doing too much. The trick is using hydrating products that reflect light naturally.

If you want that soft, light-catching finish that’s all over your feed, here’s what I recommend:

Luxury Lip Products Worth the Splurge

Sometimes you just want to treat yourself. These lip products are on the luxe side, but they really deliver on feel, finish, and experience. From elegant packaging to skincare-level ingredients, they’re little luxuries that make everyday moments feel special.

Whether you’re gifting yourself or building your collection, these are totally worth it:

Affordable Lip Products That Deliver

You don’t need to spend a ton to get amazing lips. These budget-friendly lip products work just as hard as the pricier ones. They’re hydrating, pretty, and super wearable. Some of these are drugstore legends, others are viral hits, but all of them are worth a spot in your bag.

Here’s what’s been giving me soft, juicy lips on a budget:

Final Thoughts

There’s nothing like the confidence that comes from a good lip combo. Whether it’s a buttery balm, a juicy gloss, or a cherry red glaze, these products help me show up feeling cute and comfortable. I hope this guide helped you discover a few new favorites or gave you inspo for your next look.

If you grab anything from Charlotte Tilbury, don’t forget to use my code feliceSM14T to save 15% off your first purchase. Let me know what your go-to lip products are this summer. I love seeing what everyone’s wearing.

Shop this post

Here’s a quick roundup of everything I mentioned so you can treat yourself to a juicy summer lip moment. These are the products I’ve been loving, reaching for daily, and recommending to everyone. Whether you’re into balms, glosses, lipsticks, or oils, you’ll find something here to build your perfect summer lip look. Just click below to shop my picks.

Affiliate disclaimer

Items marked with an asterisk were gifted. As always, all my reviews are my own. This post contains affiliate links. This means that I will make a commission on any purchase you make when you click on one of my links.

Multipurpose Benefits of Rosehip Oil

0


Skip to content

Why Rosehip Oil Deserves a Place in Your Skincare Routine

In the world of natural skincare, rosehip seed oil, also known as wild rose oil, stands out as a true multitasker. Derived from the seeds of the dog rose (Rosa canina), this cold-pressed golden oil is a powerhouse of vitamins (A, C, and E), fatty acids (omega-3, omega-6, and omega-9), and antioxidants like lycopene. These natural compounds work synergistically to nourish the skin, promote cell regeneration, and protect against environmental damage.

Whether you’re looking to fight wrinkles, fade scars, fight acne, or hydrate dry skin, rosehip oil offers a long list of benefits for your skincare routine. Let’s take a deep dive into how this versatile oil addresses common skin, and even hair, concerns.

Many of us are concerned about the signs of premature aging on our skin. Rosehip oil may just be your go-to answer. Thanks to its high levels of antioxidants, this oil combats free radicals that contribute to wrinkles and fine lines. Free radicals are unstable molecules that damage skin cells, but the antioxidants in rosehip oil neutralize them, slowing down the aging process.

Additionally, this oil contains beta-carotene (Vitamin A), which supports collagen production, a key protein that keeps skin firm and youthful. Regular use can create smoother, suppler skin with fewer fine lines. Plus, this oil helps to hydrate the skin, improving its elasticity and texture.

Skin that is inflamed and prone to breakouts is one of the most frustrating skin conditions! Rosehip’s anti-inflammatory and hydrating properties are a welcome option for fighting acne. The essential omega-3 fatty acids, particularly α-linoleic acid, calm irritated skin, reducing redness and inflammation. This makes rosehip oil an excellent remedy for conditions like eczema, psoriasis, and acne.

Further, unlike many other oils, rosehip oil won’t clog your pores. Instead, it helps regulate sebum production, reducing oiliness while promoting balanced, healthier skin. With its ability to reduce inflammation, hydrate the skin, and regulate oil, rosehip oil delivers clearer, smoother skin over time.

Dry skin requires deep hydration and protection from moisture loss without suffocating the skin in thick lotions. Rosehip provides both by forming a protective barrier on the skin’s surface, locking in hydration. Vitamin E, combined with fatty acids, replenishes moisture and restores balance to dry or flaky skin.

What sets this oil apart from other oils is its lightweight, “dry” texture, which absorbs quickly without leaving a greasy residue. It’s perfect for layering under other skincare products or makeup, leaving your skin smooth and hydrated throughout the day.

Whether you’re dealing with acne scars, sunspots, or pigmentation issues, rosehip oil can help even out your skin tone. The oil contains vitamin C, a natural brightening agent, which helps reduce dark spots and hyper-pigmentation. Rosehip oil’s astringent and regenerative properties also help in healing the skin of post-acne scars and stretch marks.

Plus, collagen-stimulating compounds, such as vitamin A, further boost the skin’s healing process, making this oil particularly effective for diminishing the appearance of scars and age spots.

The beauty benefits of rosehip oil extend beyond the skin—it’s also an excellent treatment for dry, itchy scalp and dull hair. The oil’s fatty acids soothe an irritated scalp, while vitamins nourish the hair from root to tip. The result is healthier, shinier, and more voluminous hair. Simply massage a few drops into your scalp to nourish the roots and promote hair growth.

Because it’s non-greasy, rosehip oil won’t weigh down your hair or make it look oily. Instead, it delivers hydration and shine, transforming dry, brittle hair into soft, healthy locks.

Lily’s offers two products that showcase this versatile oil:

Nourishing Moisture Cream This nourishing cream moisturizes and protects skin from the elements. It combines rosehip seed oil with primrose oil and comfrey to reduce the signs of aging, eliminate dry skin, and provide support for connective tissue health. Perfect for those people who love a rich cream.

Seven Facial Oil Treatment – This rich blend of oils, featuring rosehip seed oil and primrose oil plumps up the texture of the skin while deeply hydrating it. This anti-aging, vegan formula is perfect for people with super dry skin and wants immediate relief.

We invite you to see the benefits of rosehip seed oil for yourself!

Share This Story, Choose Your Platform!


Get 15% off and a FREE ebook with 25+ dry skin remedies:

Page load link

Authentic 1930s Makeup Looks and Products – Besame Cosmetics

0

As we celebrate our limited-edition makeup collection inspired by Ella Fitzgerald®, one of the greatest Jazz singers of all time, we’re sharing the looks and makeup tips that defined makeup in the 1930s.

While Ella was forging her career during the Great Depression of the 1930s, she was also building her fashion style that was full of fun from sequins to feathers. Her makeup style was more minimalist, even though women’s makeup looks during the 30s became more refined—influenced by Hollywood, as magazines started promoting the stars’ glamorous makeup looks.

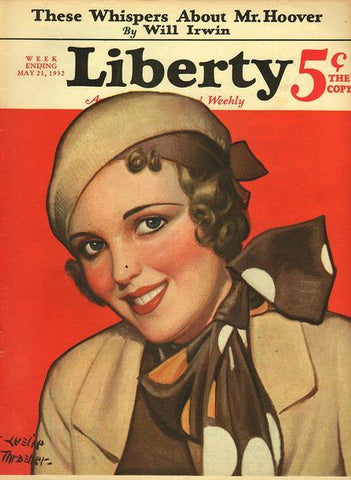
1930s magazine

Makeup that was Popular in the 30s

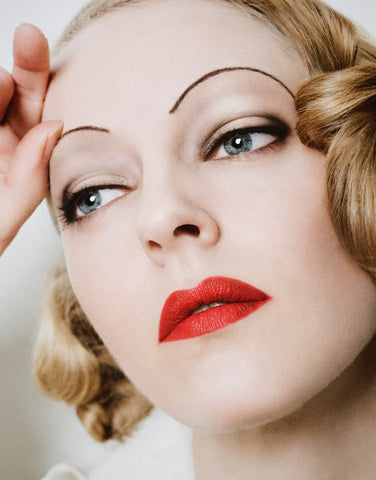
The beauty standard of the 1930s was softer than the 20s. It was not only influenced by Hollywood but also by the Great Depression. It was defined by striking eyes that relied on a lot of mascara, thin eyebrows, and soft or pale shades of eyeshadow. Lips were full, slightly overdrawn, and shaped into two long mounds that flared at the corners. Compared to the 1920s, the overall 1930s makeup look was less vamp-like and not quite as dramatic.

1930s makeup

If you are looking to re-create a makeup look from the 1930s, check out our 1930s and Jazz Age value sets featuring all of the limited edition products in our Ella Fitzgerald® collection, combined with various additional accessories and bonus makeup items to help bring a 30s look to life.

ella fitzgerald makeup collection

Mascara in the 1930s

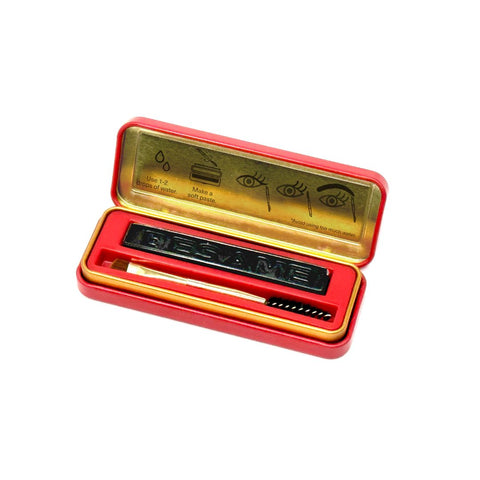
The look at the time for any Jazz Age beauty was to use a lot of mascara. Cake Mascara was the most popular form of mascara during this time, and it was a multi-functional product – used for lashes and brows.

cake mascara

Bésame Cosmetics has researched and revived a cake mascara formula and enhanced it with a little bit of modern science. It’s easy to use, activated by water, and features less than 10 ingredients. One of the best-selling products at Bésame, Cake Mascara remains popular for its versatility – often used to create a dramatic cat-eye eyeliner effect and by women who are allergic or sensitive to traditional mascara.  They appreciate the pure and simple formula of Bésame’s Cake Mascara.  Learn more about Cake Mascara here.

Eye Makeup in the 1930s

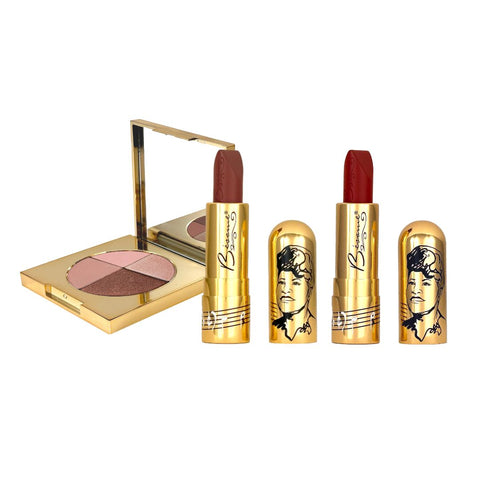
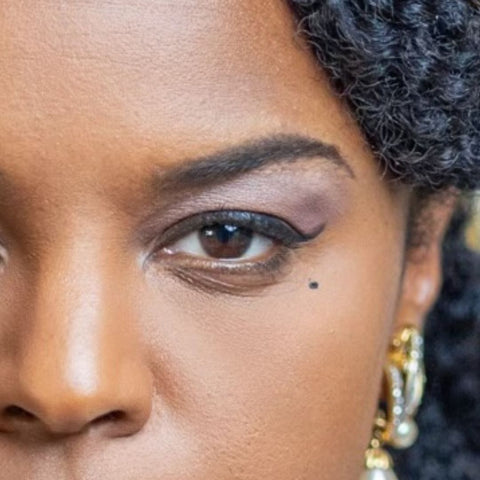
As Hollywood entered its Golden Age, it had a significant impact on women’s beauty, including more options and colors. Eyebrows were still thin but not as thin as in the 1920s, they often had a high arch towards the temples. Eyeshadow was one of the products that benefited from a new array of colors with lighter shades, silver and gold very popular. Explore the limited-edition Ella Fitzgerald® Eyeshadow Quad of matte and shimmer shades in mauve, taupe, a coffee-colored brown, and even a pale pink eyeshadow that can accent and highlight.

1930s eye makeup

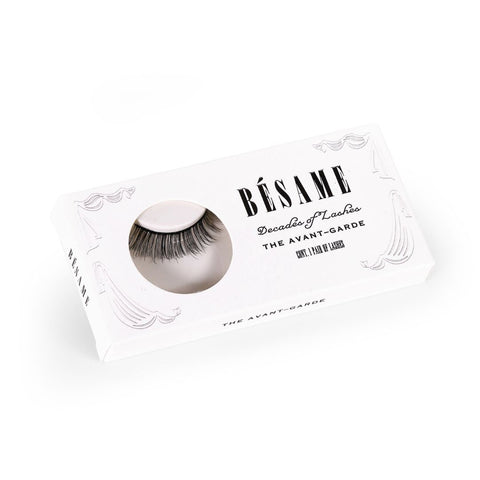
For a 1930s look, apply the taupe or deeper brown to the upper lid’s crease and blend with the light mauve or pale pink to highlight the brow bone. Elevate a 1930s eye makeup look with our fake lashes from the 1930s.

1930s lashes

Lipstick during The Great Depression

lipstick during the great depression

An interesting lip trend from this time that continues today is that as times were tough during the Depression, many women traded bigger luxuries for smaller ones like lipsticks. Lipstick was extremely popular in the 1930s. The style shifted a bit from the 1920s, lips were not quite as rounded.  However, the lip look of the time did involve creating rounds or flares at the corners of the lips — which was known as the “Crawford Smear”.  Light rose and raspberry tones, maroons, dark reds and orange tones were popular lipstick shades. Later in the 30s, brighter reds became popular. At, Bésame, we’ve revived many historic lipstick colors including some from the 1930s like Cherry Red or Carminebut we’ve also introduced two new shades in a creamy, lustrous formula inspired by the Queen of Jazz, Ella Fitzgerald. Apollo is a rum raisin, deep cool brick red lip color and Savoy is a terracotta, brown-red shade – both look fabulous on a range of skin tones.

fairest red lipstick

What were popular nail polish colors in the 1930s?

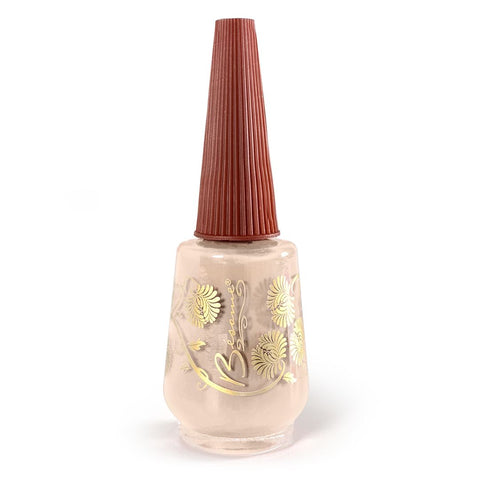
Typically, nail polish was only applied in the center of the nail with the half-moon and tips left bare.  Pale rose, light pink, and cream were popular, check out our creamy shade of Blooming Beige.  The number of nail colors grew in popularity throughout the 1930s to match a variety of dress colors.

If you decide to recreate a makeup look inspired by the 1930s, don’t forget to share it on social and tag us at Bésame Cosmetics.

bloom beige nail polish


Back to Bésame Blog

Asthma: Not Just a Childhood Condition

0

Asthma remains a common and often under-recognized respiratory condition, affecting people of all ages. It affects about 4.6 million Canadians, including 900,000 children under 19 years old. In Canada, more than 300 people are diagnosed with asthma every day and about 300 asthma-related deaths are reported annually.

Adults may experience symptoms throughout their lives or develop them for the first time in adulthood. Factors such as exposure to certain fumes, hormonal changes, and obesity may contribute to who develops asthma later in life.

What is asthma?

Asthma is a chronic lung disease that causes inflammation and narrowing of the airways, leading to symptoms such as shortness of breath, chest tightness, coughing, and wheezing. This is known as an asthma exacerbation, or more commonly, an asthma attack.

An asthma attack can last from minutes to days and is a leading cause of hospital visits and missed time from school or work. If left untreated, severe attacks can be life threatening. Although there is no cure for asthma yet, it can be managed with proper treatment.

Asthma attacks can be triggered by allergies such as dust mites, pollen, mold, or pet dander.  They may also be caused by smoke, cold air, pollution, chemicals, intense emotions, or exercise.

Who is at risk of asthma?

Researchers have not determined an exact cause of asthma, but there are several risk factors that can lead to the disease. Many patients are first diagnosed in childhood, but it is also common to be diagnosed as an adult.

Some known risk factors for asthma include:

  • Family history: Kids of parents with asthma are 2.5 to 3 times more likely to have it.
  • Allergies: Certain allergies that affect the nose and eyes increase asthma risk.
  • Premature birth: Being born before 36 weeks increases risk of developing asthma later in life.
  • Childhood lung infections: Certain lung infections at an early age increase risk of asthma.
  • Occupational exposures: Chemicals, dust, and fumes can cause adult-onset asthma.
  • Hormones: Women are more prone to asthma after menopause.
  • Air Quality: Smoking, exhaust fumes, and pollution can trigger asthma.
  • Obesity: Extra weight around the chest and inflammation can worsen asthma risk.

Exercise-Induced Asthma (EIA)

Some people experience asthma symptoms such as coughing, wheezing, and shortness of breath within 5 to 10 minutes of exercising, forcing them to stop.

Our airways function best with warm, moist air. Typically, air enters our body through the nose where it is warmed and moistened before it reaches the lungs. However, during exercise with heavy breathing, cold and dry air can enter the airways through the mouth which can trigger asthma attacks. Allergens and air pollution can also worsen symptoms in people with asthma.

For those who experience exercise-induced asthma, doctors may prescribe inhalers to use before or during exercise to help open the airways and reduce inflammation. Warming up before exercise, cooling down afterwards, and choosing indoor exercise when its cold outside or if air quality is poor can also help prevent symptoms.

How can we help?

Your London Drugs pharmacist can help identify symptoms consistent with asthma, answer your questions and concerns, and can recommend follow up with a doctor if needed. They can also assist you in managing prescribed medications, teach you how to use inhaled medications correctly, and provide advice on preventing and treating asthma attacks. Ask us about simple to use peak flow meters to monitor how well your lungs are working, or spacer devices to help deliver inhaled medications more effectively to your lungs.

Don’t be left without medication. Talk to your pharmacist if you have run out of medication or if it is expired. They can often conveniently extend or refill your prescription without contacting your doctor.

15 Simple Things You Need to Know

0

  • Reddit
  • X

Let’s talk about simple makeup tips for beginners!

Because, let’s be real—learning how to do makeup can feel overwhelming when you’re first starting out. Between YouTube tutorials, TikTok beauty trends, and influencers showing off flawless routines with 47 products, it’s easy to feel like you’re already behind.

But here’s the truth: you don’t need a massive collection or pro-level skills to look and feel great. All you really need is a few solid products, some simple techniques, and the confidence to experiment.

This guide is packed with beginner-friendly advice that actually works.

Whether you’re building your first makeup bag or just want to feel more confident doing your own face, here are 15 simple makeup tips for beginners that’ll make your routine way easier (and more fun!).


💡TIP: Pin this article to your Makeup Tips board on Pinterest so you can always come back when you need to! 👇🏼👇🏼👇🏼

15 Simple Makeup Tips for Total Beginners

*This post contains affiliate links meaning that if you make a purchase after clicking the link, I earn a small commission at no additional cost to you. This helps me provide the best possible content on this site for free. Keep in mind that I only link to quality products that I use myself and feel would be beneficial for my readers.

Please read my full affiliate disclosure for more information.


Tip #1. Start With Skincare—Always

Skincare Icon

Before you even think about foundation, concealer, or anything else, make sure your skin is clean and moisturized. This is often overlooked, but it makes a huge difference.

Dry, flaky skin makes your makeup sit weird and look patchy. Oily skin can break up your foundation. And if you skip SPF? You’re setting yourself up for long-term regret.

Here’s a simple starter skincare routine:

Hydrated skin = better base = easier makeup.


Tip #2. Match Your Foundation to Your Neck

Makeup Compact Icon

One of the most common mistakes beginners make is choosing a foundation that’s too light or too dark for their skin.

The result? A mismatched face and neck… and nobody wants that.

When shade matching, swipe a few different options along your jawline and see which one disappears into your skin in natural lighting.

Not store lighting. Not bathroom lighting. Actual sunlight.

If you’re unsure, look for a buildable formula like the L’Oréal True Match Foundation or Fenty Beauty Eaze Drop Skin Tint. Both are forgiving and beginner-approved.


Tip #3. Less Is More (Especially at First)

Less Is More Icon

Here’s a secret that even the pros know: less is more.

When you’re just starting out, it’s easy to feel like you need full coverage everything and a full face every day. But that can actually make things harder.

A simple makeup routine using just a few products can look fresh and natural—plus it’s quicker. Stick to the basics:

  • Tinted moisturizer or BB cream
  • Concealer
  • Blush
  • Mascara
  • Lip gloss or tinted balm

Keep it minimal, and build from there as you gain confidence.


Tip #4. Get a Few Good Brushes (You Don’t Need a Whole Set)

Makeup Brush Icon

You do NOT need a 25-piece brush set as a beginner. In fact, too many tools can make things more confusing. Instead, go for a few quality essentials you’ll actually use:

These will take care of 90% of your beginner makeup routine.


Tip #5. Use a Damp Sponge for Seamless Blending

Beauty Blender Icon

This one’s a game-changer. A damp makeup sponge helps blend foundation and concealer into your skin flawlessly.

No streaks. No harsh lines. Just that your skin but better vibe.

After applying your product, use a bouncing motion (not swiping) to blend it in.

💡 For a tip: Run your sponge under water and squeeze out the excess until it feels bouncy and soft.


Tip #6. Creams and Liquids Are Easier Than Powders

Makeup Bottle Icon

If you’re new to makeup, it’s easier to work with cream or liquid formulas. They blend more easily and give you a dewy, natural finish… which is exactly what most beginners want.

Try these:

They’re easier to fix if you mess up… and they won’t emphasize texture or dryness the way powders can.


Tip #7. Concealer: Dot, Tap, Done

Dots Icon

Concealer is a lifesaver when you want to cover dark circles, blemishes, or redness. But too much can crease or look cakey.

Here’s how to apply it:

  • Dot it on the inner and outer corners of your eyes, not the whole under-eye.
  • Use your ring finger or a damp sponge to tapnot rub, until blended.
  • A little goes a long way.

Beginners love Maybelline Instant Age Rewind for a reason… it’s affordable, effective, and super blendable.


Tip #8. Fill in Your Brows With Light Strokes

Eyebrow Icon

Your brows frame your face, and even a tiny bit of filling can make a big difference. But be gentle—overdrawn brows can make your whole look feel heavy.

Use a pencil like NYX Micro Brow Pencil (what I use) or Benefit Precisely, My Brow.
Mimic tiny hairs with short strokes, then blend with a spoolie. That’s it.


Tip #9. Stick With Neutrals for Eyeshadow

Eye Makeup Icon

If you’re nervous about eyeshadow, start with one or two neutral shades—like warm browns, peachy tones, or soft shimmers. These colors are flattering on everyone and hard to mess up.

For an easy look:

  • Use a light shade all over your lid
  • Add a slightly deeper shade in the crease
  • Blend, blend, blend

Try Maybelline Nudes of New York Palette or Tartelette In Bloom Palette for easy combos.


Tip #10. Mascara Is a Must

Eyelash Icon

Even if you skip everything else, a good coat of mascara instantly makes you look more awake and polished.

Start by curling your lashes (with a tool like the Tweezerman Lash Curler), then apply a lengthening mascara like:

Don’t overthink it—one or two coats is enough.


Tip #11. Blush Is Your Secret Weapon

Makeup Icon

A little blush can make you look instantly healthier and more alive. It’s one of those easy makeup tricks that makes a big impact.

Smile, then dab blush on the apples of your cheeks and blend up toward your temples. Go for a cream or liquid blush to start—they’re harder to mess up and easier to blend.

I love Rare Beauty Soft Pinch Liquid Blush or Milani Cheek Kiss Cream Blush.


Tip #12. Tinted Lip Balm > Bold Lipstick

Lips Icon

If lipstick feels too intense, try a tinted balm, gloss, or lip oil. They’re super low-maintenance and look pretty without requiring precision.

Try these:

These are beginner makeup essentials for everyday wear.


Tip #13. Set With Translucent Powder (If Needed)

Makeup Brush Icon

If your skin tends to get shiny, lightly dust your T-zone with translucent powder. But skip the heavy baking trend—it’s not beginner-friendly and can make you look dry or cakey.

Just use a fluffy brush and a light hand. Try e.l.f. Halo Glow Setting Powder or Laura Mercier Translucent Setting Powder.


Tip #14. Natural Light Is Your Best Friend

Sun Icon

Always do your makeup near a window if you can. Artificial lighting can distort colors and make you apply too much.

💡 For a tip: If you’re in a poorly lit space, try a portable makeup mirror with natural LED lighting like this one on Amazon.


Tip #15. Don’t Overthink It—Just Practice!

Sprakle Icon

This might be the most important tip of all: don’t stress.

Makeup should be fun, not stressful. You’re not going to master your beginner makeup routine in a day—and that’s okay.

Practice when you have time. Watch tutorials. Try new products. You’ll get better with each attempt, and eventually, it’ll feel second nature.


FAQ

FAQ Icon
What makeup should a beginner start with?

Start with: tinted moisturizer, concealer, blush, mascara, lip balm, and brow pencil.

What are the best beginner makeup brands?

NYX, e.l.f., Maybelline, L’Oréal, and ColourPop for budget-friendly. Rare Beauty and Fenty for mid-range.

How do I figure out my skin tone for foundation?

Look at your neck and jawline in natural light. You can also use the Sephora shade finder tool or take a quiz online like Findation.com.


Final Thoughts

Final Thoughts Icon

Learning how to do your makeup doesn’t have to feel intimidating or complicated. With these simple makeup tips, you can build a routine that feels natural, easy, and totally you.

Whether you’re doing a five-minute face before work or experimenting with new looks on the weekend, the most important thing is to enjoy the process and give yourself room to grow.

Makeup is a tool for self-expression, not perfection. Start small, practice often, and celebrate your progress. You’ll be amazed at how quickly your skills and confidence grow.

Until next time,

Hollee

🌟 Your Turn: What do you think about these makeup tips for beginners? Are there any other tips I should add to this list? Drop your thoughts in the comments section below! 👇🏼👇🏼👇🏼


🥰  Other Posts You’ll Like:


  • Reddit
  • X

The Easiest Packing Hack Ever: The 5-4-3-2-1 Method

0

Packing. Love it? Hate it? Or just pretend you’ll start tomorrow until you’re sitting on your suitcase praying the zip will just close?
As a stylist who’s seen every wardrobe crisis under the sun, I promise: there’s an easier way.

Meet the 5-4-3-2-1 method: a magical little formula that stops overpacking in its tracks and guarantees you’ll look chic the whole trip. No more “but what if I need six pairs of shoes?” (You won’t. I promise.)

What is the 5-4-3-2-1 Method?

It’s simple math with a stylish twist:

Mix and match these and, voilà! you’ve got multiple outfits that all work together. The real secret? Everything plays nicely in a colour story, so each piece earns its place.

Step 1: Pick a Colour Palette (and stick to it!)

This is where your inner stylist comes out.
Choose two or three core colours (think navy, black, or tan) and add one or two accents for fun (hello, scarlet skirt or a pop of pink!).
If everything can mix and match, you’ve suddenly got way more outfit combos than the numbers suggest.

Stylist tip: Lay everything out on your bed and do a quick “capsule check.” If a top doesn’t work with at least two bottoms, it’s staying home. Brutal but effective.

Step 2: Choose Your Fabrics Wisely

Pack fabrics that don’t crease just by looking at them. Viscose, linen blends, or soft knits are your friends.
And if you’re taking linen, embrace the wrinkles; they’re chic when intentional.

Translation: No one’s holiday highlight is you hunched over a hotel iron.

Step 3: Accessories Are Outfit Multipliers

Scarves, jewellery, and belts are tiny but mighty.
A silk scarf can transform a basic tee and shorts into “just had an espresso in Paris” energy.
Accessories weigh almost nothing but give you endless outfit combinations.

Step 4: Shoes: Keep It to Two

I know, I know. But really, two pairs is enough.
Think one pair for walking (white sneakers or flat sandals) and one for dressing up (block heels or sleek slides).
Your feet will thank you. Your suitcase will too.

Step 5: Trust the Maths (and Yourself!)

With five tops, four bottoms, three dresses, two shoes, and one statement piece, you can easily create 15–20 outfits (I’ve whipped up 18 below for you from my capsule!)
That’s more than enough for a week (or even two) away, without the panic of “I have nothing to wear.”

The Takeaway

Packing with the 5-4-3-2-1 method is like having a stylist (hi!) whispering in your ear as you fold.
It’s smart, stress-free, and leaves room for a cheeky bit of shopping while you’re away.

Now go forth and pack light, because the only thing you should be overdoing on holiday is dessert, and you might just need room in your suitcase for a few new holiday purchases too!

Let me know how you go!

DIY Vegan Cleansing Balm That Rinses Clean (No Oily Residue!) – Vegan Beauty Review | Vegan and Cruelty-Free Beauty, Fashion, Food, and Lifestyle : Vegan Beauty Review

0

If you’ve ever tried making your own cleansing balm at home, you might have noticed one little drawback… the oily film it can leave behind. Don’t get me wrong, nourishing oils and butters are amazing for melting away makeup, sunscreen, and daily grime, but sometimes you just want that luxurious balm-to-milk transformation that rinses off clean without extra scrubbing.

Good news is that you can totally make that at home! The secret is a gentle emulsifier (I’m using Olivem 1000, a vegan emulsifying wax), which allows the balm to rinse away with water, leaving skin soft, refreshed, and never greasy.

This recipe is vegan, customizable, and perfect for all skin types, even sensitive skin if you skip essential oils.

Why You’ll Love This Cleansing Balm

  • Shea Butter → deeply nourishing, softens skin without being too heavy.
  • Jojoba Oil → mimics skin’s natural sebum, balancing and non-comedogenic.
  • Sunflower Oil → light, vitamin E-rich, and super gentle.
  • Olivem 1000 → the magic emulsifier that turns oil into a silky cleansing milk when it meets water.
  • Vitamin E Oil → antioxidant protection and a natural booster for skin health.
  • Candelilla Wax → gives structure so your balm stays scoopable.

DIY No-Residue Cleansing Balm Recipe

Makes: 4 oz jar

Skin type: All (especially great for normal, dry, and combo skin)

Ingredients

Directions

  1. Melt shea butter, candelilla wax, and Olivem 1000 together in a double boiler until completely liquid.
  2. Add oils. Stir in jojoba oil, sunflower oil, and vitamin E.
  3. Cool + customize: Let the mixture cool for a few minutes, then stir in essential oils if using.
  4. Jar it up: Pour into a sterilized jar and let it set at room temperature until firm.

How to Use

  • Scoop a pea-sized amount into dry hands.
  • Massage into dry skin (it’ll dissolve makeup and sunscreen like a dream).
  • Add a splash of warm water and the balm will emulsify into a silky cleansing milk.
  • Rinse thoroughly.
  • Follow up with your favorite toner, serum, and moisturizer.

Tips & Variations

  • For a lighter balm, swap shea butter with mango butter.
  • For ultra-dry skin, add a few drops of rosehip or argan oil for extra nourishment.
  • Keep it fragrance-free if your skin is sensitive.

This cleansing balm is proof that you don’t need to spend $$ on luxury skincare to get spa-like results at home. It’s nourishing, gentle, eco-friendly, and totally customizable. Plus, making your own beauty products is so empowering and fun!

*Post contains affiliate links*

About Sunny (Sunny’s Profile)

Longtime vegan, hardcore compassionate beauty junkie, serious cake aficionado, and lover of all things floofy and sparkly! If there’s something in particular you’d like me to review, drop me a line at Sunny@VeganBeautyReview.com.
You can also find me on Facebook, Instagram, TwitterYouTube, and Google +.

Filed in: DIY vegan beauty products
Tags: all natural cleansing balm • best cleansing balm • diy cleansing balm • no residue cleansing balm

QUICK & EASY GUIDE TO HALT BALDNESS ~ THE MALE GROOMING REVIEW

0

Discover the Proven 5-Step Solution to Hair Loss

Hair loss affects millions of men and women around the world, often leading to frustration, insecurity, and a sense of helplessness. The 5-Step Hair Loss Treatment Plan: A Proven Solution for Men and Women — Stop Hair Loss Naturally and Safely by OA Books offers a clear, practical roadmap for anyone seeking real, lasting results without harsh chemicals or expensive procedures.

This breakthrough guide is built on years of research and proven strategies that address the root causes of hair loss—not just the symptoms. Unlike generic solutions, the 5-Step Plan focuses on a holistic and natural approachcombining nutrition, scalp health, proven topical treatments, and lifestyle adjustments that support strong, healthy hair growth.

Inside the book, readers will discover:

  • Step-by-step guidance on how to restore scalp balance and stimulate natural hair regrowth.

  • Nutritional strategies that help nourish hair follicles from within.

  • Safe, natural ingredients scientifically shown to reduce shedding and improve hair density.

  • Practical daily routines that fit seamlessly into busy lives.

  • Proven techniques suitable for both men and women at different stages of hair thinning.

What sets this book apart is its focus on empowerment. Rather than offering quick fixes or miracle promises, OA Books provides readers with a sustainable system that works with the body, not against it. Whether readers are noticing the first signs of thinning hair or dealing with more advanced hair loss, this guide equips them with the knowledge and confidence to take control of their hair health.

The 5-Step Hair Loss Treatment Plan is more than a book—it’s a blueprint for transformation. With clear language, expert insights, and actionable strategies, it’s designed to help readers stop hair loss naturally and safelywhile supporting overall wellness.

Available now in print and digital formats, this essential guide is a must-read for anyone ready to reclaim their confidence and achieve stronger, healthier hair.

Order your copy today >

image of 5 step hair loss treatment plan book