Home Blog Page 262

I USED A GROUT PEN AND HERE ARE THE RESULTS!

0

Everywhere in our home we have used dark grout with tiles. I love how it looks against a classic, inexpensive tile (see our bathroom here) and there’s the practicality of it not highlighting mould, stains and marks, especially in a high traffic area such as a family bathroom or kitchen.

So why didn’t you use dark grout in the kitchen I hear you asking? Well, we did, but we also used crackle glaze tiles – which we sealed! But only once – and the dark grout bled onto the tiles so badly that we had to tile an entire new layer over the section (because to remove them would’ve taken the plaster underneath off).

We then sealed them an extra three times to be sure but still got scared so just went with a light grey grout.

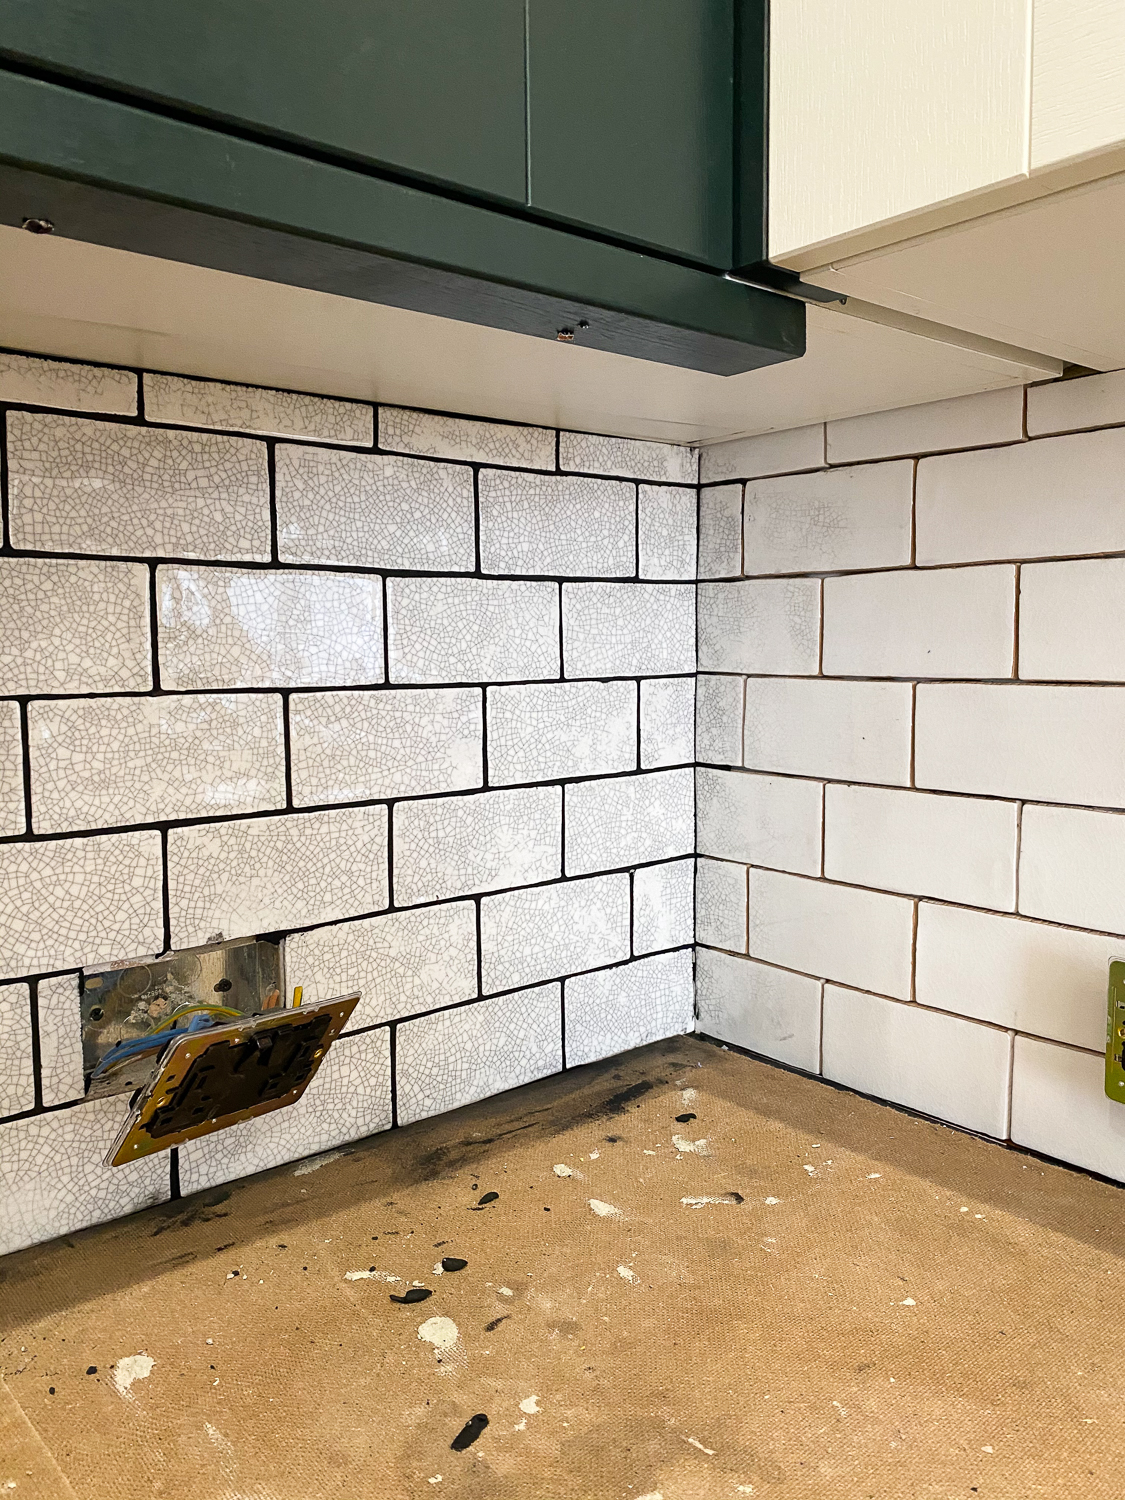
The tiles before, using a light grey grout

It was fine, they looked nice, but it just wasn’t my vision, you know? Our tiles (‘Ludlow’ in Ammonite from Porcelain superstore), in my opinion, would sing that little bit more with a darker surround.

I had been meaning to try a grout pen for ages, in fact I bought one (via Rainbow chalk) and it sat unused on my desk for ages – partly out of nervousness but mostly out of lack of time. But we have finally got round to it and here are the results!

It took a lot of getting used to at first, as we had gotten used to the lighter grout, but for me, the room instantly feels more ‘us’ and what we originally wanted – the tiles ping, as do the items leaning against the wall. Here are a few things to note:

I did not ‘prep’ the room or the tiles.

Our grout is reasonably recent (under 2 years) so it was in a good state, and our tiles were miraculously quite clean!

Grout pen work-in-progress

One pen will not do an entire room

Do not give it a go with just one pen (like me) if your space is as large (or larger) than this. I booked out an entire day and then ran out of juice (both metaphorically and literally!) after a couple of hours. In the end we used three pens for this area, I probably didn’t use the pen right until the last possible drip as it gets trickier to navigate and more room for error (and I was filming on a deadline so needed to be somewhat quick).

There are different size nibs

I used a 7ml one but they sell smaller and thicker (we accidentally bought a 15ml one and it was like a jumbo marker – we sent that one back).

I USED A GROUT PEN AND HERE ARE THE RESULTS!
Action shot

The nib generally gets worn down and rough after a while

This means that your lines aren’t as smooth and it gets a bit tougher to make markings on the grout. That’s when you change pen.

To use the pen you shake, then push down on the nib to bring the ink out (a bit like those gold pens we all used in school?!) – I would recommend having a notepad handy to do this as you go. If you push down straight onto the grout the nib will be ruined quicker (see above image!).

Try a tester area in a less visible part of the room before you start

Just in case you don’t like it! I tested it under the breakfast bar first.

Don’t worry if you go over the tiles

I generally had a damp flannel that ran over the edge of the tiles and would tidy up after it had initially dried.

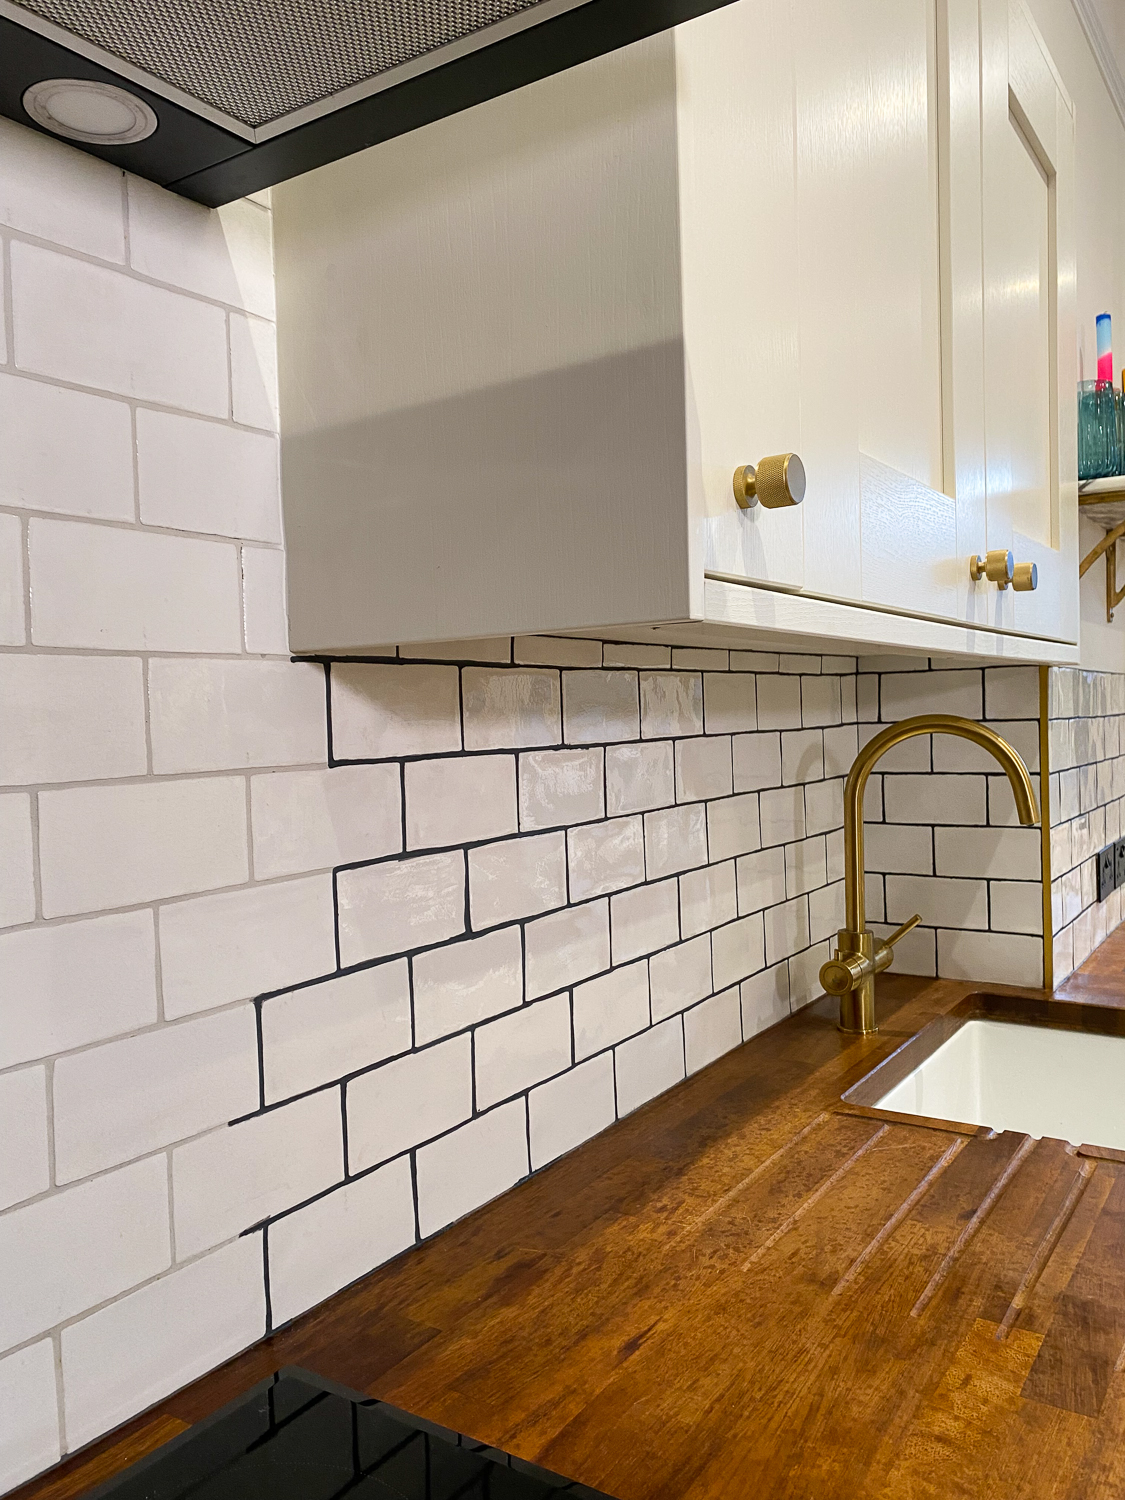
The results!

I have not tried this in a bathroom or wet room and cannot say whether it’d hold up – a few people on TikTok have said it’s fine; a few haven’t! It seems less upholding on floor grout (for obvious reasons).

Make sure, if you have different tiles like crackle-glaze, that they are sealed before attempting this. Maybe three times to be sure! You can buy some here (and we found using a mini roller was a really quick and handy way to do this).

All in all, we are really happy with the result and it’s exactly what I ‘thought’ our tiles were going to look like when we first finished our kitchen. It’s worth mentioning that this is obviously freshly done and I can’t vouch for how long it lasts – but will of course share if there are any major flaws. If this was something you were considering (or maybe you hadn’t thought of it as an option before!), it’s a really affordable change you could make without too much effort.

See the grout pen in action on my TikTok home account

Lip Repair: The Miracle Of Myrrh

0

Lip Repair was originally called Myrrhacle Balm—a cheeky nod to both myrrh, one of its star ingredients, and my somewhat nerdy sense of humor. But the name wasn’t just a play on words. Myrrh truly is miraculous in the way it helps repair cracked, damaged skin, making it one of the cornerstone ingredients in this formula.

The other two MVPs? Cupuacu butter and manuka honey. Together, they form a trio of deeply healing, hydrating, and protective ingredients that work wonders on dry, compromised lips. The balm is thick, luscious, and impressively long-lasting. Left on overnight, it works like magic—people often tell us they wake up feeling like the lip filler fairy made a house call.

How to Use Lip Repair for Best Results

For optimal healing, break through the surface of the balm with the back of a clean fingernail or a small spoon. Don’t just glide across the top—scoop up a generous amount and layer it on. It’s especially powerful as an overnight lip treatmentbut you can also use it throughout the day for ongoing moisture and repair.

And don’t stop at your lips—this balm works beautifully on ragged cuticles, cracked knucklesor dry patches under the nose (especially during cold and allergy seasons). It’s a tiny jar with big, restorative energy.

Star Ingredients in Lip Repair

Myrrh (Commiphora myrrh)

This ancient resin has been revered for thousands of years for its remarkable healing power—especially for cracked, irritated skin. It’s been used in wound care and rituals since Biblical times, thanks to its antimicrobial, anti-inflammatory properties. Myrrh’s naturally resinous texture creates a gentle protective barrier, making it perfect for supporting skin recovery on the lips. We source a certified organic extract from Somalia, with a grounding, earthy scent that speaks to its long-standing history in herbal medicine.

A wooden spoon holding golden manuka honey over a jar

Manuka Honey

Sourced from the blossoms of the manuka bush in New Zealand, this richly textured honey has earned a reputation as one of nature’s most powerful healers. What sets manuka apart from other types of honey is its exceptionally high content of methylglyoxal (MGO), an antibacterial compound that works synergistically with enzymes in your skin. Fun fact: when manuka honey interacts with the skin, it releases small amounts of hydrogen peroxide, enhancing its wound-healing and antimicrobial action. This makes it a perfect addition to any lip treatment—especially when chapping, cracking, or irritation are part of the picture.

Castor beans in a wooden bowl next to a clear bottle of castor oil

Castor Bean Oil (Common tick)

Organic castor oil is the secret behind Lip Repair’s luscious, long-lasting finish. Its thick, glossy texture creates a protective layer over the lips, locking in moisture while helping the other botanical actives sink deeper. Rich in ricinoleic acid, castor oil is both emollient and humectant, meaning it softens the lips while drawing in hydration from the surrounding environment. It’s part of what gives Lip Repair its signature staying power.

Cupuacu fruit split open with dense butter visible inside the outer hull

Cupuaçu Butter (Theobroma grandiflorum)

This Amazonian butter is a true multitasker. Cupuaçu is a botanical cousin of cocoa butter, but with even greater moisture retention capabilities. It can hold up to 400% of its weight in water, making it a powerhouse for dry, compromised lips. It draws water into the skin and reinforces the lipid barrier, sealing it in for lasting hydration. The subtly nutty scent adds to the experience, and the silky, rich texture glides on like a dream.

Brown tamanu nuts on a green leaf

Tamanu Oil (Calophyllum inophyllum)

With its rich emerald hue and earthy aroma, tamanu oil is as potent as it is unique. Traditionally used in Polynesian medicine for healing wounds, burns, and insect bites, tamanu oil contains calophyllolide, a compound known to calm inflammation and accelerate tissue regeneration. Its antibacterial and antifungal properties offer protection against infection, especially when lips are chapped or cracked, and its ability to support healthy skin repair makes it a hero ingredient in this balm.

What Real Customers Say About Lip Repair

Still not sure if this balm lives up to its name? Let our community do the talking.

“Gorgeous product and results. My favorite! I keep this on my nightstand and use it every night… Several times when I’ve worn it during the day I’ve gotten compliments, even asked if I had gotten filler! (Nope)”
Amy D.

“Osmia Lip Repair is by far THE BEST lip care out there. I live in extremely cold snowy winters in the north and I apply this each morning and night. In 4 years I’ve never battled chapped lips or peeling like I had with other products.”
Mary S.

“Best out there. I’m a lip goop fanatic and I’ve tried them all. THIS is the best one on the market.”
Annie S.

“Colorado girl here and I’ve tried every lip balm on planet earth, but Osmia’s Lip Repair is the only one that works out here in the dry, high altitude Rockies.”
Tracey B.

“My lips were abnormally dry and lip balms I have that were usually effective weren’t fixing the problem anymore. So I tried this Lip Repair hoping it really would repair my dry cracked lips—and it did! Get it. It works.”
Susan V

Why Lip Repair Is Worth It

Formulated to address the most severe cases of dryness and lip barrier dysfunction, Lip Repair combines the most powerful botanical emollients humectants in a concentrated base designed for restorative overnight use. With consistent application, it supports hydration, soothes inflammation, and encourages barrier recovery, making it a therapeutic option for compromised or chronically dry lips.

With love and myrrh-aculously soft lips,


The information contained in this post is for educational interest only. This information is not intended to be used for diagnosis or treatment of any physical or mental illness, disease, or skin conditions.

Anti-Wrinkle Eye Cream by Black Leopard

0

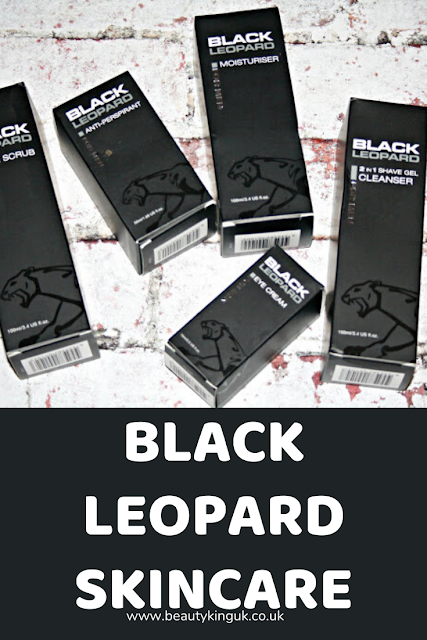
Hello 2019, and what a way to bring in the New Year and mark my return to my little blog by looking at a new range of skincare products for men from Black Leopard Skincare. With a range that includes moisturiser, aftershave, and face scrub, today I’ll be focusing on Black Leopard Eye Cream.
Anti-Wrinkle Eye Cream by Black Leopard
A 15ml tube of the cream will set you back A$29, that’s about £16 which for an eye cream if it works is in my view pretty good value for money.
This is what they say about the eye cream over at their website here:

‘This anti-wrinkle cream developed using the most advanced anti-ageing technology is specifically designed for use on men’s skin. Reducing puffiness and dark circles. Increasing elasticity, locks in moisturiser and plumps the skin to reduce wrinkles. Be amazed by how good your skin looks by adding this one step to your nightly routine.

But obviously, the crux of whether you should lay out your hard earned cash on this rests with whether it will actually banish those bags and help make your face look that bit smoother and less battle-worn (like my own).

I received the full range as a PR sample back in October shortly after coming out of hospital when I frankly looked like I’d been dead for a month, buried and then dug up again. Not a good look. Wanting to feel better about myself this was the first product I reached for, and after a good eight weeks of using it in the evening I’ve discovered that yes, yes this really does have a positive effect.

A tiny pea sized amount of the cream is all that’s needed – it has a great consistency that makes it easy to spread around the eyes and into the crevasses that I’ve cultivated over the years without leaving your fingers, hands and face feel greasy. Win!
After a week of using the cream the skin tone and feel to the touch of the skin around my eyes had started to be transformed. By the end of week two the dark bags and circles were barely noticeable and the crows feet had visibly reduced. My skin was as they promised plumper and silky smooth.
I hate looking in the mirror and seeing a corpse looking back. Thankfully, by using this beauty of a product it’s no longer an issue for me. At £16 for a product that is still going strong I have to say it represents excellent value for money, provides outstanding results and will last for month after month.

Black Leopard knock the spots off the competition.


HIGHLY RECOMMENDED

SKINCARE: Anti-Wrinkle Eye Cream by Black Leopard


How To Take Photos Like A Pro – Eyelash Emporium

0

A picture speaks a thousand words. We know so many lash artists that want to grow their social profiles focus on the amount of times they’re posting on their social pages but often forget that the quality of the images they’re posting is so important.

Lash artists are often so busy with appointments, we understand that sometimes your social presence is something you want to work on but simply don’t have the time. Therefore, we’ve put together a few simple rules that will teach you how to take photos like a pro – so when you do post, it will be quality content!

Shine a light on your work
The perfect lash picture often comes hand in hand with good lighting. As a lash artist, you should have a Glamcor or a ring light shining over your clients lashes when you’re working, so make use of this for images too. Using as much natural light as possible and combining this with a bright light like a Glamcor will ensure your images will be bright and clear. Many lash artists create such beautiful sets of lashes, but often upload dark and blurry photos that don’t do the lashes justice – and most of the time this is due to poor lighting! We recommend trying to take photos of the same eye in different lightings – natural, using ring lights/glamcors, a combination of both or none at all. Comparing the photos will help to see just how much lighting can improve your photos.

Before & after images
We live by the rule of ALWAYS taking before and after images. How many times have you created a beautiful set of lashes and thought ‘Wow that’s such a transformation – why didn’t I take an image before I started lashing?!’ Even if you don’t intend on using the before pictures, the transformation may take you by surprise, so it’s always good to be on the safe side. Before and after images are also great for treatments such as GDL as they really help to showcase the transformations to your clients.

Get those angles
Anyone who’s tried to get a good photo before a night out will know that it’s all about the angles – and the same applies to lash photography. There are a few rules we like to live by;

  1. Shoot up close. Don’t disregard a shot of both eyes, but an up-close image of one eye means you can see all the individual lashes and fans that you have placed. Other lash artists and clients love to see the lashes up close, and it showcases your precision and skill. Close up images often get a lot more engagement on social media, so don’t be scared to ask your client if you can get in close to get them angles.
  2. Keep the waterline visible. This is crucial in any images taken with the eye open, as it shows other lash artists and your clients that you obey the safety distance and is another great example of your accuracy and talent. To take photos at these angles you will often have to take the image looking up at the lashes – but always make sure you’re close enough to the lashes so that you don’t accidentally take a picture looking up your client’s nose (you’ll be surprised how often this happens!)
  3. Try different angles. Sometimes, a close-up of a closed eye from an aerial view looking at all those beautifully positioned fans can display just how perfect your placement is – so don’t be afraid to try something different.

Be the centre of attention
Backgrounds are crucial to getting the perfect shot! If you’re taking a shot far away of both eyes, make sure you have a plain background or one that is on brand. For example, if your salon logo is purple and black, then it would be appropriate to have a purple and black design in the background, but not to have another client having their lashes done or your salons kitchen.

Many lash artists forget that if you’re doing a close-up shot, there is still a background – your clients face. Make sure all under-eye pads, micropore tape, and any loose lashes that may have fallen on the face are removed so you have a completely blank canvas around the eyes. If you’ve removed make up around the eye, blend it so it doesn’t take the attention away from the lashes. The same rule can be applied to any obvious stray hairs in eyebrows that could be quickly plucked, as this will keep the focus on the lashes.

#NoFilter
We know that not every picture you take will be picture-perfect, and that is why editing apps can be so useful. There are many editing apps that are free for you to download that can correct those imperfections you may not have seen whilst taking the pictures. These apps have many uses for perfecting lash images, whether this be to smooth out a stray eyebrow hair, lightly airbrush the skin around the eyes or to brighten the white of the eye where it may have been slightly pink from adhesive fumes. There are two rules we always live by with editing and that is to; never over-edit any images, and never edit the lashes themselves. These are so important as editing apps should only be used to remove tiny imperfections, not change your work completely.

People often add watermarks to their work through these apps too, this is completely understandable and an effective way to brand your pictures. In doing this we would always recommend making your watermarks small, and for them to not cover any part of the lashes or eye, but to put them in the corner so they don’t become a distraction to your work.

We hope these photography tips are helpful for any lash artist looking to up their game on social media. We know how busy lash artists can be, so by following these tips, you won’t have to spend ages photographing each client as you’ll know exactly how to take photos like a pro.

Do you have any tips for lash photography? Let us know!

The Great Give at Caesars Forum Shops!

0

Blogger Event

It had all the makings of a disaster day – I split the back of my pencil skirt up to my butt trying to do a Rockettes-style high kick in the ‘infinity’ mirrors at our second stop, Donald J Pliner, I broke a nail (the horror!!), and the flu was somewhere in our group, but no one knew it! (even the person who had it!) Still? I had an amazing day – I always do with these girls, and how can shopping – especially at the Forum Shops – EVER be anything but awesome?! What follows is our awesome day, and while I’ll be talking about my favorites from our stops, I don’t think of it as a gift guide as much as I consider it a ‘Treat Yo’self’ guide. Better yet? When you shop at these stores (and several others) from Dec 1 until Dec 12, you’re also going to be helping give back to those in need! Read on to hear about my favorite things, and where a percentage of your purchases is going during the Forum Shops Great Give!

ANNE FONTAINE

A French & Brazilian designer known for her clean, crisp white shirts & amazing collars, Anne Fontaine has an abundance of amazing finds to gift yourself for the holidays (or your stylish loved ones!) I’ve been lusting after her collars for ages – they range from delicate and beautiful to slightly gothic and dark, which I love. There are gems, feathers, chain, flowers, and all sorts of amazing embellishments that make these collars so special, and they can really amp up a simple outfit.

Other favorites of mine from Anne Fontaine were this amazing velvet jacket, this ‘ruffled’ plaid look, and this brooch that pull double duty embellishing a shoe by simply clipping it on, or in a more traditional brooch application by pinning it on a dress, lapel, or shirt!

Last, if you’re looking for a gift that is a little lower in price, check out the printed totes, they come in three colors, fold into themselves to save space, and plant 6 trees when you buy one!

Anne Fontaine is donating a portion of each purchase to the Anne Fontaine foundation from Dec 1-12 at the Forum Shops location in Caesars Palace.

DONALD J PLINER

You guys know I’m no stranger to Donald Pliner shoes – I’ve posted on my FB more times than I can count! In the last few years, the brand has stepped up their style and has some seriously cute shoes! (I actually wore a pair of DJP ankle/calf boots to this shopping day!) We visited during a time of transition and got to see the best of fall and some of the Spring newness all at once! I have a few pairs from fall, but Spring brightened the store with neon and bright colors and fun sneakers, and there’s still more to come! I’m definitely going to need the white sneakers with the neon orange sprayed where the upper sole meets the side. I’m really digging the rainbow sole with the white and silver upper, too! So bright and fun! (and while I didn’t try them on, I bet they’re comfy too!)

Fall favorites from DJP that I don’t have yet are these adorable leopard spotted boots (head over to my pal Christie’s instagram for a shot of them in action!), and the velvet combat boots! (they also have patent glitter ones!) My only heartbreak is that my feet are too wide for the combat boots, so I’ll have to live vicariously through you gorgeous folks that snag a pair!

Did I mention that store manager Sarah whips up a tasty Bloody Mary? They were garnished with a caper berry, which I’ve never eaten before, and it was super yum! Bloody Mary might be the perfect drink – they’re like a salad in a glass – practically a health tonic, amiright?!

Donald J Pliner is donating a portion of each purchase to the American Cancer Society from Dec 1-12 at the Forum Shops location in Caesars Palace.

MULBERRY

Mulberry England is actually a brand I didn’t know very much about – my only experience with it is my previously mentioned friend Christie posting about it on her blog and Instagram. You might also have noticed that England’s newest favorite Royal, Megan Markle, has been spotted carrying Mulberry bags! (and we all know about the Megan Markle effect, right?)

Mulberry is definitely not a new brand, but it’s gained popularity in recent years because of the royals favoring the brand to other luxury bag designers. It’s delightfully British, through and through, but in a regal, refined way. You can find simple, but unique designs, a couple twists (no pun intended) on their signature Postman’s lock.

I feel like while they definitely stay true to their aesthetic, they have different colors, textures, and styles to satisfy a range of people! I particularly loved the glitter bags from fall and the new bright colors for spring! Croc-embossed leather and amazing leather are trademarks that you’ll see throughout their collections. I also couldn’t resist touching these fab feather clutches – would you carry one?

I ended up grabbing a pair of the most amazing sunglasses – as soon as I put them on, I knew I needed them in my life (and collection). They give serious steampunk vibes while still looking posh. I adore the color, too – such a great color for my gingerness. (and they match my lipstick – SCORE!)

Mulberry is donating a portion of each purchase to the Public Education Foundation from Dec 1-12 at the Forum Shops location in Caesars Palace.

MONTBLANC

I’m not sure if any of you know this about me, but I LOVE writing with fountain pens – I bought my first ‘fancy’ fountain pen in early 2012 after trying a cheap-o one and loving how writing with it felt. It was the Sailor Chalana, and coming in around $200, it was definitely a splurge for a pen for me. I don’t know, I feel like there is just something so romantic about writing in real ink, in refilling the pen, having ink stains on your writing hand. Maybe I’m a weirdo, but Montblanc existing is proof I’m not!

Montblanc is said to have been the inventor of the modern fountain pen – they created it to make a pen that could travel – one that could be used anywhere, not simply at a desk with a need to be repeatedly dipped in an inkwell. While Montblanc pens are sadly a bit out of my budget (they range in price from about $600 to well over $1,000), the brand does offer some other, more modern options in the stationery tech realm (is that a real category or did I make it up?). I got to try out their new Augmented Paper, which is a leather portfolio that contains a lined notebook and their StarWalker ballpoint, which allows you to take notes or doodle on actual paper, and then you simply push a button and it transmits to your smart device. Once you have it on your device, you can alter, add color, or even draw/write additional stuff within the Montblanc Hub app!

Another amazing low-tech item they’re currently offering is perfect for that Marilyn lover in your life – they have a White journal with Marilyn’s lip print in her signature red (Max Factor Ruby Tuesday!) – and it even has her beauty mark! In addition, they’ve designed a sleek red pen (inspired by her favorite Ferragamo heels) in a matching red!

Montblanc is donating a portion of each purchase to St. Jude’s from Dec 1-12 at the Forum Shops location in Caesars Palace.

PANDORA

I’m sure you’ve all heard of Pandora, the company that specializes in charm bracelets that you can continually add to over time (which makes them a perfect gift to yourself or others, and a great way to commemorate a milestone or life experience).

This Christmas, they’ve released a fun collaboration with the Rockettes (ironically, we went here AFTER I destroyed my skirt attempting to do Rockette-style chorus line kicks.) Included in the collection is a swirled enamel and silver-tone tree ornament that opens to reveal a swirled white and sparkly charm to add to your bracelet!

Pandora is donating a portion of each purchase to Opportunity Village from Dec 1-12 at the Forum Shops location in Caesars Palace.

THE PALM

What goes best after a day of shopping? How about a delicious meal? We found ours at The Palm restaurant, which is located right near the entrance to the Forum Shops from Caesars Palace. Walking in, we were greeted by 4 handsome centurions who were guarding our private dining room! Talk about an appetizer! The tastiest part of the meal was yet to come though!

I started with a Caesar salad (when in Rome, right?) Fun fact: the caesar salad was invented in Tijuana, and not in Rome at all!! Anyway, enough with the history lesson, this salad was one of the best caesars I’ve had in a long time. I needed a salad fix… BAD.

For our main, we had the choice of Chicken Parmesan, Salmon, Swordfish, Filet medallions, or their Chairman’s Reserve NY Strip, which is what I chose. Topped with shallot butter (my FAVE) and gremolata-seasoned shoestring potatoes, and cooked to absolute perfection, it seriously melted in my mouth. GOD I LOVE STEAK. Seriously, I don’t know how people live on vegetables alone. Alongside the entrees, dishes of their half & half (half cottage fries and half onion straws) and steamed veggies were served family-style. Lets just say the half & half went fast – those onions were AMAZING.

Now, no dinner is truly complete without dessert (says the diabetic – but I DO eat dessert from time to time, I’m only human!), and we had the option of Key Lime pie, New York cheesecake (my choice!), or flourless chocolate cake. Topped with a perfectly tart raspberry sauce, it was just what I needed to finish things off. Well, that and another glass of my cabernet. 😀

Even The Palm restaurant is getting in on the Great Give action, they’re donating a portion of each purchase to Unshakeable, which is a non-profit that helps woman out of a dangerous or hard time in their life. They’re giving from Dec 1-12 at the Forum Shops location in Caesars Palace.

THE GREAT GIVE

Other stores at the Forum Shops donating during the Great Give are:

Brighton Collectibles, donating to Opportunity Village
Carmine’s NYC Family Style Italian Restaurant, donating to St. Judes
Kalifano, donating to Camp Anytown
Magical Memories Dimensions Art Gallery, donating to Make a Wish
Magical Memories featuring Disney fine art, donating to Make a Wish
Stuart Weitzman, donating to Las Veg Philharmonic Guild
Ted Baker, donating to Opportunity Village

So tell me, if you were a store in the Forum Shops, what organization would YOU donate to? Mine would be the Michael J. Fox Foundation – did you know that 88 cents of every dollar actually goes to research?


Thank you to The Forum Shops, along with Anne Fontaine, Donald J Pliner, Mulberry, Montblanc, Pandora, and The Palm restaurant for an amazing day, I can’t wait to come back and shop with you again!

How Much Sunscreen to Use on Your Face?

0

Sunscreen is a non-negotiable step in our skincare routine. We slather it on our bodies before heading out for a day at the beach, but what about our faces? The skin on our face needs special attention and care.

When it comes to safeguarding our faces, the application of sunscreen is crucial, but do you know exactly how much sunscreen to use on your face?

It’s important to apply enough to protect your skin, but using too much or the wrong type can also lead to skin irritation. Let Kate Somerville walk you through the ins and outs of facial sunscreen application and the proper amount to use for optimal protection.

Mastering Sunscreen Application

Ensuring thorough coverage without overdoing it is key to maintaining skin health and maximizing sun protection. Here are essential tips to achieve just that:

  • Measure the Right Amount: A common guideline is to use approximately two finger lengths of sunscreen to cover your face and neck adequately. This ensures you apply enough product to achieve the protection stated on the sunscreen label.
  • Apply Evenly: Start by dotting sunscreen on your forehead, cheeks, nose, chin, and neck. Then, using gentle, upward motions, blend the sunscreen smoothly and evenly. Make sure to cover all exposed areas, including the hairline, jawline, and the tops of your ears.
  • Layer It Right: If you use multiple skincare products in the morning, sunscreen should be the last step in your routine before applying makeup. Allow any moisturizers or serums to fully absorb into your skin before you apply sunscreen to ensure it forms an effective barrier against UV rays.
  • Reapply Regularly: Sunscreen isn’t just a one-and-done deal in the morning. For continuous protection, reapply every two hours, or immediately after sweating, swimming, or towel drying. Using a setting spray with SPF can also help top up your face’s UV defense without disturbing makeup.

Why Facial Sunscreen is Important

The sun emits harmful ultraviolet (UV) rays, categorized as UVA and UVB. UVA rays penetrate deep into the skin, causing premature aging, while UVB rays primarily lead to sunburn. Sun protection acts as a barrier that absorbs or reflects these harmful UV rays, preventing them from penetrating the skin and causing damage.

Choosing the Right Sunscreen

Choosing the right sunscreen will provide effective protection while suiting your skin type and lifestyle needs. Opt for broad-spectrum sunscreens, which shield against both UVA and UVB rays, to ensure comprehensive coverage. Additionally, consider your daily activities. If you spend a lot of time outdoors or in the water, look for water-resistant formulas that maintain their efficacy as you sweat or swim.

With many benefits and easy application, HydraKate Illuminating SPF 50+ Drops stand out as a clear choice for sun protection. This mineral-based sunscreen features an impressive 24.5% concentration of Non-Nano Zinc Oxide, one of the highest levels available on the market. Zinc oxide in sunscreen ensures superior defense against the sun’s damaging rays, but what makes our SPF drops special is that they don’t leave any white cast, blending seamlessly into the skin for a clear, radiant finish.

Beyond mere sun protection, HydraKate Illuminating SPF 50+ Drops are meant to be part of your skincare routine. The formula of the SPF drops includes ectoin, a powerful ingredient known for supporting long-term skin health. Ectoin in skincare helps to fortify the skin’s barrier, safeguard against urban pollution, and maintain hydration levels, effectively contributing to a healthier, more resilient complexion.

Incorporating SPF drops into your daily skincare routine enhances skin quality with its moisturizing and illuminating properties of ectoin and zinc oxide. Our formula is engineered to hydrate, illuminate, and refine skin texture, leaving your skin looking luminous and evenly toned. By choosing a product that combines effective sun defense with skin health benefits, you’re taking a proactive step towards maintaining youthful, healthy skin in the face of everyday environmental challenges.

Types of Sunscreen

When it comes to sunscreen, chemical and mineral sunscreen are the two main types. Chemical sunscreens absorb UV rays and convert them into heat, while mineral sunscreens create a protective barrier that reflects the sun’s rays away from your skin. For those with sensitive skin or a preference for natural ingredients, mineral sunscreens, often containing zinc oxide or titanium dioxide, are an excellent choice. On the other hand, chemical sunscreens offer a lightweight and transparent option for easy everyday wear.

So, when choosing between mineral vs chemical sunscreenconsider your skin type and preferences to ensure you’re getting the right protection for your needs.

What SPF to Choose

You’ve seen the letters SPF followed by a number on every sunscreen product, but what do you need to know about SPF? SPF, or Sun Protection Factor, indicates the level of protection a sunscreen offers against UVB rays. As we mentioned earlier, UVB rays are mainly responsible for causing sunburns. Dermatologists generally recommend using an SPF of 30 or higher for daily use.

For extended outdoor activities, such as beach days or hiking, consider using SPF 50 or above to safeguard your skin against prolonged UV exposure. Remember, sunscreen is not just for sunny days. Even on cloudy days, UV rays can still penetrate through the clouds. Don’t forget to wear sunscreen on your face every day, regardless of the weather.

It’s important to understand that no sunscreen provides 100% protection, regardless of the SPF. The key lies in proper application and reapplication.

Optimizing Sunscreen Use

Getting the most out of your sunscreen not only includes choosing the right product but also integrating it into your routine effectively. This section will guide you through how to incorporate sunscreen effectively into your skincare routine, ensuring that your skin reaps the full spectrum of benefits from sun protection. Additionally, we will detail how much sunscreen you should be using to maintain optimal protection throughout the day, helping you prevent common mistakes that can lead to inadequate coverage.

Incorporating Sunscreen into Your Skincare Routine

Wondering if sunscreen helps acnesigns of aging, hyperpigmentation, dark spots, etc? The answer to all of these is yes! Sunscreen offers a variety of benefits for the skin and incorporating it into your routine can work wonders. Here’s how to add sunscreen to your skincare routine:

  • Cleansing: Start with a gentle cleanser to remove dirt, oil, and impurities from your skin. The DeliKate® Soothing Cleanser is a great option, especially for sensitive skin.
  • Toning: Use a toner to balance your skin’s pH levels and prepare it for the next steps.
  • Serums and Moisturizers: Apply any serums or moisturizers you typically use. Wait a few minutes for them to absorb. If you’re looking to add a serum to your skincare routine, opt for a gentle yet effective one like the DeliKate® Recovery Serum that aids stressed skin and restores the skin’s protective barrier.
  • Sunscreen: Apply the recommended amount of sunscreen to your face, neck, and any exposed areas.
  • Makeup: If you wear makeup, apply it after the sunscreen has fully absorbed. Looking for extra protection, use the UncompliKated SPF 50 Setting Spray after applying makeup.
  • Reapplication: Throughout the day, remember to reapply sunscreen every two hours or as needed, especially if you’re spending time outdoors.

The Correct Amount of Sunscreen to Use

Using the right amount of sunscreen is as important as selecting the correct SPF. Most people apply far less sunscreen than necessary, which can lessen its protective effects. When it comes to applying sunscreen on your face, the recommended amount is around 1⁄4 teaspoon. This may not seem like much, but applying enough is important to get adequate coverage. An alternative method to determine how much sunscreen you need is the two-finger rule. Squeeze out enough sunscreen to cover the length of two fingers.

A general rule is to cover all areas of exposed skin, including your ears, neck, and décolletage.

If you’re using a spray sunscreen, make sure to apply it generously to ensure complete coverage. It’s also recommended to reapply sunscreen every two hours or more often if you’re sweating or swimming.

Achieving Full Sun Protection

Achieving full sun protection involves more than just applying sunscreen; it’s about making sun protection a regular part of your daily routine. Protective clothing such as hats, sunglasses, and long sleeves can keep you out of harm’s way. Reapplication of sunscreen is also just as important as putting it on before you head out for the day. These combined efforts will help defend you against harmful UV rays, reducing your risk of sun damage and skin-related health issues.

Sun Protection for Healthy Skin

Among the various methods of sun protection, applying sunscreen is undoubtedly one of the most effective. However, the effectiveness of sunscreen largely depends on using the right amount, besides choosing the right type and SPF. Sun protection is the cornerstone of healthy, protected, and glowing skin.

When it comes to sun protection, don’t forget to also seek out shaded areas during the peak sun hours, typically between 10 am and 4 pm, when the sun’s radiation is at its strongest. If you wear makeup, consider using products that have built-in SPF to provide an additional protective barrier.

Remember, taking care of your skin is not just a seasonal concern but a year-round commitment. Prioritize your skin’s health, your skin will thank you for it!

Reapplication and Coverage Tips

To maintain the effectiveness of your sunscreen throughout the day, remember to reapply! Sunscreen can wear off due to sweat, water, or simply the passage of time, making regular touch-ups essential for continued protection.

  • Reapply Regularly: As a general rule, reapply sunscreen every two hours, especially if you are outdoors. However, if you’re swimming, sweating, or towel-drying, you might need to apply more frequently. A handy tip is to set a reminder on your phone as a prompt to reapply.
  • Ensure Complete Coverage: When reapplying, don’t overlook areas like the tops of your feet, back of the neck, and the ears, which are often missed but still vulnerable to UV damage. For the face, a mineral-based powder sunscreen can be a convenient reapplication option over makeup.
  • Use Adequate Amounts: Make sure to use enough sunscreen to cover all exposed skin. Keep the two-finger rule in mind as you reapply to get the most protection out of your chosen product without overdoing it.

Embracing these reapplication and coverage tips will help you achieve comprehensive sun protection, keeping your skin healthy and shielded against the premature aging effects of sun exposure.

We hope this guide to how much SPF for face protection has illuminated a sure path to staying safe while basking in the sun.

Augustinus Bader Luxury Gift Guide 2023

0

Augustinus Bader 2023 Holiday sets are out now! Give the gift of youthful skin with these Augustinus Bader choices. With their patented formula to help regenerate the skin, they will be grateful for these gift choices.

Shop from Augustinus Bader luxury beauty line and pamper yourself with their rich creams, luxurious oils and high end haircare products. These splurge worthy gifts are perfect for the luxury lover in your life. Be sure to get something for yourself too.

Augustinus Bader Luxury Skincare Gift Guide

Shop everything  here: https://shopmy.us/collections/304976

Augustinus Bader the Rich Cream:

Augustinus Bader the Cream:

Augustinus Bader the Face Oil:

Augustinus Bader the Body Cream:

Augustinus Bader the Lip Balm:

Augustinus Bader the Cream Cleansing Gel:

Augustinus Bader the Cleansing Balm:

Augustinus Bader the Essence Exfoliating Toner:

Augustinus Bader the Eye Cream:

Augustinus Bader the Serum:

Augustinus Bader the Eye Patches:

Augustinus Bader the Ultimate Soothing Cream:

Augustinus Bader the Hand Treatment:

Augustinus Bader the Body Oil:

https://go.shopmy.us/p-2710923

Augustinus Bader the Face Cream Mask:

Augustine Bader the Retinol Serum:

Augustinus Bader the Light Cream:

Augustinus Bader the Starter Kit with the Rich Cream:

Augustinus Bader the Foaming Cleanser:

Augustinus Bader the Winter Recovery Kit:

Augustinus Bader the Skin Renewal System:

Augustinus Bader the Body Cleanser:

Augustinus Bader the Bader Ritual:

Augustinus Bader the Hero Face Hydrators:

Shop more of my favorite products here: https://shopmy.us/lyfestilebeauty

Augustinus Bader Hair Care Luxury Gift guide

Items marked with an asterisk were gifted. As always, all my reviews are my own. This post contains affiliate links. This means that I will make a commission on any purchase you make when you click on one of my links.

New Products at skinfo®

0

Love to stay up-to-date on the latest in skincare? Here is a highlight of what’s new at skinfo®!

SEEN™ Fragrance-Free Shampoo ($29, 8.6 oz) and SEEN™ Fragrance-Free Conditioner ($26, 8.6 oz) are a gentle shampoo and conditioner duo that will not clog pores. Clinical trials showed that hair shedding was reduced by 44% when used together. They will leave the scalp and hair feeling clean and healthy.

Neocutis® Journée Firm ($88, 15ml) ($198, 50ml) is the ultimate anti-aging day cream. Users of Neocutis® Journée or Neocutis® MicroDay will love this new and improved formula that combines the technologies of the two. Growth factors and Proprietary Peptides help nourish your collagen and elastin, smoothing and tightening the skin. Hyaluronic Acid restores moisture, while Zinc Oxide and Titanium Dioxide protect skin from harmful UVB and UVA radiation.

Colorescience Sunforgettable® Total Protection™ Color Balm SPF 50 ($32, 0.32 oz) provides sun protection while giving your lips and cheeks a pop of color! It will keep skin hydrated while providing antioxidants for environmental protection as well as Zinc Oxide for UVA/UVB protection. The color Blush is nude with undertones of pink for a natural look. Berry is a raspberry hue for more vibrancy.

SkinMedica® Firm & Tone Body Lotion ($165, 6 oz) improves the appearance of crepey and sagging skin while smoothing out uneven skin texture. Green microalgae and shitake mushroom extract support collagen and elastin, while lemon balm extract renews skin cells. This lotion also contains antioxidants to prevent free-radical damage. Skin will appear firmer over time.

SkinCeuticals® HA Intensifier ($106, 1 oz) delivers a high concentration of Hyaluronic Acid to the skin to support hydration and firmness. Skin texture will improve, including the appearance of crow’s feet, marionette lines, and nasolabial folds. HA Intensifier can also enhance the results of dermal fillers.

Avène RetrinAL Advanced Correcting Serum ($78, 1 oz) contains bakuchiol, a plant-based retinol alternative, which helps improve the appearance of fine lines and wrinkles. Niacinamide strengthens the skin barrier, keeping skin hydrated all day long. Skin tone will appear brighter and more radiant. This serum is lightweight and fast-absorbing and does not cause irritation.

Alastin® A-Luminate Brightening Serum™ ($168, 1.7 oz) is a powerful non-hydroquinone, non-retinol serum that targets hyperpigmentation, dark spots, and melasma. It helps to even and brighten skin tone without drying or irritating the area. It also reduces redness associated with hyperpigmentation, including post-inflammatory redness. Powerful antioxidants help prevent further discoloration.

Visit the “new arrivals” section on skinfo.com for a full list of all our new products!

Benefits and How To Apply

0

When you think of hair oils that help promote healthy hair, baobab oil probably isn’t the first one that comes to mind. But baobab oil is a hidden gem that is slowly becoming the hair hack you never knew that you needed.

Baobab oil doubles as the perfect moisturizer for both your hair and skin. Originating in tropical Africa, it’s a plant-based oil filled with healthy nutrients like omega fatty acids (such as linoleic acid, which helps to seal in the moisture in your hair), antioxidants, vitamins A, C, D, E and F. It has a plethora of benefits for your hair including moisturizing extremely dry hair, smoothing out frizzy hair and healing damaged hair and so much more.

Intrigued? Keep reading to learn why baobab oil is a must-have in your hair product stash.

What are the benefits of baobab oil?

#1: It moisturizes dry hair

If you have extremely dry, damaged hair, baobab oil will give you the burst of hydration that your hair so desperately craves. It’s moisturizing properties work its way through every inch of your scalp, which helps to heal your damaged hair follicles. The oil is composed of omega fatty acids three, six and nine, which make it one of the most hydrating oils on the market. Baobab oil works great for those with dry hair and iis a definite must-have for those with type 3 or type 4 hair which tends to be drier than other hair types.

#2: It helps to detangle

Baobab oil is also a great detangling agent. It has an acid profile which consists of one-third saturated fats, one-third monounsaturated fats, and one-third polyunsaturated fats. When these fats penetrate your hair cuticles, they separate any knots and pieces that may be stuck together, leaving your hair soft and smooth. Our wide tooth Cloud Comb can help you get rid of knots and tangles.

#3: It repairs itchy, flaky scalps

Baobab oil is also a great product to repair an itchy, flaky scalp or dandruff. If left untreated your scalp can become a host for harmful bacterias that will lead to excessive hair loss, but regularly using baobab oil will help to stop harmful bacteria dead in its tracks. It’s anti-inflammatory properties also help to combat an irritated scalp. Baobab oil is a perfect fit for those who may have skin conditions such as eczema and psoriasis, which can often inflame the scalp.

It protects your hair (and skin) from pollution and Ultraviolet rays
Let’s face it – most of our environments are in full-on crisis mode. But baobab oil provides your hair with an extra layer of protection for both your hair and skin. It also has insulation properties that help protect your hair from extremely cold or warm temperatures.

baobab oil hair treatment

#4: It doesn’t weigh down your hair

Have you ever applied oil to your hair only to realize that it made your hair look greasy and weighed down? Baobab oil does the complete opposite. It provides a blast of moisture to your hair, leaving you with a soft and silky finish that looks lightweight and natural.

#5: It’s great for promoting hair growth

Baobab oil contains an extraordinary amount of collagen, which helps to build up keratin proteins in your hair which is the key to hair growth. Whether you can’t seem to grow your hair past a certain length or you’ve recently undergone a “big chop,” baobab oil will grow out your tresses in no time. If you’re looking to expedite the growth process, use a length repairing hair mask at least once a week.

#6: It helps to strengthen your hair

If you have weak and brittle hair strands, especially due to chemical damage, baobab oil can help strengthen and rejuvenate your hair strands. Because it’s so rich in vitamins and nutrients, it helps to replenish your hair cells and will not only strengthen your hair, but as we mentioned earlier, will also promote hair growth.

#7: It’s great for your skin

Because it’s so rich in collagen, baobab oil has great anti-aging properties that can help reduce the appearance of fine lines and wrinkles. Not only is the vitamin C it contains great for your hair, but it also is great for your skin. It helps to reduce dark spots and hyperpigmentation that is often caused by acne scars. It also helps to balance the production of the natural oils that your skin produces. This is a great benefit because excessively oily skin can often lead to severe acne breakouts.

#8: It’s the perfect serum for your eyes

Whether it’s hereditary or caused by a lack of sleep, many of us suffer from dark undereye circles, puffy eyes and bags. Baobab oil helps to brighten and depuff your under eye area.

#9: It strengthens your immune system
Because our bodies can’t naturally produce Vitamin C, eating baobab fruit can help to fulfill one-third of the recommended Vitamin C intake.

How do you apply baobab oil to hair?

Baobab oil can be applied to your hair in a number of different ways either as a pre-shampoo treatment, with other hair oils, a conditioning treatment or a leave-in cream.

hair oil treatment

Pre-Shampoo Treatment

You can use baobab oil as a pre-shampoo (also known as pre-poo) treatment to your hair. Those who have curly hair textures know that a good pre-shampoo treatment can help to cut your hair wash time in half.

We loved this ingredient so much we ended up adding it to our Luminous Hair Oil Treatment which contains a blend of baobab oil, coconut oil and kukui nut oil to add some extra shine.

To apply baobab oil as a pre-shampoo treatment, warm it up in a bowl for approximately 30 seconds in the microwave. Once ready, apply the warmed oil from root to tip. As you would do with a normal pre-shampoo treatment, you can leave it on your hair for up to 30 minutes, throw on a shower cap to add some heat to your hair and seal in the product then rinse it out and proceed with your regular shampoo routine.

If you’re looking for extreme moisture, you can also leave the oil on overnight, apply a headwrap for protection then wash it out and shampoo as normal in the morning. We recommend using a charcoal detox shampoo to give your hair a solid, clarifying cleanse.

Baobab Oil + Coconut Oil Treatment

Coconut oil is arguably the veteran of all hair and skin oils. Together baobab oil and coconut oil make the most beautiful luminous shine hair oil that your hair will thank you for later. To achieve these amazing results, mix one-third coconut oil with one-third baobab oil in a bowl then warm it up for approximately 30 seconds just as we recommended for the pre-shampoo treatment. Next you’ll want to divide your hair into four sections (our Tortoise clips are perfect for this!) and apply the baobab and coconut oil mixture onto your hair from root to tip. Leave the mixture on your hair for no longer than 45 minutes then rinse it out, shampoo then style your hair as usual with your favorite pair of hair extensions.

Baobab Oil Conditioner Treatment

Because of its potent moisturizing properties, baobab oil can also be used as a conditioner. In lieu of your usual conditioner, apply baobab oil to your hair, letting it set for about 10 minutes then rinsing it out. You can also mix your favorite high gloss smoothing conditioner with about a quarter of baobab oil for soft bouncy locks.

Baobab Oil + Leave-In Cream

So far we’ve shown you how you can apply and rinse off baobab oil to provide a blast of moisture to your hair. But did you know you can also apply baobab oil after washing and conditioning your hair? Baobab oil is a great mixing agent to add to leave-in conditioning treatments then applied to either damp or dry hair. Mix just about one part baobab oil with four parts leave-in conditioner then apply the mixture to your freshly washed hair then style as usual for beautiful silky locks.

hydrated hair

Why do you need baobab oil in your hair product collection?

Hair care is self care and there’s no better way of taking care of your hair than making sure it’s hydrated, healthy and damage free. While you may have previously slept on baobab oil, we’re happy to open your eyes to a beauty product we’re sure will be a mainstay in your hair routine.

Looking for more hair advice and styling tips? Subscribe to our newsletter to step up your hair game.

Written by Ashley Inkumsah

6 Bad Style Habits You Need To Break ASAP

0

6 Bad Style Habits You Need To Break ASAP

Are you guilty of bad style habits holding you back from being the best-dressed version of yourself? Today is your lucky day because I’m here to help you break those habits ASAP!

First on the list is mindless shopping. We’ve all been there, buying clothes when bored or without a purpose. But this bad habit can be expensive and wasteful. So let’s take a cue from the guys and start shopping with intention. Make a list of what you need and prioritize your purchases. Trust me; it will save money and help you wear more of what’s already in your closet.

Next up is buying the same things over and over again. I’m guilty of this one myself. It’s so easy to get stuck in a style rut and buy the same clothes. But let’s be real; no one wants to be a cartoon character with a closet full of the same thing. So, let’s break this bad habit and try new styles and silhouettes.

The third bad style habit is not taking care of your clothes. It’s easy to get lazy and not want to go to the dry cleaners or do laundry, but this bad habit can ruin your clothes and make you look sloppy. So, take the time to properly care for your clothes, whether at the dry cleaners or using an at-home kit.

Moving on to bad habit number four, wearing clothes that don’t fit properly. We’ve all been guilty of this one, holding onto clothes that are too small or too big, hoping we’ll fit into them someday. But the truth is, ill-fitting clothes can make you look messy and unpolished. So, let’s break this habit and invest in clothes that fit us properly.

Bad habit number five is not experimenting with new styles. It’s easy to get stuck in a style rut and wear the same thing repeatedly, but trying new things can be fun and refreshing. So, let’s break this habit and start experimenting with new styles, colors, and silhouettes.

Last but not least, bad habit number six is not wearing what you already have. It’s so easy to get caught up in the cycle of wanting something new, but we often forget what we already have in our closets. So, let’s break this habit and start wearing what we already have. Mix and match pieces to create new outfits; don’t be afraid to wear something again.

So, there you have six bad style habits you need to break ASAP. Let’s commit to breaking these habits and becoming the best-dressed version of ourselves. And if you’re an aspiring personal stylist, don’t forget to download my free ebook to learn industry secrets and turn your dream job into a reality.