Home Blog Page 181

Growth, Accessibility, and the Cost of Scaling

0

U Beauty’s retail journey matters here.

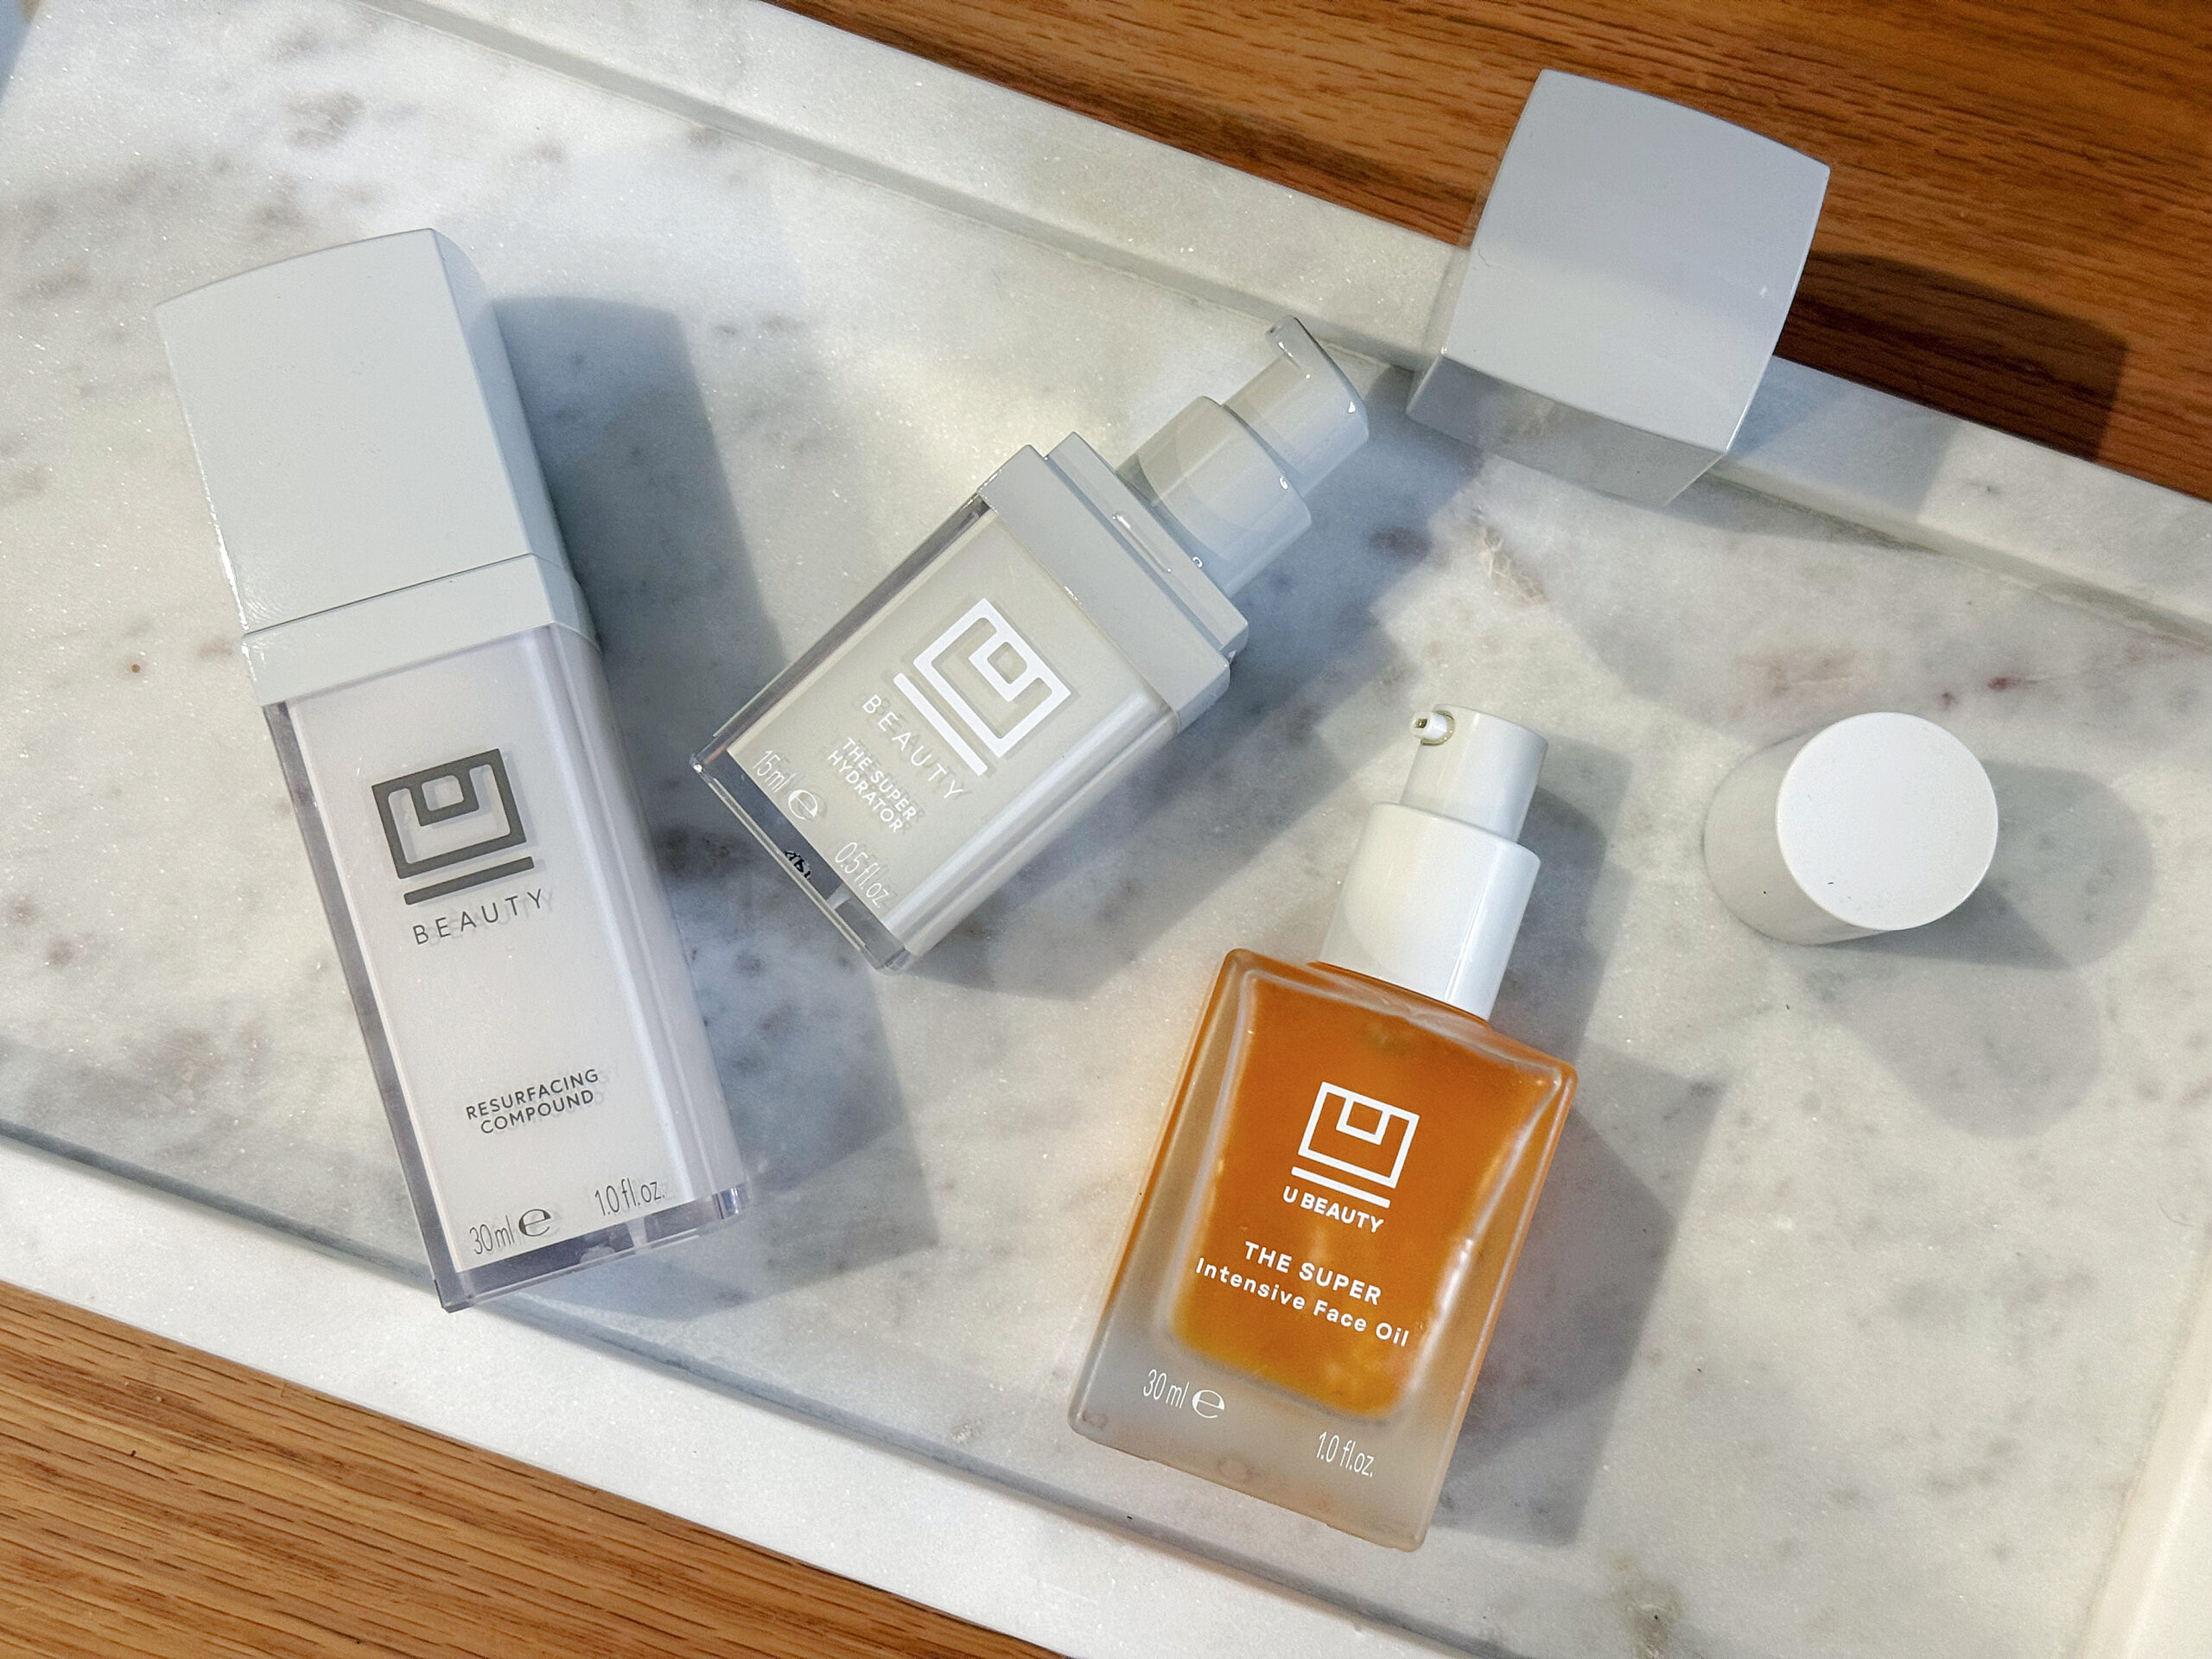
image courtesy of U Beauty

When the brand launched in 2019, it debuted at Net-a-Porter, a platform that, at the time, approached beauty with the same level of editing and discretion it applied to fashion. That positioning felt intentional. U Beauty later joined Violet Grey, where it quickly became a darling within a tightly curated ecosystem. The alignment made sense. One hero product. A disciplined launch strategy. Efficiency over excess.

It is also worth noting that Net-a-Porter officially exited the beauty business in early 2025. So this is not about clinging to a retailer that no longer exists in the same form. It is about what that original context represented. U Beauty entered the market in environments that valued restraint, education, and selective distribution.

Which is why the move into Sephora feels like more than a standard expansion. It signals a clear departure from the brand’s original retail DNA.


Violet Code Approved U Beauty skincare
image courtesy of Violet Grey

The Violet Grey Effect

The power of Violet Grey has always been its capsule approach to curation. Exclusivity without intimidation. Abundance distilled down to the essential. Niche, by design, implies staying in your lane. There is restraint there. Mindfulness. Intention.

U Beauty and other luxury skincare products
Could technically be a VG edit…

From spa treatment room staples like iS Clinical to elusive Japanese gems like Koh Gen Do cleansing wipes, alongside founder-driven, formulation-obsessed brands like Marie Veronique or Susanne Kaufmann, Violet Grey has always understood balance. Yes, the shelves include indisputable icons like Embryolisse Concentrated Milk-Cream or Avène Thermal Spring Water. That mix of prestige and familiarity tempers the splurge factor and eases the guilt. It feels considered.

Koh Gen Do face wipes review
No, there are no better face cleansing wipes out there.

What Violet Grey does particularly well is act as a support system for brands you might not otherwise encounter, Sweet Chemistry being a great example. It is also where you will find the under-discussed Hyper Real skincare from MAC. At a deeper level, many brands benefit simply from being in the same room, for lack of a better phrase, as industry heavyweights like Auteur or Sisley. Context matters. Curation is the product.

U Beauty skincare is it worth it?
A handful of favorites.

So why does U Beauty’s move into Sephora feel less like growth and more like a money grab? Or worse, a betrayal of its original promise?

Because really, Sephora?

I have been shopping at Sephora since 1999, and I have watched the retailer evolve in real time. It is no longer my destination for skincare discovery. Most locations feel chaotic. Associates are often undertrained. Product education is not a priority. Browsing feels like work. The few times I have shopped Sephora this year, it has been online with in-store pickup, and even that felt transactional.

How Luxury Lost Its Luster book by Dana Thomas
This is a fantastic read.

I am not suggesting that U Beauty suddenly loses its validity because of this expansion. But the move feels misaligned. It brings to mind Deluxe: How Luxury Lost Its Luster by Dana Thomas, a book I read years ago and still think about often. Highly recommended.

The U Beauty customer did not ask for tinted lip glosses. Nobody asked for a fragrance. This is a brand that built its identity on fragrance-free formulas and disciplined restraint. More importantly, many early loyalists feel overwhelmed by the pace and volume of launches. This expansion does not feel feedback-driven. It feels growth-driven, at any cost.

U Beauty skincare overview
The oil is seriously fantastic.

What Made U Beauty Compelling in the First Place

When U Beauty launched, the premise echoed something we saw a year earlier with Augustinus Bader. One hero product. The Resurfacing Compound. A single step designed to address multiple concerns at once. In an industry obsessed with excess and endless layering, that simplicity was compelling.

U Beauty Resurfacing Compound is it worth it?
Yes, I like it enough to own it in various sizes.

I have always liked the Resurfacing Compound. It is a lightweight treatment that functions as a serum but, for me, can double as a moisturizer under sunscreen during warmer months. My only longstanding hesitation has been the inclusion of Retinyl Palmitate.

That said, the choice makes sense. As the most gentle and weakest vitamin A derivative, a precursor rather than an active retinoid, it ensures the formula can be used by virtually everyone. It is a smart decision from an accessibility standpoint, even if those seeking true retinoid-driven results may want something more targeted. I have softened my stance on retinol purism over time, but I still prefer retinol or retinal when anti-aging is the primary goal. Bakuchiol remains a meh for me.

U Beauty skincare review
Some layer, I alternate.

What Works Against U Beauty at Sephora

Education, or rather the lack of it, is the biggest issue. Prestige skincare deserves an experience rooted in knowledge and confidence, not a sales pitch tied to hourly targets. Sephora’s lax return policy, while consumer-friendly, can also work against brands at this price point, turning serious formulas into disposable experiments.

In many ways, the Sephora move echoes earlier brand decisions, favoring maximum compatibility and reach over specialization. That philosophy has long been present in formulas designed to work for everyone.

What Should Work, But Doesn’t

In theory, Sephora offers the advantage of experiencing products on the skin before purchasing. In practice, tester displays are often borderline gross. Empty bottles, compromised packaging, and little respect for the product itself. For a brand positioned at U Beauty’s price level, the presentation undermines the message.

What Actually Does Work

Accessibility and discounts. Sephora sales offer an easy entry point for both new and existing customers, with VIB shoppers reaching up to 20 percent off. That said, Violet Grey regularly offers 20 to 25 percent off during the holidays. And for what it is worth, my code OMGBART gives you 15 percent off U Beauty at Dermstore year-round. Just saying.

U Beauty Products I Recommend

U Beauty resurfacing compound review
Very good.

Resurfacing Compound

If you want a true multitasker, this still delivers. The Resurfacing Compound hydrates, micro-exfoliates, helps improve uneven tone, loss of elasticity, and the appearance of enlarged pores. The texture is lightweight enough to slot into almost any routine. With consistent use, my skin does look brighter.

$148 (30 ml) or $228 (50 ml)

U Beauty face oil review
Super(b).

The Super Intensive Face Oil

Never did I expect to be this impressed. It is rich without feeling heavy, with a silky, non-greasy slip that genuinely nourishes the skin. It excels at addressing dryness and dehydration. The pump bottle alone is a win if you are dropper-averse like me.

$188 (30 ml)

U Beauty hydrator moisturizer
Hydrator but also VERY moisturizing.

The Super Hydrator

Full transparency, this one is not for everyone. The Super Hydrator is a lotion with real weight. There is an initial stretch to the texture, think Kiehl’s Creamy Eye Treatment with Avocado, but it absorbs completely within a couple of minutes. It is deeply hydrating, soothing, and peptide-rich. I prefer it at night or while traveling, when my skin tends to be parched, compromised, or both.

$168 (50 ml)

u beauty resurfacing body compound
Lives up to the hype.

Resurfacing Body Compound

Shockingly effective. This helped smooth rough bumps on my arms, ashy elbows, and unexpected texture on my legs a few summers ago. It does feel sticky at first, and the fragrance-free scent profile is specific, but both dissipate quickly. Not an everyday product for me, but one I like to keep on hand.

$128 (200 ml)

Available at ubeauty.com, violetgrey.com, dermstore.com (use my affiliate code OMGBART for 15 percent off), and now sephora.com.

Final Thoughts

None of this makes U Beauty a bad brand. But it does make it a different one. Its early success was built within retail environments that valued editing, context, and restraint. The Sephora move prioritizes reach over curation and accessibility over distinction. That trade-off is not inherently wrong, but it does come at a cost. For a brand once defined by its ability to say less and do more, the shift is noticeable. Whether that matters depends on what you valued about U Beauty in the first place.


This post includes affiliate links. I may earn a commission if you shop through them. It helps support the site and keeps the content honest and independent.


17 Marilyn Monroe Makeup Secrets – Besame Cosmetics

0

Marilyn Monroe was one of the most beautiful women to ever grace the silver screen. And she worked hard for that bombshell look! Though graced with natural gorgeousness, Marilyn meticulously worked to educate herself, become a better actor, and create the bombshell character everyone came to love.

Working with her favorite makeup artist Allan ‘Whitey’ Snyder, Marilyn learned how to accetuate her features for the camera. From using lots of white highlight to keeping her peach fuzz, here are Marilyn Monroe’s biggest beauty secrets she used to become an iconic woman.

1. Love the Little Things

Photo by Milton H. Greene © 2018 Joshua Greene

As a child, Marilyn grew up in an array of foster homes and orphanages. She never had any money and few possessions to her name. So, she cherished the little things, including makeup. In her autobiography, Marilyn said:

“I stood in front of the mirror one morning and put lipstick on my lips. I darkened my blond eyebrows. I had no money for clothes and I had no clothes except my orphan rig and the lone sweater. The lipstick and mascara were like my clothes, however. I saw that they improved my looks as much as if I had put on a real gown.”

With just a few products, at the age of 14, Marilyn realized the power of makeup. It didn’t simply make her prettier, it made her feel like a star. That confidence carried her through many hard years until she finally became the biggest star in Hollywood.

2. Don’t Rush

Marilyn enjoyed the process of getting ready. So much so, it made her chronically late! Still, taking a bit of time to luxuriate in the makeup process helped Marilyn craft her memorable performances.

Time asked about Marilyn’s process for getting ready and she said, “I don’t like to rush this process….I love to dress leisurely. I think we’re rushing too much nowadays.”

3. Put Away the Razor

Like many of us, Marilyn had lots of peach fuzz hairs on her cheeks and face. Instead of shaving it away, Marilyn kept it — on purpose! She knew the tiny hairs gave a blurring and glowing effect to her look under the studio lights. Marilyn took what could be considered an imperfection and made it a plus!

4. Keep Out of the Sun

Though tanning was all the rage, Marilyn avoided the sun. “I like to be blonde all over” she famously quipped. To keep Marilyn’s pristine skin, you don’t have to avoid the sunshine, just be sure to wear SPF everyday.

5. Moisturize Moisturize Moisturize

Skincare has become increasingly popular in the last few years, but Marilyn knew the importance of moisturizer almost 80 years ago! She used Nivea Cream or Vaseline under her makeup to keep her skin soft, supple, and healthy.

Vaseline as primer might be a bit much nowadays. Instead, be sure to moisturize every night and morning. For a vintage primer with modern ingredients, try our Vanishing Cream. With lily extract, Meadowfoam seed oil, and Vitamin A, the cream nourishes and moisturizes skin while providing a perfect base for makeup.

6. Highlight the Cheeks (But Maybe Not With Vaseline)

Vaseline was a big part of Marilyn’s makeup routine. She not only used it as a primer, but as highlighter, too! She put a small amount on her cheekbones and that shiny surface perfectly caught the lights and made her look even more lovely on camera.

Thankfully, you don’t have to rely on Vaseline as a highlighter anymore. Try a dot of White Cream Highlighter from our Marilyn Monroe Collection and blend thoroughly into makeup. Or, use a shimmering or glossy highlighter of your choice to replicate the look (without the sticky mess of Vaseline).

7. Let Your Eyes Shine (Literally)

Guess what Marilyn used on her eyelids? Vaseline! After applying eyeshadow, liner, and lashes, Marilyn would add a tiny touch of Vaseline or oil to the eyelids to give them a glossy look. Marilyn loved how gloss gave added dimension to any look under the camera.

Again, you don’t need to use Vaseline to get a similar look. Instead, use a tiny amount of coconut oil or any gloss that’s formulated to be eye safe.

8. Five Shades of Lipstick

Marilyn famously used five lip products to create her signature pout. Using darker colors towards the edges of the lips and lighter colors in the middle created a contoured effect. Then, she’d finish with a bit of white highlight in the middle of the lower lip and a coat of gloss. All together, this clever use of lipstick made her lips look fuller and made her overall makeup even more glamorous.

Check out our article on How to Create the Marilyn Look to find out how to do this technique yourself!

9. Use A Lip Brush

Getting all the details right for Marilyn’s layered lip look would be nearly impossible without a brush. She always used a lip brush to get the precision she needed. Make sure your brush has a pointed tip so you can create the shape you want and blend the colors together seamlessly.

10. Prime the Eyelids

Marilyn used a base of white cream on her eyelids for every look. She’d blend it all the way up to the brow bone, then apply the rest of her makeup. This left a bit of white in the corners and underneath the brow to act as highlight, while the rest of the white worked as a primer for eyeshadow. This both opens up the eyes and helps the look last longer!

11.Use Three Kinds of Eyeliner

Photo by Milton H. Greene © 2018 Joshua Greene

Creating a perfect on camera look takes a lot of detail. So, Marilyn used three different colors of eyeliner to get it just right. For the upper lid and wing, she used black liner. For the lower lash line, she used brown, and in the water line, she used white to make the eyes look even bigger.

It sounds a little complicated, but this technique is worth a try! The mix of colors gives added dimension and though white might seem harsh, it opens the eye and gives you a real old Hollywood feel.

12. Add Red to the Eyes

This one sounds a bit nutty — but it works! Marilyn would add a dot of red liner to the inner corner of her eyes. This highlights the eyes and actually makes them look whiter! Use our Berry Pencil from the Marilyn Collection to give this unique trick a try.

13. Cut Lashes in Half

To create the perfect eye shape, Marilyn cut her lashes in half. Then, she placed these half lashes towards the outer corners of the eye. This gives the eyes some extra glamour, but looks surprisingly natural.

This is a great trick if you don’t love the look of false lashes, but you’d like a little extra volume. Luckily, you don’t have to cut your lashes in half, you can use the Half Lash set in our Marilyn Collection!

14. Arch the Brows

Photo by Milton H. Greene © 2018 Joshua Greene

In the 1920s and 1930s, brows were thin, long, and very round. By the 1940s, a more natural, arched look became popular and in the 1950s, Marilyn took it one step further. Her brows were kept brown (several shades darker than her hair color) and very arched. It might feel a bit dramatic to give your brows the same pointed look as Marilyn, but experiment with a more angular brow to emulate her look.

15. Add a Touch of Blush to the Nose

Contour did not start with the Kardashians! Marilyn used blush to contour her face shape since the 1950s. In addition to sculpting the cheeks, Marilyn would add a touch of blush to the tip of her nose. This added warmth to the face and slightly slimmed the nose.

16. Powder Carefully

Marilyn loved her glow, so she used as little finishing powder as possible. Use a light touch of Silver Screen Powder to set makeup. Or, to really maintain your natural dewiness, only use powder where you get a little shiny, like the sides of the nose and forehead.

17.Plan Your Disguise

At the height of Marilyn’s career, she was the most famous person in America. So, she and her makeup artist devised a simple disguise so she could go out in public without hassle. Makeup artist Snyder said:

“It was a simple thing to disguise Marilyn. I put a turban on her and we used a red bang under the turban and a pair of dark glasses. We’d gone many places and nobody ever looked around. No one had any idea that was Marilyn Monroe.”

After using all the makeup tips, you’re likely to turn heads whenever you go out! So don’t discount the power of a pair of fake red bangs and some sunglasses to keep you anonymous.

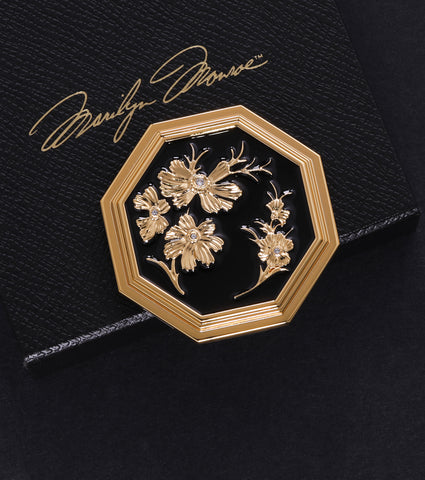
Try all these beauty secrets yourself with the new Marilyn Monroe Collection. Bésame has recreated Marilyn’s makeup. Based on actual items from her vanity and preferred colors, this collection truly brings the beauty of an icon to life.

PureBrow Collection: Get Your Best Brow

0

At jane iredaleour brand is known for transcending fashion trends and social media styles.  As The Skincare Makeup, we’ve often been known for our complexion products rather than our color stories.  But the introduction of our NEW PureBrow Collection has created quite a sensation with our consumers and makeup artists alike.  Why is this new collection making such a ruckus?  The answer is simple.  We’ve once again married simplicity and performance with clean technology in a way that only jane iredale can do.  It’s the perfect way to define, shape and tame your brows like never before.  Let’s talk about this extraordinary new assortment of brow enhancing products!

Define –

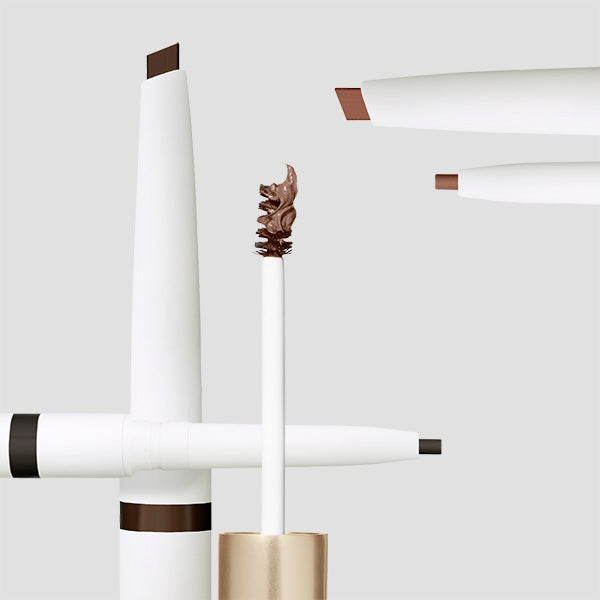
The PureBrow Precision Pencil is a retractable brow pencil with an ultra-precision tip for defining the brows.  It can be used to draw individual hairs on the brows or create structured lines that can then be blended effortlessly.  The result is a brow that is exquisitely defined but never drawn on.  It’s an excellent tool for anyone who wants to address sparse brows or missing hairs.  It’s also great for creating that perfectly defined tail to the brow.

jane iredale purebrow precision pencil

Shape –

The PureBrow Shaping Pencil is also a retractable brow pencil but in a thicker, wedge shaped format that gives you the ability to fill in the brows or shape the edges for a well finished brow with consistent depth and color.  It can be used to fill brows quickly and frame brows for a smooth finish. It is the perfect tool for anyone with thin brows or a desire to create a perfected, opaque brows.

jane iredale purebrow shaping pencil

Tame –

The PureBrow Gel is an update to our original brow gel but with a new, smaller, more precise spoolie brush for exact product placement and easy blending.  It can be used to brush brows in the direction you want them to go and hold them in place for longer wear.  It works great alone or in combination with our other brow tools.  This product also comes in a clear formula with no pigment.  It’s a great tool for those with unruly brows, grey hair in the brows that you’d like to cover or for ultra-natural looks.

jane iredale purebrow gel

Shades –

Because we realize that people often enjoy using multiple tools on their brows, we wanted to create a system that would be interchangeable and corresponding.  Thus, we created a consistent shade assortment across the entire collection.  This means that, if you like our brow gel in Neutral Blonde, you can also purchase the Precision Pencil or Shaping Pencil in exactly the same color for a consistent look.

PureBrow Formulas –

In the true spirit of jane iredale’s mission to use the highest quality and cleanest formula, we’ve developed our PureBrow products with a wonderful assortment of ingredients.

For both our Precision Pencils and Shaping Pencils:

Vitamin C – to help prevent brow hairs from breaking and being lost.

Vitamin E – to give antioxidant protection and coat the brows for healthy skin and hair.

For the PureBrow Gel:

Algae Extract – to coat the hairs and make them smoother and more manageable.

Meadowfoam Seed Extract – to hydrate the hairs, give them more manageability and prevent future breakage.

And, as always, we’ve left out irritants and toxins like parabens, petroleum and phthalates.

The PureBrow Eyebrow Makeup Look –

Right now, we’re seeing fuller brows with a well-groomed appearance.  It is best achieved by following a few simple steps:

  1. Start by making sure your eyebrows are clean and have no product or oils on them. Some professionals will even clean the brows using a cotton swab or spoolie and astringent to remove any natural oils from the brows.  It gives the brow a better ability to hold the products you’re applying.
  2. If filling in sparse brows or making them thicker, apply your pencils first to put pigment on the skin between the brows. Blend the pencil well to hide any strokes and make the brows appear thicker or more dense.
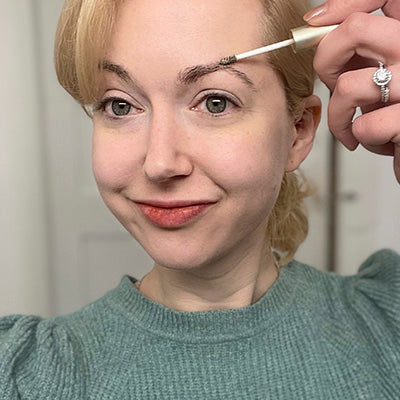
  3. Apply our PureBrow Gel to make the brows go in the direction you’d like them go. Brushing them straight up and then then blending in the direction they grow is a typical process.  Keep in mind that, at first, the gel will be fluid and the hold wont’ be apparent.  But as the gel begins to dry, you’ll get more hold.  For dramatic brow lift, two or three layers of gel are often used.  Some artists will start with clear gel and then add a colored gel or visa versa.
  4. Finish by using the edge of the camouflage brush to apply a thin coating of our active light concealer to the skin above and below the brow to sharpen the line of demarcation and make them pop. Blend out the edges.

For mothere tips on applying brow makeup, follow our simple guide: How to Shape and Define Your Eyebrows Like a Pro.

As fashions change and repeat, an interesting occurrence happens.  Many people who tweezed their brows in one decade find they wish they could get them back in another.  Women who tweezed their brows out in the 60s and 90s are now looking to create thicker, fuller brows to look more on the current trend.  This is where a good collection of eyebrow makeup and tools becomes invaluable.

Apple Cider Vinegar Hair Rinse DIY Hair Recipe

0

If you’re the kind of girl who likes to avoid hair wash days for as long as possible or wants to instantly replenish your scalp, apple cider vinegar is a  great natural ingredient for combating product buildup. Apple cider vinegar is a multi-tasking product that can be used in the kitchen, on your skin and to restore your hair health.

The use of excessive hair care styling products can take a heavy toll on your hair. Heavy use of hairsprays, gels and creams can cause your hair to become stiff, flaky and greasy. Instead of shelling out the big bucks on a salon-quality clarifying shampoo, for a fraction of the cost you can whip your hair back into shape using our DIY apple cider vinegar hair rinse method. Not only will this ACV hair hack help you get rid of buildup such as dandruff, dirt and grime, but it will also help to encourage hair growth. And who doesn’t want that? But first let’s figure out if using ACV will work with your hair concerns before diving into a step by step apple cider vinegar hair recipe.

Here’s how to know if an apple cider vinegar vinegar hair rinse is suitable for your hair type:

Is my hair a good candidate for an apple cider vinegar rinse?

Yes if…

1. You have a significant amount of product buildup.

We’ve all had days and even weeks where we just don’t feel up to washing our hair. Depending on the length and thickness of your hair, let’s face it, some wash days can be just straight up exhausting, especially if you have recently transitioned to natural hair.

So in an effort to make your hair still look somewhat under control, you start slathering on haircare products like dry shampoo, mousse and gels day after day. And while these products are great temporary solutions, prolonged use of them can wreak havoc on your hair. When you’re ready to hit reset and thoroughly wash out all of the excess product, this is where the apple cider vinegar rinse comes in handy.

Regular shampoos are just not going to be able to get rid of all the dirt and grime that is sitting on your oversaturated hair. The versatile chemical properties of apple cider vinegar make it the perfect product to rinse away stubborn product buildup.

2. You’re looking to restore your scalp’s pH balance to encourage hair growth.

Having a healthy pH balance in your scalp is the key to hair growth. Your scalp is composed of what’s known as an acid mantle. The acid mantle is what produces your hair’s natural oils known as sebum which helps to balance the moisture in your scalp. When your acid mantle is imbalanced, this leads to breakage and a lack of hair growth. Your scalp’s pH balance can be disrupted by a number of products including many hair products that aren’t built with your scalp’s health in mind, pollutants and certain foods you may eat.


Shampoos with sulfates are often the biggest perpetrators when it comes to imbalancing the pH in your scalp. Many shampoos contain sulfates which are filled with alkalines which are overly acidic and can dry out your hair cuticles. Apple cider vinegar helps to restore the balance in your pH because when diluted with water, it has a healthy amount of natural acidity and is not overly acidic like many drugstore shampoos. Apple cider vinegar is filled with alpha hydroxy acid, a mild naturally occuring acid that helps to gently exfoliate the dead skin cells sitting on top of your scalp, therefore balancing out your pH.

Apple Cider Vinegar Hair Rinse

3. You want to prevent bacteria from forming on your hair.

We don’t know anyone who wouldn’t want to prevent bacteria from formulating on their hair. While no one of course intentionally allows bacteria to grow on their scalp, it can sometimes sneakily grow on your scalp unbeknownst to you. In fact, it is actually quite common for your scalp to be a host of fungus and bacteria that are usually harmless, but can cause significant damage to your scalp if not treated. These fungal and bacterial growths can then develop into yeast.

“ACV can help balance a dry and itchy scalp by helping to control the bacteria or fungi that can lead to scalp and hair problems,” celebrity hairstylist Michelle Cleveland told ipsy.

The anti-inflammatory properties of apple cider vinegar help to combat the growth of yeast cells that can lead to a scalp infection on your hair. Bacterial scalp infections often lead to conditions like ringworm, folliculitis and piedra, which all cause your hair to fall out in droves. Luckily, apple cider vinegar is a foolproof preventative product to recover your hair. It also helps to get rid of any itching and/or flaking sensations that you may be experiencing in your scalp.

You’re not a good candidate for an apple cider vinegar rinse if:

1. Your hair is extremely dry.

Using apple cider vinegar on hair that is highly dry is not recommended as it can strip your of its natural oils due to its acidic properties. If you have drier hair, we recommend finding the best shampoo for your hair type such as a smoothing or moisturizing shampoo instead of opting for an apple cider vinegar hair rinse. We also recommend trying a moisturizing D.I.Y. hair mask.

2. You have color-treated hair.

While we don’t entirely discourage you from trying an apple cider vinegar rinse if your hair is color-treated, we do recommend that you tread lightly. Not only is color-treated hair more susceptible to dryness, but apple cider vinegar may start to alter the color of your hair if used too frequently. This is why it’s recommended that you only use apple cider vinegar once a week if your hair is colored.

How do I rinse my hair out with apple cider vinegar?

The very first thing you want to do before even permeating your hair with apple cider vinegar is you want to dilute it with water. This is the most important part when you create a DIY apple cider vinegar hair recipe. Without diluting apple cider vinegar with water, your scalp can become extremely irritated, so you want to be sure to take the acidity down a couple of notches by diluting it with about five parts water to one part vinegar in a spray bottle of your choice. After rinsing your hair in the shower, you can start using your ACV spray! You want to evenly saturate your entire scalp with your apple cider vinegar and water mix. Using your fingers, you’ll want to work the product into every inch of your hair and massage your scalp. Use a compact mirror for a closer view of your scalp so you don’t miss a spot. Once you’ve adequately worked the product into your hair, you’ll want to let it sit for three to five minutes. After letting the product sit in your hair for three to five minutes, you can now start rinsing it out of your hair using cool water.

Apple Cider Vinegar Hair Rinse

After this rinse, apply a lightweight conditioner that won’t weigh your hair down too much. Finally, you’ll need to rinse that conditioner out of your hair until the water runs clear, making sure that you rinsed all of the product out.

Once you’ve gotten rid of all the product, simply style your hair as usual by blow drying and brushing and clipping in your favorite pair of hair extensions. And there you have it! After completing these steps, your hair should be as good as new and filled with a healthy amount of shine and overall cleanliness.

We are absolutely obsessed with this money-saving hair hack that restores and replenishes your mane in mere minutes. And the best part about it is that you can skip the trip to the salon and revitalize your hair in the comfort of your own home.

Have you tried the apple cider vinegar hair rinse before?

Looking for more hair advice and styling tips? Subscribe to our newsletter to step up your hair game!

Written by Ashley Inkumsah

How Much Moisturizer Should I Use? Guide

0

If there’s one product most of us would say we can’t live without, it’s moisturizer. Moisturizer is the foundation of any skincare routine, but using the right amount is crucial for achieving the best results.

In this guide, we’ll talk about the ins and outs of moisturizer application, helping to make sure your skin gets the hydration it needs without overdoing it.

What Exactly Is Moisturizer?

Moisturizer is a natural skincare product designed to hydrate and nourish the skin. It typically contains a combination of ingredients that:

  • Lock in moisture: Help retain water in the skin to prevent dryness.
  • Support skin barrier function: Strengthen the outer layer of skin to protect against environmental stressors.
  • Provide essential nutrients: Delivers vitamins and antioxidants that promote healthy skin.

At Juice Beauty, we believe in the power of organic, plant-based ingredients to deliver effective moisturization without harmful chemicals or unnecessary ingredients. Our Stem Cellular Anti-Wrinkle Moisturizer, for example, harnesses the power of grape stem cells and vitamin C to hydrate and rejuvenate the skin.

In a six-week instrument-measured study, 100% of users showed an increase in skin hydration, and 88% noticed a reduction in fine lines and wrinkles.

What Are the Main Types of Moisturizers?

Moisturizers come in various forms, each catering to different skin types and concerns:

  1. Creams: Thick and rich, these are ideal for dry or mature skin. People with dry skin should look for a moisturizer that contains rich ingredients like shea butter, ceramides, and glycerin.
  2. Lotions: Lighter than creams, lotions are suitable for normal to combination skin. If you have this skin type, look for a moisturizing lotion that combines humectants and occlusive agents, such as glycerin and dimethicone.
  3. Gels: Water-based and refreshing, gels are perfect for oily or acne-prone skin. For our oily-skinned friends, a gel formulation that contains hyaluronic acid or a similar humectant is the right choice. Our Prebiotix Hydrating Gel Moisturizer fits the bill perfectly.

Understanding your skin type can help you choose the right moisturizer that meets your specific needs.

What Are the Benefits of Moisturizer?

Regular use of moisturizer offers numerous benefits for your skin.

Hydration

Moisturizer has the power to keep your skin plump and supple by providing essential moisture. Moisturizing creams, lotions, and gels do this better than any other skincare product on the market.

Protection

A good moisturizer will strengthen the skin barrier against environmental stressors such as pollution and the sun’s harmful rays. If your moisturizer has SPF, it offers an additional layer of protection.

Anti-Aging

Keeping your skin moist and hydrated helps reduce the appearance of fine lines and wrinkles by maintaining elasticity. If you choose a moisturizer with ingredients like retinol or vitamin C, it packs an extra punch of anti-aging power.

Balancing

Using moisturizer regularly can help regulate oil production in both dry and oily skin types, which prevents excess shine or dryness.

Why Is the Right Amount of Product so Important?

Using the correct amount of moisturizer is crucial for a few reasons:

  • Efficacy: Too little won’t provide adequate hydration, while too much can lead to clogged pores or greasiness.
  • Cost-effectiveness: Using the right amount of product ensures that you’re not wasting product; overusing can lead to unnecessary expenses.
  • Skin Health: Overuse can potentially irritate the skin or disrupt its natural balance.

Finding Your Perfect Amount

Determining how much moisturizer you need can depend on several factors:

  1. Skin type: Oily skin may require less product than dry or sensitive skin.
  2. Climate: In humid climates, you may need less moisturizer compared to dry or cold environments.
  3. Product formulation: Some moisturizers are more concentrated than others; always check product instructions, and try products out for yourself to see how they feel on your skin.

How Much Moisturizer Should I Use?

The ideal amount of moisturizer depends on skin type, climate, and product formulation. However, a general guideline is to use about a nickel-sized amount for your face and neck.

For specific areas:

  • Face: Use approximately ¼ teaspoon
  • Neck: Apply approximately ½ teaspoon
  • Decolletage (chest area): Use another ½ teaspoon

Of course, you know your skin best. These are general recommendations, but much of moisturizer application is going to vary depending on your specific skin. Very dry skin might soak up moisturizer like a sponge, while oily skin often needs less moisturizer.

In What Order Should You Apply Skincare Products?

To maximize the benefits of your skincare routine, follow this order of application:

  1. Cleanser: Start with a gentle cleanser to remove impurities.
  2. Toner: Apply toner to balance pH levels and prepare your skin for the next step.
  3. Serum: Use targeted serums that address specific skin concerns like pigmentation or fine lines. If you’re looking for light moisture and dark spot correction, check out our Green Apple Age Defy Serum. At Juice Beauty, all of our products start with our Bio70+ technology, which ensures each formula has a base of at least 70% organic ingredients — creating the perfect antioxidant-rich environment for our potent actives.
  4. Eye Cream: Apply eye cream gently around the delicate eye area.
  5. Moisturizer: Lock in hydration with your moisturizer of choice.
  6. Sunscreen (during the day): This is a non-negotiable. Protect your skin from UV damage with broad-spectrum sunscreen.

Nighttime Routine Skincare Tips

In the evenings, the only thing that can truly change is that you don’t need to apply sunscreen. However, some people prefer to use a thicker cream at night for extra hydration, even if they use a lighter lotion or gel during the day.

For nighttime care, consider incorporating our Stem Cellular Anti-Wrinkle Overnight Cream as your final step for intensive repair and rejuvenation while you sleep. In a 4-week study, 91% of participants reported improved skin moisture replenishment overnight.

What To Keep in Mind When Moisturizing

There are a few special considerations to take into account:

Seasonal Changes

Your moisturizing needs may change with the seasons, especially if you live in a part of the world where the differences between the seasons are stark. Those who experience harsh winters will have to make big changes to their skincare when the weather gets cold.

  • In winter, opt for thicker creams that provide extra protection against cold air. Don’t forget to wear your sunscreen, even in winter months.
  • In summer or late spring, lighter lotions or gels may be more suitable due to increased humidity in the air.

Skin Conditions

If you have specific skin conditions such as eczema or rosacea, consult with a dermatologist for personalized recommendations on moisturizing products that cater to sensitive or compromised skin barriers. When in doubt, seek the advice of a medical professional.

What Are Some Common Mistakes When Applying Moisturizer?

To ensure you’re getting the most out of your moisturizer application, avoid these common pitfalls:

  1. Skipping It Entirely: Even oily skin types need hydration; skipping moisturizer can lead to increased oil production as your skin tries to compensate for dryness (we know, it’s counterintuitive, but skipping the moisturizer makes skin even MORE oily!)
  2. Applying on Dry Skin: Always apply serums and moisturizers on slightly damp skin after cleansing or toning. This helps lock in moisture much better.
  3. Too Much Exfoliation: Many who suffer from dry skin think that they should scrub all the flakiness from their skin before applying moisturizer. While this seems like it makes sense, it can actually strip skin of moisture.
  4. Using Too Much Product: More isn’t always better; over-applying can lead to clogged pores and breakouts.
  5. Using Too Little Product: A lack of product can mean that you won’t get the promised results. You need the Goldilocks method when it comes to moisturizer: it needs to be just right.

The Bottom Line

Understanding how much moisturizer to use is key to maintaining healthy, radiant skin. Pay attention to how your skin feels, as application “rules” may vary depending on skin type, season, or the product you’re using.

By following the guidelines provided and choosing high-quality organic products like those offered by Juice Beauty, you can ensure your skin receives optimal hydration and nourishment. What you put on your skin is just as important as what you put in your body. So, choose wisely, and choose Juice.

Sources:

Moisturizers | StatPearls

Optimal Application Method of a Moisturizer on the Basis of Skin Physiological Functions | Journal of Cosmetic Dermatology

Moisturizers: Do They Work? | Harvard Medical School Health Publishing

How To Pick the Right Moisturizer for Your Skin | American Academy of Dermatology Association

How to Quit Drinking, for Now or Forever

0

Perhaps it’s the delicious mocktails on tap at your local bar or the terrible bout of hangxiety you get whenever you drink. Maybe it’s the influx of research linking alcohol to a wide range of health issues, including liver disease, cancer, and mental health disorders. There are endless reasons people—roughly half Americans, per recent estimates—are giving up booze. But the pressure to drink remains strong.

That’s because, historically, social activities have largely centered around alcohol, Annalyse Lucero, LMFT, a licensed marriage and family therapist and licensed substance abuse counselor, tells SELF. Think about it: Weddings and office parties often feature open bars, book clubs are routinely paired with wine, and what would trivia night be without a dirt-cheap pitcher of beer?

Quitting booze can feel like an intimidating choice, especially when your friends are still inviting you to happy hour, which is why experts recommend having a game plan in place. After all, when you take alcohol out of the picture, you eventually need to replace it with another thing—whether that be a zero-proof beverage or a sober activity you actually enjoy. “Alcohol served some purpose in your social life,” says Lucero. “If you’re not centering something else—like connection, joy, pleasure, excitement—you might feel like you’re missing out.”

Here’s how to quit drinking, avoid the FOMO, and actually stick with it.

Know if and when you may have a problem—and talk to a doctor.

Before we dig into the ways to successfully cut back on drinking, Smita Das, MD, PhD, MPH, a board-certified addiction psychiatrist and the chair of the American Psychiatric Association’s Council on Addiction Psychiatry, points out an important caveat: If you’re a chronic, heavy drinker—that roughly means five-plus drinks a day for men, or four or more for women—trying to stop cold turkey puts you at risk of alcohol withdrawal syndrome. “Withdrawal can require medical attention and be life-threatening,” Dr. Das says. If regularly drinking that amount of alcohol is where you are now, see a physician about whether you need to safely detox with medical help and pursue options for addiction treatment—under no circumstances should you go through this alone.

Dr. Das emphasizes that you should also tell any mental health care professionals you see about your plans to quit drinking so they can adjust their treatment plans if necessary. “[Many] people with a substance use disorder like alcohol use disorder (AUD) have another mental health condition, so it’s really important to treat both,” she says. “If we don’t treat depression or anxiety that might be associated with [excessive drinking]then we’re only working with half of what’s going on.”

Determine your why.

Lucero recommends asking yourself why you want a new relationship with alcohol. “Maybe you’re sick of feeling ashamed after boozy night outs. Or, perhaps, your hangovers have become unbearable or you have a chronic health condition, like inflammatory bowel disease (IBD), that flares up when you drink.

Hydrating Makeup Routine for Winter

0

My skin is not its best self in the winter. Between the weather, the heat, and the fact that I should really remember to drink more water, I woke up on this cold January morning with very, very dry skin. (Not the New Year New Me look I was aiming for.)

Thankfully, my makeup bag has the skin-nourishing jane iredale formulas needed to revive my dull winter complexion so that I can leave my house looking glowy even if I did not wake up that way.

Prep with Hydrating Skincare

I start by prepping my face with BeautyPrep™ Hyaluronic Serum followed by BeautyPrep™ Face Moisturizer to plump my skin and give it a much-needed boost of hydration. (I cannot recommend the Hyaluronic Serum highly enough – it saves my skin in the winter.)

The Skincare Makeup System

Next, I use Smooth Affair® Brightening Face Primer to blur my pores and help my makeup last all day.

I am super pale and sunburn easily so foundation with SPF is a must year-round. My favorite SPF foundation is PurePressed® Base because it has the buildable coverage I like but still lets my skin breathe.

I tend to apply most makeup with my fingers, but I use The Handi™ Brush for PurePressed® Base. (Pro tip from the jane iredale Educators: apply PurePressed® Base with The Handi™ Brush using downward strokes to help the minerals lay flat against your skin.)

That’s followed up with a quick spritz of POMMISST™ Hydration Spray to set the minerals.

Cheeks

A lot of bronzers can appear orange on my skin tone but the Glow Time™ Bronzer Stick in Sizzle blends in nicely, providing a subtle contoured look.

I add Glow Time® Blush Stick in Balmy to the apples of my cheeks for a flush of color and dust the golden highlighter shade from Moonglow Bronzer Refill across the top of my cheekbones.

Eyes

PureBrow® Brow Gel

After a quick application of PureBrow® Brow Gel in Clear to tame my eyebrows, I sweep the golden highlighter shade from Moonglow Bronzer Refill onto my eyelids – it’s a great multitasker. For a bolder eye look, I add in a little Mystikol® in Dark Topaz.

PureLash® Lengthening Mascara in Jet Black is my go-to mascara as it lengthens my lashes without causing irritation when I’m wearing contacts.

Lips

Just Kissed® Lip & Cheek Stain

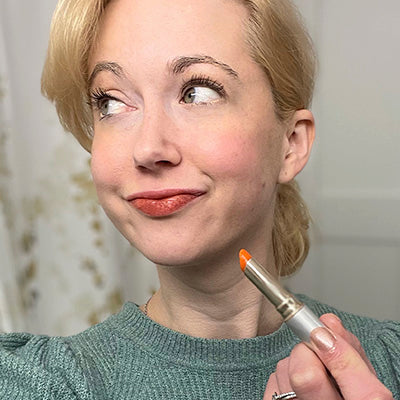
To finish off the look, I swipe on Forever Peach Just Kissed® Lip & Cheek Stain, which successfully moisturizes my chapped winter lips and provides a subtle red tint (my favorite). One of the many things I love about the Just Kissed line is that each formula adjusts to your skin’s chemistry, creating a shade that’s unique to you.

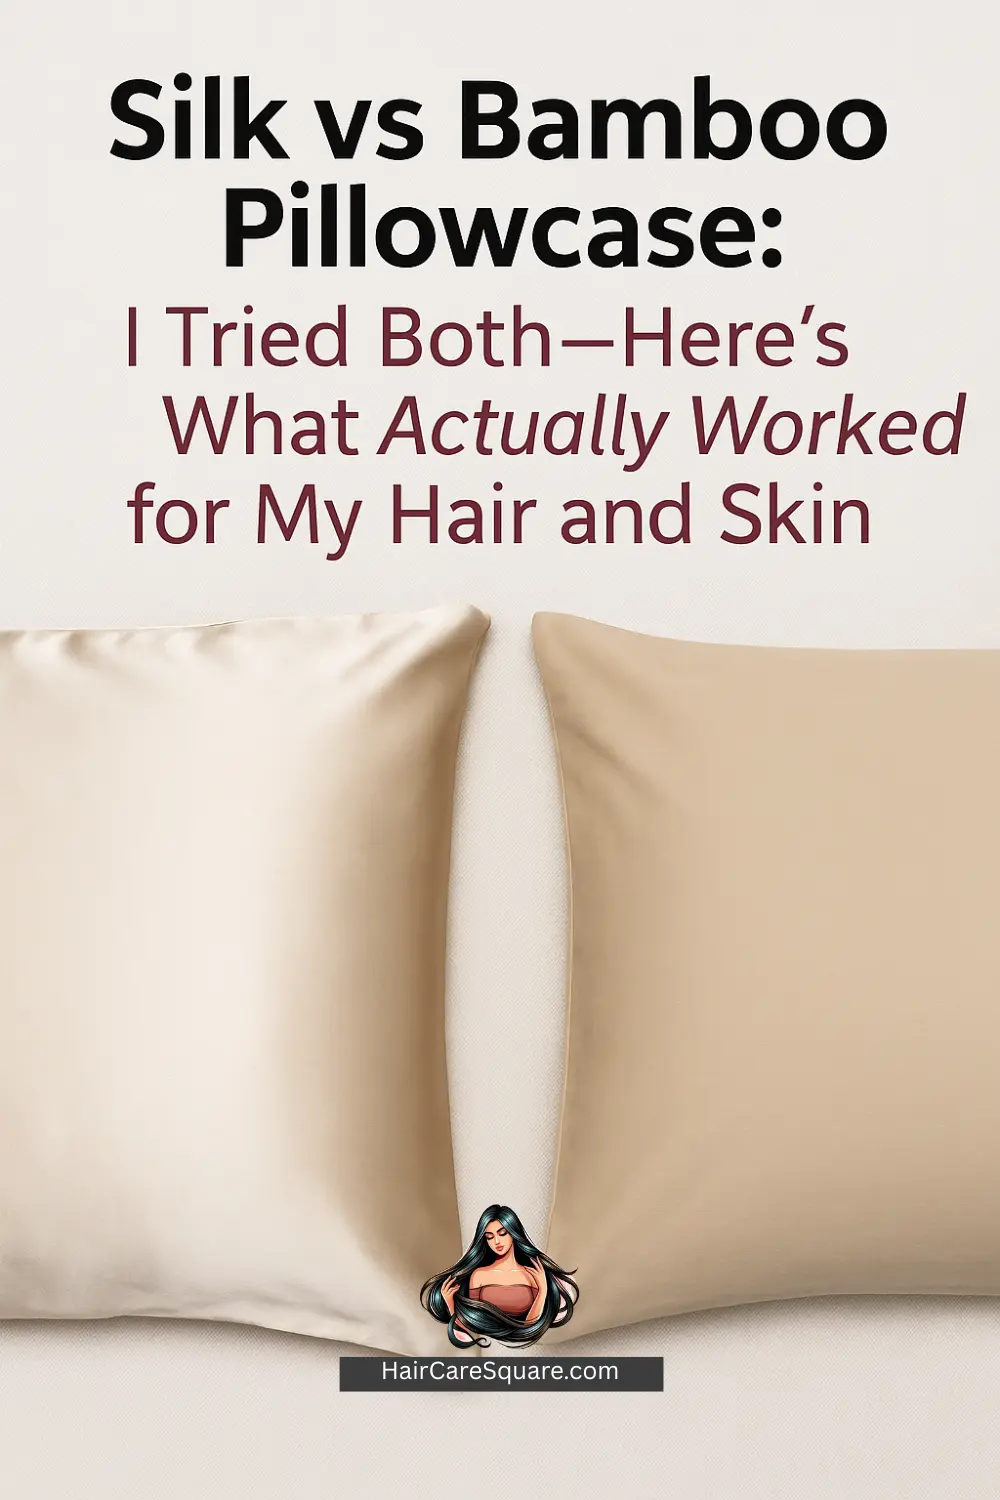
I Tried Both-Here’s What Actually Worked For My Hair And Skin

0

Sharing is caring!


  • Twitter

Hey there! Some links on this page are affiliate links which means that, if you choose to make a purchase, I may earn a small commission at no extra cost to you. I greatly appreciate your support 🙂

Let’s talk about something that seems small but can make a huge difference in your beauty routine; your pillowcase.

I used to sleep on basic cotton pillowcases for years (like most of us do). But after dealing with frizz, breakouts, and feeling like my skincare was drying and aging overnight, I decided it was time for an upgrade. I tested both silk and bamboo pillowcases for weeksand girl, the difference was undeniable. If you’re wondering which one is truly better for your hair and skin, I’ve got all the details.

Silk vs Bamboo Pillowcase: Which One Is the Best for You?

After using both, I can tell you that both silk and bamboo pillowcases are major upgrades from the regular cotton ones we often sleep on. But which one should you go for? Let’s dive into the details and compare them head-to-head.

silk or bamboo pillow cases which one is better for your hair

My Personal Experience with Silk Pillowcases

When I made the switch from cotton to silk pillowcases, I picked a set from SILKTALE. Their pillowcases are made from mulberry silk and are colored with environmentally safe dyes. I preferred mulberry silk pillowcases because they are rich in amino acids that prevent wrinkles, aging, retain better moisture and protect hair from damage.

When I first switched to silk, I immediately noticed how incredibly smooth and luxurious it felt on my skin. It was like I was sleeping on a cloud. Silk has a natural sheen that not only looks chic but also helps to lock in moisture. I noticed a significant difference in how my skin felt when I woke up. It was less dry, and my fine lines appeared smoother.

For my hair, the experience was just as amazing. I have wavy hair, and silk helped reduce the frizz I’d often wake up with. The friction on my hair was minimal, which meant fewer knots and hair breakage. My hair tangles were almost negligible. However, the luxury of silk comes at a higher price, and I found that it requires more care when washing. I had to be extra gentle when cleaning it to keep the fabric intact.

Last update on 2025-12-28 / Affiliate links / Images from Amazon Product Advertising API

Silk pillow case is better than bamboo because

  • If you’re craving a touch of luxury, silk is divine. It’s smoother to the touch and feels like you’re sleeping on a cloud.
  • Helps your skin retain moisture
  • Reduces friction, meaning fewer sleep lines and less hair breakage
  • Comes in a ton of color and design options (hello, aesthetic bedroom goals!)

So yes, silk is gorgeous and effective, but it’s higher maintenance and comes with a heavier price tag. Plus, it’s not as allergy-friendly as bamboo.

Last update on 2025-12-28 / Affiliate links / Images from Amazon Product Advertising API

My Personal Experience with Bamboo Pillowcases

Then, I gave bamboo pillowcases by WARMDERN a try, and I have to say, I was pleasantly surprised. The pillowcases were super soft, comfy and had a cooling effect which if you are a hot sleeper like me you are going to appreciate it.

First off, bamboo is super soft. It might not have the same luxurious sheen as silk, but it’s just as comfortable and gentle on your skin. One of the biggest benefits I experienced was how it didn’t irritate my skin like other materials sometimes do. Since I have sensitive skin, I noticed bamboo kept my breakouts at bay and reduced the redness I sometimes wake up with.

For my hair, bamboo worked wonders too. It’s just as effective as silk when it comes to moisture retention. My hair felt smoother, and I didn’t have to deal with the usual dryness that comes from sleeping on a cotton pillowcase. Plus, bamboo is way easier to take care of. I didn’t need to worry about any special washing instructions, and I could simply toss it in the washing machine without a second thought.

Last update on 2025-12-28 / Affiliate links / Images from Amazon Product Advertising API

Bamboo pillow case is better than silk because:

  • Hypoallergenic: It’s a dream come true if you’ve got sensitive skin, allergies, or scalp conditions like psoriasis or dermatitis.
  • Moisture-Friendly: It doesn’t suck the moisture out of your skin or hair (unlike cotton). You wake up with hydrated skin and smoother strands.
  • Budget-Friendly: Bamboo pillowcases are way more affordable than silk without compromising on beauty benefits.
  • Eco-Friendly: As someone who cares about our planet, I love that bamboo is a sustainable material. Win-win!

Last update on 2025-12-28 / Affiliate links / Images from Amazon Product Advertising API

Here’s the Breakdown: Silk vs Bamboo Pillowcase Comparison

Feature Bamboo Pillowcase Silk Pillowcase
Texture Smooth, soft Ultra-smooth, luxurious
Moisture Retention Great for hair & skin hydration Excellent moisture retention
Hypoallergenic ✅ Best for sensitive skin Not as hypoallergenic
Eco-Friendly ✅ Sustainable & biodegradable Less eco-friendly
Maintenance Easy to wash & maintain Needs delicate care
Price Budget-friendly Premium pricing
Design Choices Limited Lots of colors and patterns
Buy Here Buy Bamboo Pillowcase Buy Silk Pillowcase

What to Choose: Silk or Bamboo Pillowcase?

To sum it all up:

If you’re on a budget, have sensitive skin, or simply want something eco-friendly and easy to maintain, bamboo is your best friend. If you’re looking for a luxurious pillowcase that feels amazing and helps with moisture retention, silk might be your go-to.

If you want my expert advice: go for bamboo. Personally, I’ve been loving the bamboo pillowcases for the past few months because they’re so soft, hypoallergenic, and affordable. But I can’t deny the luxurious feel of silk, and I still use it on special nights when I want to pamper myself.

No matter which one you choose, silk or bamboo pillowcases will help improve your skin and hair health. They’re a game-changer when it comes to preventing hair breakage, skin irritation, and sleep lines. Trust me, after switching from regular cotton pillowcases, I’ve noticed a real improvement in how I feel when I wake up.

Which one do you think you’ll try: silk or bamboo? I’d love to hear your thoughts and experiences in the comments below. And before you leave, don’t miss this helpful post:

Have a lovely day!

Gentle New Year Skincare Resolutions Backed by Science (2026 Guide)| Tips for Natural Beauty

0

I’m Entering the New Year With a Softer, Science-Based Approach to Skincare

I’ve learned over the years that my skin doesn’t respond well to extremes—especially at the start of a new year. Dramatic routines, aggressive treatments, and trend-hopping only leave my skin confused, irritated, and compromised.

This year, I’m choosing gentle, science-backed skincare resolutions that actually support long-term skin health. Instead of chasing fast results, I’m focusing on habits proven to protect my skin barrier, reduce inflammation, and improve my skin resilience over time.

If you want healthier skin—not just temporarily, but sustainably—these resolutions are for you.

1. I’m Prioritizing Skin Barrier Health Over Every Other Goal

The skin barrier (also called the stratum corneum) is your skin’s first line of defense. Scientifically, it’s made of corneocytes held together by lipids like ceramides, cholesterol, and fatty acids. When this barrier is compromised, studies show increased water loss, irritation, breakouts, and sensitivity.

This year, my skincare resolution is simple: protect the barrier first.

That means:

  • Using gentle, low-pH cleansers
  • Limiting exfoliation to once or twice a week at most
  • Choosing moisturizers with ceramides, glycerin, and panthenol

When your barrier is healthy, concerns like dryness, redness, and even acne become easier to manage.

2. I’m Choosing Consistency Over Skincare Perfection

From a scientific perspective, skin cells renew approximately every 28–40 days, depending on age. This means no product can work overnight—results depend on consistent use over time.

Instead of changing routines every few weeks, I’m committing to:

  • A simple morning and evening routine
  • Giving products at least 6–8 weeks before judging results
  • Avoiding unnecessary product layering

If you want real results, consistency matters far more than having the “perfect” routine.

3. I’m Buying Less—and Respecting My Skin’s Adaptation Cycle

Overusing new products is one of the fastest ways to disrupt your skin barrier. Research shows that frequent product switching increases the risk of irritant contact dermatitis—especially when actives are involved.

This year, my mindful beauty resolution is to:

  • Finish products before opening new ones
  • Introduce only one new product at a time
  • Patch test every active product

➡️ More about How to Introduce New Skincare Products Safely

Your skin thrives on stability, not constant experimentation.

4. I’m Listening to My Skin—Not Algorithm-Driven Trends

Social media trends often prioritize dramatic before-and-after results, not long-term skin health. Dermatologists consistently warn that what works for one skin type may damage another.

This year, I’m paying attention to:

  • Signs of irritation (stinging, redness, tightness)
  • Seasonal skin changes
  • My skin’s response—not influencer routines

If your skin feels calm, hydrated, and balanced, you’re doing it right—even if your routine isn’t trending.

5. Beauty Trends I’m Choosing to Follow This Year

Not all trends are bad. Some are supported by solid research and dermatological practice.

Trends worth following:

  • Barrier-repair skincare (ceramides, cholesterol, fatty acids)
  • Skinimalism: fewer products, better formulations
  • Bakuchiol as a gentler alternative to retinol for sensitive skin
  • Daily sunscreen use, even indoors near windows
  • Microbiome-friendly skincare that supports healthy skin flora

These trends align with what science already tells us about healthy skin.

6. Beauty Trends I’m Skipping for the Sake of My Skin

Some popular trends may look exciting but can compromise skin health.

Trends I’m avoiding:

  • Daily exfoliating acids or peels
  • Overuse of high-percentage actives without professional guidance
  • DIY skincare with acidic or abrasive ingredients
  • Trend-driven product layering without purpose

Skipping these doesn’t mean you’re missing out—it means you’re protecting your skin.

7. I’m Treating Skincare as Preventive Self-Care

Scientifically, prevention is more effective than correction. Daily sun protection, barrier support, and gentle cleansing do more for your skin long term than aggressive treatments later.

This year, I’m reframing skincare as:

  • Preventive care, not damage control
  • A daily ritual, not a chore
  • A form of self-respect, not self-criticism

You Don’t Need a New Face—Just Better, Smarter Care

If there’s one resolution I’m carrying into the new year, it’s this: healthy skin comes from gentle, informed choices repeated consistently.

Neither you need more products nor you need harsher treatments. All you need is education, patience, and a routine that supports your skin’s natural biology.

FAQ: New Year Skincare Resolutions

Are gentle skincare routines really effective?

Yes. Clinical research shows that gentle cleansing, barrier repair, and sun protection significantly improve skin function over time.

How long should I follow a routine before changing it?

Dermatologists recommend at least 6–8 weeks unless irritation occurs.

What is the most important skincare resolution for the new year?

Protecting your skin barrier and using sunscreen daily.

If this post helped you rethink your skincare goals, save it or share it with someone who wants healthier skin—not harsher routines—this year. ✨

Velvet Skin, Romantic Blush, Grunge

0

Say what you will about winter, but the season knows how to romanticize a routine: candles flickering in every corner, cozy blankets in constant rotation, loungewear becoming a literal uniform, and those earlier evenings that make an early pour of red wine feel perfectly reasonable. It also brings that familiar itch to refresh your makeup bag, and with celebrity makeup artists already sketching out the season’s biggest trends, I can assure you there’s plenty to get excited about.

The overall vibe this winter feels different in the best way. As celebrity makeup artist Lisa Eldridge told me, “as we move into the greyer, more introspective months, there’s a palpable shift in mood, a collective desire for makeup maximalism and expressive color.” But that doesn’t mean there’s only one way to show up. Euphoria’s lead makeup artist Donni Davy reminded me, “it depends on one’s mood! There’s room for it all.” So whether you’re feeling soft and minimal or ready to go full maximalist, winter’s letting you do both. A snapshot of what’s ahead includes the whole spectrum—from velvety skin and blurred lips to romantic flushes, bold color, and even a little grunge.

To unpack everything properly, I went straight to the experts. Davy squeezed in our chat between filming scenes for Season 3, and Eldridge—legendary artist and namesake brand founder whose clients include Dua Lipa, Kate Winslet, and Keira Knightley—walked me through the shifts she’s seeing right now. Ahead, all the biggest makeup trends for winter 2026.